

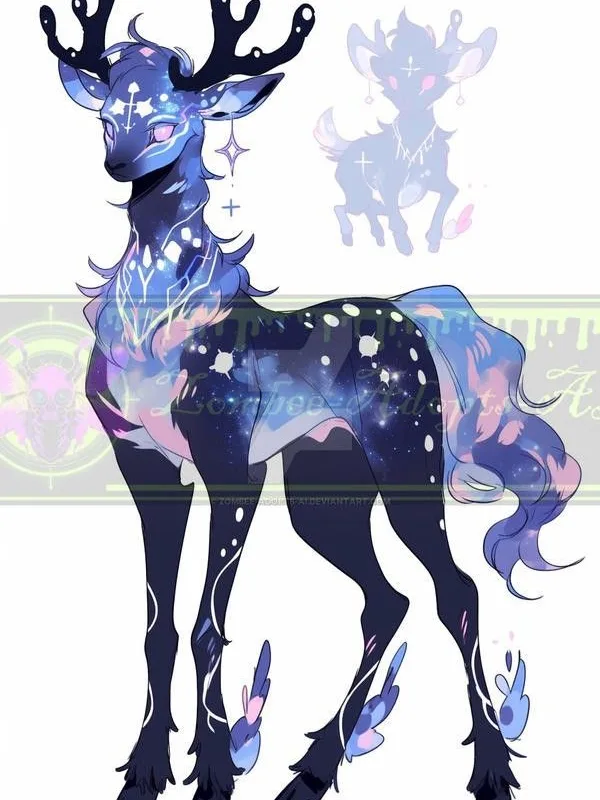
A deer with a constellation tangled in its antlers is one of those images that looks magical on Pinterest and terrifying on blank paper — until you know the order of operations. Below you'll find the exact layering, line-weight, and star-placement decisions that turn a wobbly sketch into something worth framing.
Advertisements1
- Draw the skull and pedicle dots before anything else — the antlers and stars depend on those anchors.
- Antlers are load-bearing structure: thick tapering bases and four to five tines per side.
- Cluster stars in three groups of varying size instead of scattering them evenly.
- Limit yourself to three values and three line weights so the stars actually glow.
- Six to twelve stars total is the sweet spot; more turns magic into confetti.
- Asymmetric antlers look alive; perfect symmetry looks like clip art.
Start With the Skull, Not the Stars
Here's the mistake almost everyone makes: they draw the antlers first, sprinkle stars on top, and then try to wedge a deer underneath. The result looks like a hat wearing an animal. Draw the skull first — a simple egg shape tilted about 15 degrees — because the antlers grow from the pedicles, two bony nubs just behind and above the eye line. If those anchor points are wrong, every star above them floats in the wrong place.
Sketch the skull in light pencil, then mark the pedicles with two small dots roughly one eye-width apart. That spacing is your whole composition's spine. I learned this after a week of drawing antlers that looked like they were glued to the deer's ears — the fix was embarrassingly simple once I moved the anchor points back.
Try this: draw five egg-shaped skulls in a row, each tilted a little differently. Then dot the pedicles. You'll feel immediately which tilts leave room for a starry crown and which ones crowd it.
Build Antlers as a Load-Bearing Structure
Stars need somewhere to sit, and antlers are the shelf. Instead of drawing decorative squiggles, think like a tree surgeon: a main beam curving up and back, with tines branching forward off it. Real whitetail antlers typically carry four to five tines per side, and that number matters — fewer than three looks sparse, more than six gets busy once stars are added.
Draw the main beam first as a single confident curve, then add tines as short strokes that taper. Keep the base thick (about the width of the deer's eye) and thin the tips to a point. This taper is what makes the structure read as bone rather than wire, and it gives your stars a visual gradient to sit against.
Ask yourself: does this antler look like it could hold weight? If not, thicken the base by a millimeter and try again. A crown of stars should feel earned, not pasted on.
Place Stars in Three Deliberate Clusters
Random scattering is the enemy of magic. Scatter reads as noise; clustering reads as constellation. I place stars in three groups: a dense cluster of 5–7 at the crown's peak, a medium cluster of 3–4 nestled in a tine fork, and one or two lone stars drifting off the outer edge to suggest the deer is shedding light.
Vary the sizes — roughly 3mm, 5mm, and 8mm at a 9×12 inch scale — and rotate each star between 10 and 20 degrees off vertical so they don't look stamped. Five-pointed stars drawn with a single continuous stroke (down-left, up, down-right, left, right) stay crisp and take about four seconds each.
Here's a question worth sitting with: what is the story of these stars? Are they caught in the antlers, or growing from them? Your answer changes everything — caught stars overlap the tines, growing stars sit behind them with a small gap of light.
Use Line Weight to Separate Fur, Bone, and Light
Three materials, three line weights. Fur gets the softest, broken strokes — short 2–4mm flicks that follow the direction of growth, denser at the neck and jaw. Antlers get a firm, unbroken contour. Stars get the thinnest line you own, or no outline at all if you're working in color.
This hierarchy is what makes the drawing legible at thumbnail size on a phone screen, which is exactly how most people will first see it. If your star lines are as heavy as your fur lines, the whole image flattens into a texture blob.
Practical test: squint at your drawing until it blurs. You should still see the antler silhouette and the bright star shapes. If the stars vanish, they're too small or too lightly weighted — push them.
Choose a Palette That Makes the Stars Glow
The stars only glow if everything around them is quieter. I work in three values: a warm mid-tone for the deer's body (raw umber or a soft grey-brown), a deep near-black for the deepest shadows under the jaw and inside the ear, and an untouched paper white for the stars. No fourth value. That restraint is what creates the illusion of light.
If you're adding color, a single accent — pale gold or icy blue on the star cores — does more than a full rainbow. Gold on warm brown feels like candlelight; blue-white on cool grey feels like winter sky. Pick one mood and commit.
A personal habit: I keep a scrap of paper beside me and test the star color against the deer color before committing. Ten seconds of testing has saved me from more muddy drawings than any technique.
Fix the Five Most Common Failures
Stars too evenly spaced — break the grid by nudging every third star 2–3mm off its neighbors. Antlers too symmetrical — real antlers are asymmetric; make one side's main beam curve 10 degrees wider. Deer's eyes too high — the eye sits roughly halfway down the skull, not near the top. Stars overlapping the deer's face — keep the face clear; the crown lives above the brow line. And the big one: too many stars. Six to twelve total is plenty. More than that and the eye has nowhere to rest.
Each of these is a two-minute fix, and together they account for most of the "something's off but I can't say what" drawings I see. Check them in order before you add any detail.
How to Do It, Step by Step
- 1Sketch the skull egg and pedicle dots
Draw a tilted egg for the skull, then two dots one eye-width apart behind the brow. This sets the anchor for every antler and star above it. - 2Draw the main antler beams first
One confident curve per side, thick at the base and tapering to a point. Tapering is what makes them read as bone. - 3Add four to five tines per side
Short forward-branching strokes off the main beam. Fewer looks sparse; more competes with the stars. - 4Lay in three star clusters
A dense 5–7 star crown, a 3–4 star fork cluster, and one or two drifting outliers. Rotate each star 10–20 degrees. - 5Establish three line weights
Broken soft strokes for fur, firm contours for antlers, hairline or none for stars. Squint-test the result. - 6Block in three values only
Warm mid-tone body, near-black shadows, paper-white stars. One accent color maximum. - 7Run the five-failure checklist
Check star spacing, antler asymmetry, eye height, face clearance, and total star count before detailing.
The stars don't make the deer magical — the space you leave around them does.
Frequently Asked Questions
How do you draw a deer with stars on its head step by step?
Start with a tilted egg-shaped skull and two pedicle dots, build tapering antlers from those dots, then add stars in three clusters of varying size. Finish with three line weights and three values so the stars read as light.
How many stars should I put on the deer's antlers?
Six to twelve stars total works best, split into a dense crown cluster, a medium fork cluster, and one or two drifting outliers. More than that and the eye has nowhere to rest.
What does a deer with stars on its head symbolize?
It most often reads as wonder, intuition, or a creature touched by the night sky — a guardian of the forest. Because the meaning is open, the drawing works equally well as a tattoo design, a nursery print, or a fantasy illustration.
What art supplies work best for a starry deer drawing?
A 2B pencil for the sketch, a 0.3mm fineliner for antler contours, and either white gel pen or untouched paper for the stars. On toned grey or tan paper, a white gel pen makes the stars pop with almost no effort.
Should the stars be in front of or behind the antlers?
Both, deliberately — stars that overlap the tines read as caught in the antlers, while stars behind with a small gap read as growing from them. Mixing the two creates depth.

Amara explores creative writing and storytelling, with a focus on finding your unique voice and building compelling narratives. She shares prompts and exercises to spark imagination, drawing on her love of folklore and modern fiction.


