

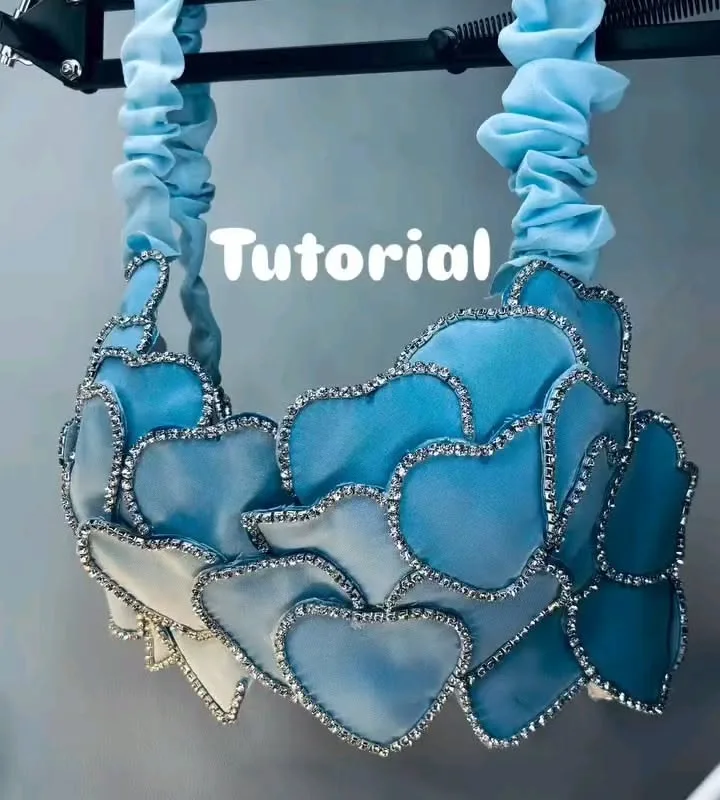
You've seen the heart aesthetic top all over Pinterest, and now you want to make your own. These 7 hacks will have you crafting a viral-worthy piece in under an hour, with pro tips to avoid common mistakes.
Advertisements1
- Pre-washing fabric prevents shrinkage and ensures a perfect fit after the first wash.
- A custom heart template based on your bust measurement flatters your shape better than a one-size-fits-all pattern.
- Using fusible interfacing and a blind stitch gives a professional, store-bought look.
- One or two embellishments are enough—over-decorating can make the top look cluttered.
- Natural light during golden hour makes your DIY top look its best in photos.
- Always wash inside out in cold water and lay flat to dry to preserve the heart shape and embellishments.
Hack 1: Choose the Right Fabric for a Flattering Drape
The fabric you choose makes or breaks your DIY heart top. For a soft, drapey look that flatters every body type, go for a cotton-spandex blend (95% cotton, 5% spandex) or a lightweight jersey knit. These fabrics have just enough stretch to hug curves without clinging. If you want a more structured heart shape, use a medium-weight cotton twill or felt—it holds its form beautifully. Avoid stiff fabrics like heavy denim or canvas; they won't drape nicely around the heart cutout.
Prep time: 10 minutes to gather materials. No cooking here, but you will need: 1 yard of fabric, fabric scissors, fabric marker, sewing pins, and a sewing machine (or needle and thread for hand-sewing). Substitution: If you don't have spandex, a 100% cotton jersey works, but it won't stretch as much. For a no-sew option, use fabric glue (but test it first on a scrap).
Common mistake: Not pre-washing your fabric. Cotton can shrink up to 5%, ruining your fit after the first wash. Always pre-wash and dry your fabric before cutting.
Hack 2: Draft a Heart Template That Fits Your Body Perfectly
A one-size-fits-all heart template is a myth. To get a heart that flatters your unique shape, start by measuring your bust and waist. Then, draw a heart on paper that is about 1/3 of your bust width. For example, if your bust is 36 inches, make the heart about 12 inches wide at its widest point. Position the heart so its top curves sit just below your collarbone and the point ends at your natural waist. This placement elongates your torso and draws the eye upward.
Use a fabric marker to trace the template onto the wrong side of your fabric. Cut carefully—sharp scissors are your best friend. If you're nervous, practice on muslin first. Substitution: If you can't draw a symmetrical heart, fold your paper in half and cut half a heart, then unfold. Voilà!
Common mistake: Making the heart too small. A tiny heart can look like an afterthought. Go bold—it's a statement piece.
Hack 3: Sew the Heart Cutout with a Clean Finish (No Raw Edges!)
Raw edges scream 'homemade' in the bad way. To get a professional finish, use the 'sandwich' method: cut two identical heart shapes from your main fabric and one from fusible interfacing. Iron the interfacing to the wrong side of one heart. Place the two hearts right sides together and sew around the edge with a 1/4-inch seam allowance, leaving a 2-inch opening. Turn it right side out, press, and slip stitch the opening closed. Now you have a perfectly finished heart appliqué.
If you're cutting a heart hole in the top itself, finish the edges with a narrow zigzag stitch or fold under 1/4 inch and topstitch. For a no-sew version, use iron-on hem tape. Time: 20 minutes for sewing, 5 for pressing.
Common mistake: Skipping the interfacing. Without it, your heart may stretch out of shape. Fusible interfacing adds stability and keeps the heart crisp.
Hack 4: Attach the Heart with Invisible Stitches for a Floating Effect
Want your heart to look like it's floating on your top? Use a blind stitch or a slip stitch to attach the heart appliqué. Thread a needle with matching thread, knot it, and bring it up through the back of the top fabric, catching just a few threads of the heart's edge. Take tiny stitches, about 1/8 inch apart, all around the heart. This creates an invisible bond that looks seamless. For extra security, add a few tack stitches at the top curves and bottom point.
If you're using a sewing machine, use a blind hem stitch or a narrow zigzag with matching thread. Test on a scrap first. Time: 15 minutes. Substitution: If you're short on time, fabric glue works, but it may stiffen the fabric. Use sparingly.
Common mistake: Using a contrasting thread. It will show and ruin the floating effect. Always match your thread to the fabric.
Hack 5: Add Embellishments That Make It Pop (Without Going Overboard)
A plain heart is cute, but a few well-placed embellishments can take it to viral status. Try adding a row of tiny pearls along the heart's outline, or use fabric paint to create an ombre effect inside the heart. Another trendy idea: sew on a few small rhinestones or sequins for a subtle sparkle. Keep it balanced—if you add pearls, skip the sequins. One focal point is enough.
For a romantic vibe, stitch a small lace trim around the heart. For an edgy look, use studs. Time: 10-15 minutes. Substitution: If you don't have pearls, use small beads or even French knots with embroidery floss. Get creative!
Common mistake: Over-embellishing. More isn't always better. Choose one or two accents and let the heart be the star.
Hack 6: Style Your Heart Top for Maximum Viral Appeal
The way you style your DIY heart top can make or break its viral potential. For a Pinterest-worthy photo, pair it with high-waisted jeans and layered gold necklaces. Tuck the front slightly to show off the heart. If your top is cropped, add a high-waisted skirt or paperbag shorts. For a softer look, wear it under a cardigan or denim jacket, leaving the heart visible.
Lighting matters: natural light is your best friend. Take photos near a window during golden hour (about an hour before sunset) for a warm, flattering glow. Use a clean, uncluttered background—a plain wall or a field of flowers works great. Time: 5 minutes to style, 10 for photos.
Common mistake: Wearing busy patterns with your heart top. Let the heart be the focal point; keep other pieces neutral.
Hack 7: Care for Your Heart Top So It Lasts Beyond the Trend
To keep your heart top looking new, always turn it inside out before washing. Use cold water and a gentle cycle to prevent shrinking and fading. If you added embellishments like pearls or rhinestones, hand wash or use a mesh laundry bag. Tumble dry on low or lay flat to dry. Iron on the reverse side, using a pressing cloth if you have delicate accents.
Store your top folded rather than hung to avoid stretching the shoulders. If you used fabric glue, avoid ironing directly on the glued area—it can melt. With proper care, your top will last for years, not just one season. Time: 2 minutes to prep for wash.
Common mistake: Throwing it in the dryer on high heat. That's a one-way ticket to shrinkage and damaged embellishments.
The Hacks, Step by Step
- 1Gather Your Materials
Collect fabric, scissors, marker, pins, sewing machine or needle and thread, and any embellishments. Pre-wash fabric to avoid shrinkage. - 2Create Your Heart Template
Measure your bust and draw a heart that's about 1/3 of your bust width. Cut it out and trace onto fabric. - 3Cut and Prepare the Heart
Cut two heart shapes from fabric and one from fusible interfacing. Iron interfacing to one heart. - 4Sew the Heart Appliqué
Sew the two hearts right sides together, leaving an opening. Turn, press, and slip stitch closed. - 5Attach to Your Top
Use a blind stitch to attach the heart to your top, catching only a few threads for an invisible finish. - 6Add Embellishments
Sew on pearls, rhinestones, or lace trim along the heart's edge. Keep it balanced. - 7Style and Photograph
Pair with high-waisted bottoms and neutral pieces. Photograph in natural light during golden hour. - 8Care for Your Top
Wash inside out in cold water, gentle cycle. Lay flat to dry. Store folded.
The secret to a viral DIY top isn't just the design—it's the flawless finish that makes people ask, 'Where did you buy that?'
Frequently Asked Questions
What fabric is best for a DIY heart top?
A cotton-spandex blend or lightweight jersey knit is best because it drapes well and has enough stretch. For a structured heart, use medium-weight cotton twill.
How do I make a heart template that fits me?
Measure your bust and draw a heart that's about one-third of your bust width. Position it so the top curves sit below your collarbone and the point ends at your waist.
Can I make this top without a sewing machine?
Yes, you can hand-sew using a blind stitch or use fabric glue for a no-sew version. Hand-sewing takes longer but gives a professional finish.
How do I wash a DIY heart top with embellishments?
Turn it inside out and wash on a gentle cycle in cold water, or hand wash. Place it in a mesh laundry bag if it has pearls or rhinestones. Lay flat to dry.
What if my heart shape doesn't look right?
Practice on paper or muslin first. Fold the paper in half to cut a symmetrical heart. Adjust the size and shape until you're happy, then trace onto fabric.


