

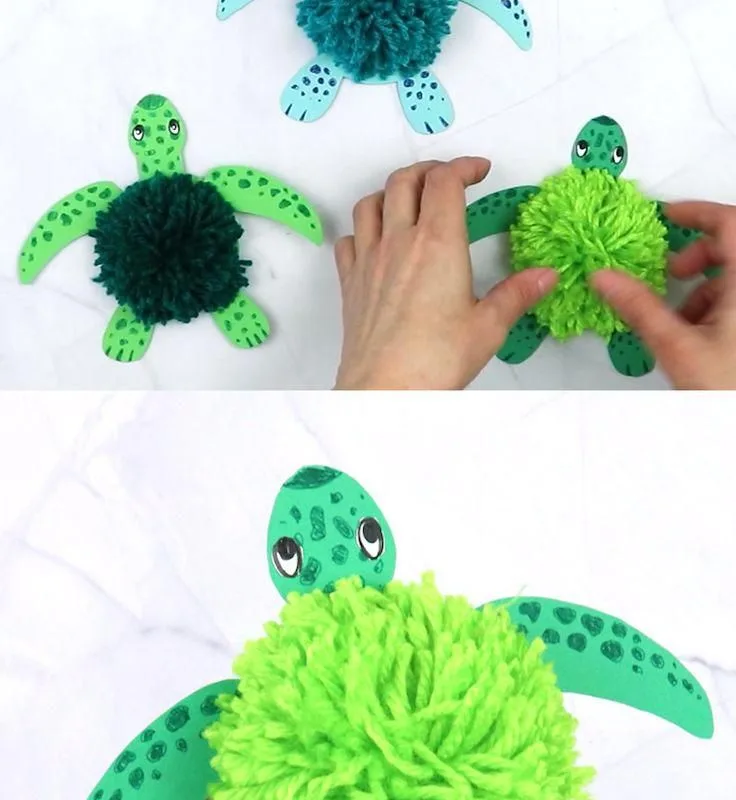
Ever seen a tiny yarn turtle and felt your heart do a little flip? These pocket-sized pals are not just adorable—they're a fantastic way to use up scrap yarn and practice essential techniques. In this guide, I'll share my favorite tips and tricks to help you create yarn turtles that are as sturdy as they are sweet.
Advertisements1
- Yarn turtles are perfect for using scrap yarn and practicing shaping techniques on a small scale.
- Choose the right yarn and hook size: worsted weight with a 3.5mm hook is a reliable combo for beginners.
- Pin all parts before sewing to ensure proper placement and symmetry.
- Embroidered eyes are safer for children under three; safety eyes are for older kids and adults.
- Stuff lightly and evenly to avoid lumps and maintain a smooth shape.
- Embrace imperfections—they add character and make your turtle unique.
Why Yarn Turtles Are the Perfect Small Project
Yarn turtles are the goldfish of the crafting world—small, charming, and surprisingly easy to care for. They take less than an hour to make, use minimal materials, and teach you skills like increasing, decreasing, and seaming on a tiny scale. Plus, they're a brilliant way to use up those leftover bits of yarn that are too precious to toss.
I remember my first yarn turtle: a lumpy, lopsided little guy I named Sheldon. He wasn't perfect, but he was mine, and making him taught me more about shaping than any big project could. So if you're a beginner, don't be intimidated—turtles are forgiving. If you're a pro, they're a delightful palate cleanser between larger WIPs.
And let's not forget the joy of giving them away. A yarn turtle tucked into a get-well package or left on a friend's desk is a tiny ambassador of comfort. Who wouldn't smile at that?
Choosing the Right Yarn and Hook for Your Turtle
Not all yarn is created equal when it comes to tiny turtles. For a cuddly, soft friend, go for worsted-weight acrylic or cotton—they hold shape well and are easy to work with. If you want a more delicate, realistic look, try sport-weight or even thread with a smaller hook. Just remember: the smaller the yarn, the more patience you'll need.
Hook size matters, too. For worsted weight, a 3.5mm (E) hook usually gives a tight enough fabric that stuffing won't peek through. If you crochet loosely, drop down a size. And always check your gauge—even a tiny difference can make your turtle too big or too small for its shell.
Color choices? This is where you can let your imagination run wild. A classic green body with a brown shell is timeless, but why not a purple turtle with a sparkly shell? I once made a turtle with a rainbow shell for a friend's kid, and it became their favorite toy. The point is: there are no rules, only possibilities.
Mastering the Shell: Tips for a Perfect Dome
The shell is the signature of a yarn turtle—it's what makes it instantly recognizable. Whether you crochet or knit, the shell is usually worked in the round, starting with a magic ring and increasing evenly to form a flat circle, then decreasing to create a dome. The key is to keep your stitches tight and consistent so the shell holds its shape.
One of my favorite techniques is to work the shell in a spiral rather than joined rounds. This eliminates the seam and gives a smoother finish. If you're knitting, try a beret-style construction: cast on a small number, increase rapidly, then decrease. Stuff the shell lightly—overstuffing makes it bulge, understuffing makes it floppy.
For extra realism, add a few surface stitches or embroidery to mimic shell patterns. A simple running stitch in a contrasting color can suggest the scutes (those hexagonal plates) on a real turtle's shell. It's a small detail that makes a big difference.
Attaching Head, Legs, and Tail Without Tears
Attaching small parts is where many crafters struggle. The trick is to pin everything in place first. Use sewing pins to position the head, legs, and tail exactly where you want them, then step back and check the proportions. I can't tell you how many times I've sewn a head on only to realize it was crooked—pinning saves you from that heartache.
When sewing, use a tapestry needle and the same yarn you used for the body (or a matching thread). Whipstitch or mattress stitch works well for a seamless look. Go through the pieces multiple times to secure them, especially if the turtle will be handled by children. A little extra reinforcement now prevents a limbless turtle later.
For a more posable turtle, you can insert a pipe cleaner or wire into the neck before attaching the head. This allows you to bend the head into different poses. Just make sure the wire is completely covered and secure—safety first!
Adding Personality: Eyes, Expressions, and Accessories
Eyes are the window to the soul—even for a yarn turtle. Safety eyes give a polished look, but they're not safe for children under three. For little ones, embroidered eyes are the way to go. Use a satin stitch or French knot to create expressive eyes. A tiny smile embroidered with black thread can make your turtle look friendly, mischievous, or wise.
Don't be afraid to accessorize. A tiny bow, a flower on the shell, or even a miniature scarf can turn a simple turtle into a character. I once made a turtle with a tiny top hat and monocle—he looked like a distinguished gentleman. It's these little touches that make your creation truly one-of-a-kind.
And remember, imperfections are charming. A slightly wonky eye or a lumpy shell adds character. Embrace the wabi-sabi of handmade.
Finishing Touches: Stuffing, Shaping, and Blocking
Stuffing is an art. Use small amounts of fiberfill, adding it in wisps rather than big clumps. This prevents lumps and gives a smooth finish. For the body, stuff firmly but not rock-hard; for the head, use less stuffing so it stays proportionate. A chopstick or the back of a pencil helps push stuffing into small areas.
After stuffing, shape the turtle with your hands, pinching and molding it into the desired form. If you crocheted with cotton, you can lightly steam block the shell to smooth out any irregularities. Just hold the iron an inch above the fabric and let the steam do the work—never press directly, or you'll flatten the stitches.
Finally, weave in all ends securely. A yarn turtle that unravels is a sad turtle. I like to leave a long tail when I start and finish, then weave in multiple directions to lock everything in place.
Troubleshooting Common Yarn Turtle Problems
Even the most experienced crafters run into issues. If your turtle's shell is too flat, you probably didn't increase enough in the early rounds. Rip back and add a few more increase rounds. If the head is too big, try using a smaller hook for just that part. Gaps between stitches? Go down a hook size or use a tighter tension.
One common problem is the turtle looking more like a blob. This usually means the proportions are off. Compare your work to a photo of a real turtle or a pattern you trust. Adjust by making the shell larger or the limbs smaller. And if you're really stuck, join a crafting forum or group—someone has been there and can help.
Remember, every mistake is a learning opportunity. My first turtle had three legs and a head that flopped to the side. But you know what? He was loved anyway. So keep going, and don't be too hard on yourself.
How to Do It, Step by Step
- 1Gather your materials
Choose a small amount of worsted-weight yarn in two colors (body and shell), a 3.5mm crochet hook or size 4 knitting needles, tapestry needle, stuffing, and scissors. Having everything within reach prevents interruptions. - 2Crochet or knit the body
Start with a magic ring and work in continuous rounds, increasing to form an oval shape. Use stitch markers to keep track of rounds. Stuff lightly as you go. - 3Create the shell
Work a flat circle in the round, increasing evenly until it's the desired width, then decrease to form a dome. Leave a small opening for stuffing, then close. - 4Make the limbs and head
Work small tubes for legs and a slightly larger ball for the head. Use tight stitches to avoid gaps. Leave long tails for sewing. - 5Pin and sew all parts
Use sewing pins to position the head, legs, and tail on the body. Adjust until symmetrical, then sew securely with a tapestry needle and matching yarn. - 6Add facial features
Attach safety eyes if using, or embroider eyes and a smile with black thread. Place them slightly above the center of the head for a cute look. - 7Stuff and shape
Add small wisps of stuffing to the body and head until firm but squeezable. Mold with your hands to shape the turtle. - 8Weave in ends and finish
Thread any remaining yarn tails onto a tapestry needle and weave them into the body in multiple directions to secure. Trim excess.
A yarn turtle is more than a project; it's a tiny companion that carries your creativity wherever it goes.
Frequently Asked Questions
What is the best yarn for making yarn turtles?
Worsted-weight acrylic or cotton yarn is ideal for beginners because it's easy to work with and holds shape well. For a more delicate look, use sport weight or thread with a smaller hook.
How do I make the shell of a yarn turtle?
The shell is typically worked in the round, starting with a magic ring and increasing to form a flat circle, then decreasing to create a dome. Work in a spiral to avoid seams.
Can I use safety eyes for a yarn turtle?
Safety eyes are fine for adults and children over three, but for babies and toddlers, embroider the eyes with thread to avoid a choking hazard.
How long does it take to make a yarn turtle?
Most yarn turtles take about 1-2 hours to make, depending on your skill level and the size of the turtle. They're a quick, satisfying project.
How do I prevent my yarn turtle from looking lumpy?
Stuff with small wisps of fiberfill rather than large clumps, and use a chopstick to distribute stuffing evenly. Also, maintain consistent tension while stitching.

Amara explores creative writing and storytelling, with a focus on finding your unique voice and building compelling narratives. She shares prompts and exercises to spark imagination, drawing on her love of folklore and modern fiction.


