

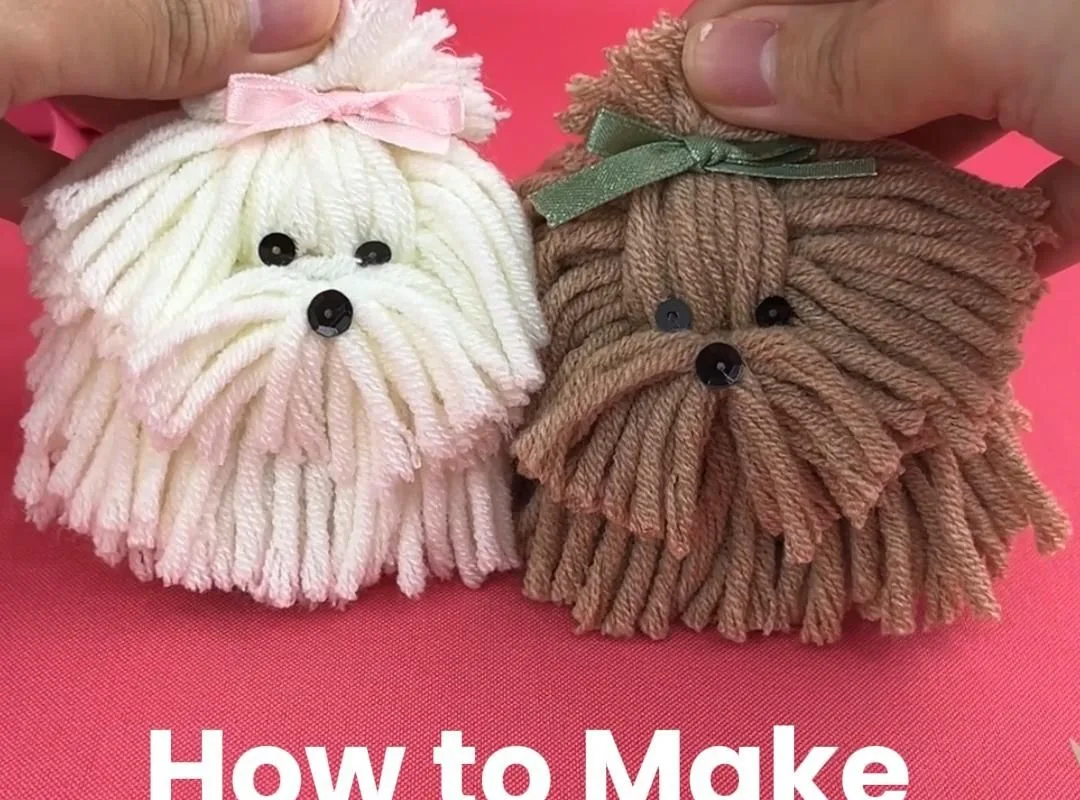
Most yarn dog tutorials skip the math, so you end up with a lopsided puppy and wasted yarn. These seven hacks give you exact measurements, tension control, and assembly tricks to make a sturdy, adorable yarn dog in under two hours.
Advertisements1
- Weigh yarn to avoid shortages: 6-inch dog needs 0.6 oz (30 yards).
- Use a fork to make uniform pom-poms in 2 minutes.
- 18-gauge wire makes legs poseable; wrap it to prevent poking.
- Russian join saves time and looks seamless.
- Safety eyes and nose are non-negotiable for child-safe toys.
- Ladder stitch hides seams and holds securely.
Hack 1: Calculate Yarn Length by Weight, Not Guesswork
A 6-inch yarn dog needs about 30 yards of medium-weight (worsted) yarn. I weigh my yarn: 1 ounce of worsted is roughly 50 yards. So for a 6-inch dog, I need 0.6 ounces. For an 8-inch dog, scale up: volume increases by the cube of the size ratio. An 8-inch dog is 1.33 times longer, so it needs 1.33^3 = 2.37 times more yarn, or about 71 yards (1.4 ounces).
Why it works: yarn is sold by weight, and density stays constant, so weight is the most accurate proxy for length. This prevents mid-project shortages.
Common mistake: buying one 3-ounce skein for a 10-inch dog. A 10-inch dog needs about 139 yards (2.8 ounces), so you'll run out. Always buy 20% extra for mistakes and joining.
Hack 2: Use a Fork to Make Perfectly Uniform Pom-Poms
Wrap yarn around a fork 40 times for a 1.5-inch pom-pom. Slide the bundle off, tie tightly around the center with a 6-inch piece of yarn, then cut the loops. Trim to a sphere. This takes 2 minutes per pom-pom and yields consistent size.
Why it works: the fork's tines set a fixed width, so every pom-pom matches. Uniformity makes the dog look professional.
Common mistake: tying the center too loosely. The pom-pom will shed. Tie with a double knot and pull until the bundle pinches to half its width.
Hack 3: Build a Wire Armature for Poseable Legs
Cut four 6-inch pieces of 18-gauge floral wire. Bend each into a U-shape for legs. Insert into the body before stuffing. Wrap the wire with a thin layer of yarn to prevent poking through. This adds 10 minutes but lets you pose the dog.
Why it works: wire holds shape, so the dog can stand or sit. Without it, legs flop.
Common mistake: using wire that's too thin (like 24-gauge). It bends under the dog's weight. 18-gauge is stiff enough for a 6-inch dog.
Hack 4: Join Yarn with a Russian Join to Avoid Tails
Thread the old yarn end onto a needle, insert it back through its own strands for 2 inches, then thread the new yarn through the loop and repeat. Pull tight. This creates a seamless join that won't unravel.
Why it works: the join is interlocked, so it holds under tension and looks invisible.
Common mistake: knotting and cutting short tails. Knots create bumps and can come undone. The Russian join takes 30 seconds and saves weaving in ends later.
Hack 5: Stuff with Polyester Fiberfill in Small Tufts
Pull off small tufts (about the size of a cotton ball) and stuff them one at a time. Use a chopstick to push into corners. For a 6-inch dog, use about 1.5 ounces of fiberfill.
Why it works: small tufts prevent lumps and allow even distribution. Overstuffing makes the dog hard; understuffing makes it floppy.
Common mistake: using one large clump. It creates a lumpy surface and stretches the stitches.
Hack 6: Attach Ears and Tail with a Ladder Stitch
Pin the ear in place. Thread a needle with matching yarn. Make small stitches that pick up one loop from the ear and one from the body, alternating. This creates an invisible seam. Repeat for the tail.
Why it works: the ladder stitch distributes tension evenly and hides the thread.
Common mistake: sewing with a whipstitch, which shows and can pull out. The ladder stitch takes practice but looks professional.
Hack 7: Add a Safety Nose and Eyes for Child-Safe Toys
Use 6mm safety eyes and a 10mm safety nose. Insert between stitches, then push the washer on from the inside. They lock permanently. For a 6-inch dog, place eyes 1 inch apart, 0.5 inch above the nose.
Why it works: safety eyes won't come off, so they're safe for kids under 3.
Common mistake: using glue-on eyes. They fall off and become choking hazards. Always use safety eyes with washers.
The Hacks, Step by Step
- 1Gather materials
For a 6-inch dog: 30 yards worsted yarn, 1.5 oz fiberfill, 18-gauge wire, 6mm safety eyes, 10mm safety nose, size G crochet hook (4mm), tapestry needle, scissors. - 2Crochet the body
Start with a magic ring, 6 sc. Increase to 24 stitches over 4 rounds. Work even for 8 rounds. Decrease back to 12 stitches. Stuff firmly with small tufts. - 3Make legs and ears
Legs: magic ring, 6 sc, increase to 12, work 6 rounds even. Ears: flat oval, 8 sc in magic ring, increase to 16, work 2 rounds even. - 4Insert wire armature
Bend four 6-inch wires into U-shapes. Wrap with yarn. Insert into body before closing. Position legs at 4 corners. - 5Attach ears and tail
Pin ears 1 inch apart on top of head. Use ladder stitch to sew. Tail: 6 sc in magic ring, work 4 rounds even, attach at back. - 6Add face
Insert safety eyes 1 inch apart, 0.5 inch above nose. Push washers on inside. Nose goes at center of muzzle. - 7Trim and finish
Weave in all ends. Trim any loose fibers. Fluff the dog. If desired, add a pom-pom for a tail tip.
Measure your yarn by weight, not by eye—it's the difference between a finished puppy and a yarn shortage.
Frequently Asked Questions
How much yarn do I need for a 6-inch yarn dog?
You need about 30 yards of worsted weight yarn, which weighs 0.6 ounces. Buy 20% extra to allow for mistakes.
Can I make a yarn dog without a crochet hook?
Yes, you can make a yarn dog using only your hands and a fork for pom-poms. However, crochet gives more control and structure.
What's the best yarn for a DIY puppy?
Medium worsted weight acrylic yarn is best because it's durable, washable, and holds shape. Avoid fuzzy yarns that hide stitches.
Are safety eyes safe for babies?
Yes, if installed correctly with washers. They are designed not to pull off. Avoid glue-on eyes for children under 3.
How long does it take to make a yarn dog?
A 6-inch dog takes about 2 hours for a beginner, including assembly. With practice, you can finish in 1 hour.


