

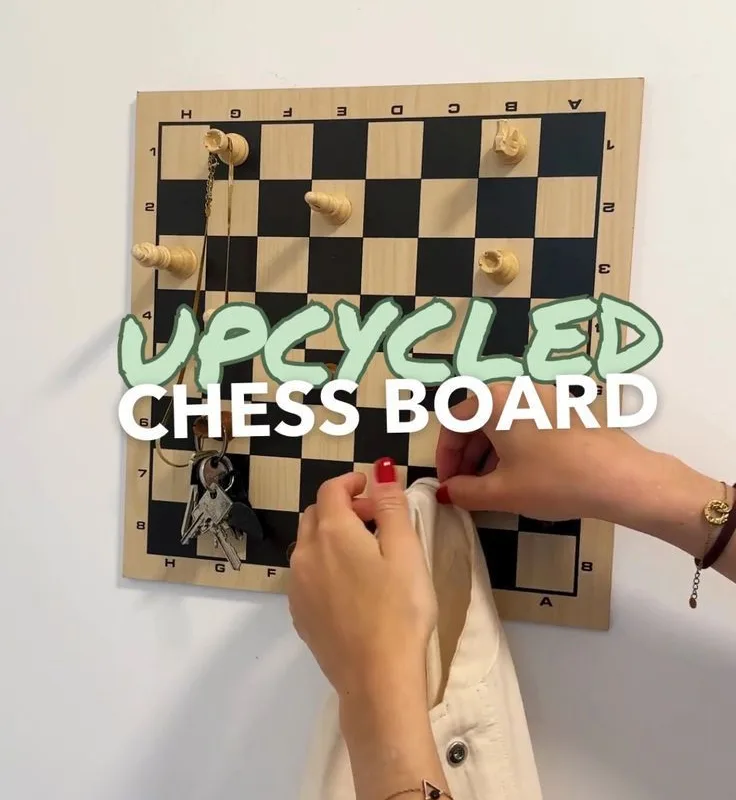
Got a dusty chessboard in the attic? Don't toss it—transform it into something beautiful and functional. Here are 10 specific, actionable upcycling hacks that turn that forgotten board into a conversation piece.
Advertisements1
- Always check for warping before starting; a flat board is crucial for most projects.
- Use food-safe finishes for any item that will contact food, like serving trays.
- Reinforce thin boards with a backing for stability in furniture projects.
- Choose non-toxic paints and finishes if the project is for children.
- Measure twice, cut once—especially when cutting the board into smaller pieces.
Turn Your Chessboard into a Stylish Side Table
A chessboard's 64 squares make a perfect geometric tabletop. I once found a battered board at a flea market for $3 and turned it into a side table that now holds my coffee every morning. The key is to reinforce the board with a sturdy base. Remove any loose veneer, sand the surface lightly, then seal it with three coats of polyurethane. Attach four hairpin legs (available at hardware stores for about $20) using wood screws. The result? A unique piece that looks like it cost hundreds. But beware: if the board is warped, it won't sit flat. Check for straightness before you start. If it's warped, soak it in water, then press it under heavy books for a week to flatten it.
Create a Magnetic Chess Set for Your Fridge
Why not turn your old board into a fridge magnet game? Cut the board into 2-inch squares using a fine-tooth saw. Sand the edges smooth. Glue a small magnet to the back of each square with strong epoxy. For the pieces, you can either use the original chess pieces (if they're small) or make your own by gluing magnets to tiny wooden knobs. This project takes about an hour and costs under $10. It's a great way to keep the game alive in a small space. Common mistake: using weak magnets that can't hold the weight. Use neodymium magnets rated for at least 1 pound. Also, make sure the squares are thin enough—no more than 1/4 inch thick—so they don't stick out too far.
Upcycle into a Decorative Serving Tray
A chessboard makes a stunning serving tray for cheese and crackers. I did this with a board that had a beautiful walnut and maple inlay. First, clean the surface thoroughly with a damp cloth. Then, apply a food-safe finish like mineral oil or beeswax. Attach two handles to opposite sides using brass cabinet pulls. If the board is too thin, glue it to a slightly larger piece of plywood for stability. The tray is perfect for game nights or as a centerpiece. Watch out: don't use a varnish that isn't food-safe, as it can leach chemicals into your food. Also, avoid placing hot items directly on the tray; use a coaster.
Make a Unique Wall Art Piece
Chessboards are inherently artistic. Mount your old board on the wall as a statement piece. If it's plain, add a frame using wooden trim painted in a contrasting color. For a modern twist, arrange multiple small chessboards in a grid pattern to create a larger artwork. I once saw a gallery wall where someone used nine chessboards to form a giant 3×3 square—it was stunning. Use heavy-duty picture hangers rated for at least 20 pounds. The mistake? Hanging it in direct sunlight, which can fade the wood over time. Also, if the board is heavy, make sure you anchor it into a stud, not just drywall.
Transform into a Memory Game for Kids
Turn your chessboard into a memory matching game. Paint each square a different color or pattern, then create pairs. For example, two red squares, two blue, etc. Seal with a non-toxic finish. Kids can flip the board over and try to find matches. This is a great way to teach pattern recognition. I made one for my niece using acrylic paint and it kept her busy for hours. A common mistake: using lead-based paint. Always choose water-based, child-safe paints. Also, make sure the pieces are large enough not to be a choking hazard if you're making separate tiles.
Create a Custom Clock
A chessboard clock is a quirky addition to any game room. Purchase a clock mechanism kit (about $8 online). Drill a hole in the center of the board (if it's not already there). Mount the mechanism on the back and attach the hands on the front. You can use chess pieces as hour markers—glue them around the edge. This project takes 30 minutes and looks amazing. The mistake? Not checking the clock mechanism's shaft length; it must be long enough to go through the board's thickness. Also, if the board is too thick, you may need a longer shaft or to recess the mechanism.
The Hacks, Step by Step
- 1Clean and Assess Your Chessboard
Wipe the board with a damp cloth and mild soap. Check for warping, cracks, or loose veneer. If warped, flatten it by dampening and pressing under heavy books for a week. This ensures a stable base for your project. - 2Choose Your Upcycling Project
Decide whether you want a functional item (table, tray) or decorative (wall art, clock). Consider your skill level and available tools. For beginners, the fridge magnet set or memory game are easiest. - 3Gather Materials and Tools
Based on your project, collect items like sandpaper, wood glue, magnets, legs, or clock kits. Ensure you have safety gear: goggles and gloves. A mitre box or saw for cutting if needed. - 4Prepare the Surface
Sand the board lightly with 220-grit sandpaper to roughen the surface for better adhesion. Wipe away dust. If painting, apply a primer first. This step prevents peeling and ensures a professional finish. - 5Execute the Transformation
Follow the specific instructions for your chosen project. Take your time with measurements and alignment. For example, when attaching legs, mark screw holes precisely to avoid splitting the wood. - 6Seal and Finish
Apply a protective finish like polyurethane, mineral oil, or beeswax depending on use. For food-contact items, use food-safe finishes. Let it cure fully before use, usually 24-48 hours. - 7Display and Enjoy
Place your upcycled piece where it can be admired. Share your creation on social media with #upcycledchess. Enjoy the compliments and the satisfaction of giving new life to an old game.
Upcycling isn't just about saving money; it's about preserving the stories and craftsmanship embedded in everyday objects.
Frequently Asked Questions
Can I upcycle a chessboard that is missing pieces?
Absolutely! Missing pieces don't affect the board itself. You can still use the board for furniture, art, or games that don't require the original pieces, like a memory game or clock.
What is the best way to clean an old chessboard before upcycling?
Use a damp cloth with mild soap to remove dust and grime. Avoid soaking the wood. For stubborn stains, gently rub with a soft cloth and a little vinegar. Let it dry completely before proceeding.
How do I prevent the chessboard from warping after upcycling?
Seal all sides of the board, including the edges and back, with a finish like polyurethane. This prevents moisture from entering unevenly. Also, avoid placing it in humid areas or direct sunlight.
Are there any safety concerns when cutting a chessboard?
Yes, always wear safety goggles and a dust mask. Use a fine-tooth saw to minimize splintering. Clamp the board securely before cutting. If using power tools, follow all safety guidelines.
What kind of finish should I use for a chessboard table?
For a table, use a durable finish like polyurethane or lacquer. Apply at least three coats, sanding lightly between coats. This protects against scratches and spills.


