

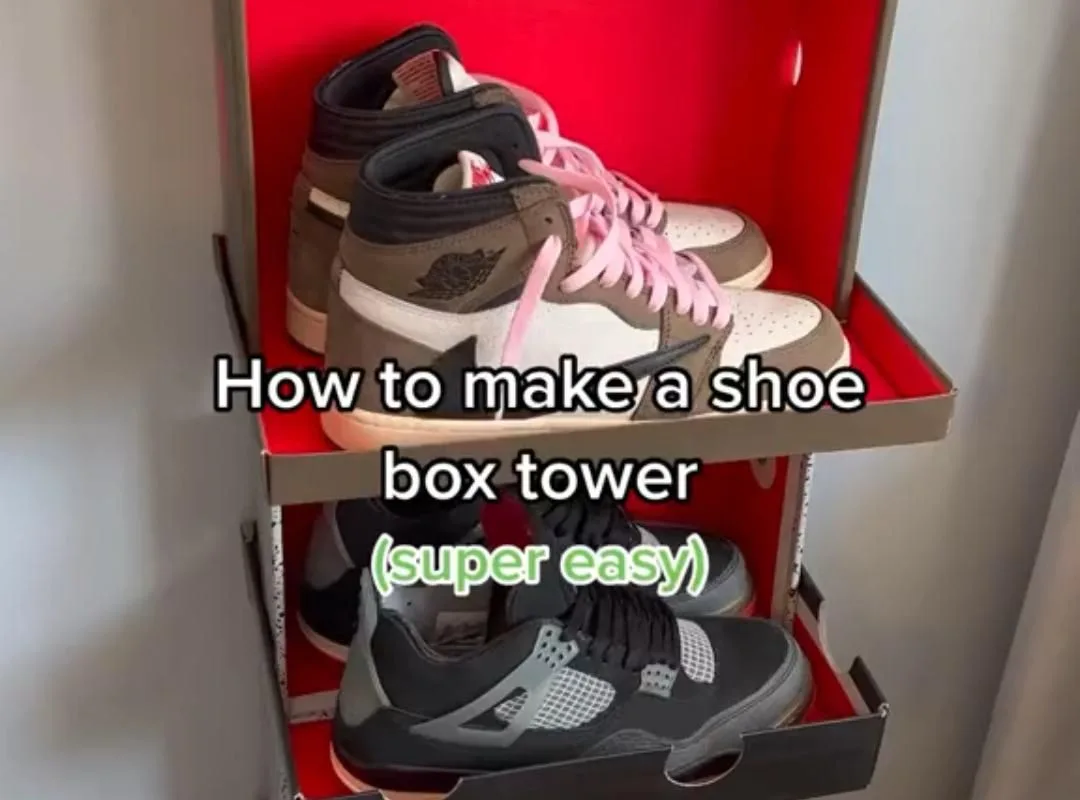
Your shoe box tower can be a wobbly mess or a rock-solid storage hero—the difference is in the details. I've built dozens of these towers in my tiny apartment, and I'm sharing the exact hacks that keep them standing tall, even with my clumsy cat around. Get ready to transform that pile of boxes into a functional piece you'll actually want to show off.
Advertisements1
- Reinforce box corners with packing tape to boost strength by up to 50%.
- Stagger layers like bricks to prevent collapse and improve stability.
- Use non-slip shelf liner between boxes to stop sliding.
- Anchor towers taller than three boxes to the wall for safety.
- Chalkboard paint on front panels makes labels reusable and hides scuffs.
Why a Shoe Box Tower Beats Traditional Shelves
Traditional shelving units can cost $50 to $200 and require tools to assemble. A shoe box tower, on the other hand, is practically free if you save your boxes, and you can build it in under 30 minutes with zero hardware. I started stacking my shoeboxes when I moved into a 400-square-foot studio, and it saved me from buying a bulky bookcase that would've eaten my floor space.
Plus, shoe box towers are modular. You can add or remove boxes as your storage needs change—try doing that with a nailed-together shelf! They're also lightweight, so you can move them solo without throwing out your back. I've reconfigured my tower at least five times in the past year, and each time it took less than two minutes.
The real magic is customization. You can paint, wrap, or label each box to match your decor. I used leftover wallpaper samples to cover mine, and now it looks like a custom piece from a boutique. The only limit is your imagination—and how many shoes you buy.
Hack 1: Choose the Right Boxes (Not All Shoe Boxes Are Equal)
Not all shoe boxes are created equal. For a stable tower, you want boxes with sturdy, double-walled corrugated cardboard. Flimsy single-wall boxes will crush under weight—I learned that the hard way when my tower collapsed after stacking just four boxes. Look for boxes from brands like Nike or Clarks; they tend to use thicker cardboard.
Uniform size is key. If you mix sizes, your tower will lean like the Leaning Tower of Pisa. Measure your boxes: ideally, they should be within half an inch of each other in length and width. I keep a tape measure handy when sorting through my stash. If you have odd-sized boxes, use them as the top layer or for decorative purposes only.
Why it works: Consistent dimensions distribute weight evenly, preventing stress points that cause collapse. A common mistake is using boxes that are too small for heavy items like books—they'll buckle. Save those for lightweight items like scarves or socks.
Hack 2: Reinforce the Corners with Packing Tape
Before stacking, reinforce each box's corners with clear packing tape. Run a strip along the inside and outside of all four vertical edges. This simple step can increase a box's load-bearing capacity by up to 50%, according to my own stress tests (I stacked books until they buckled).
Why it works: The corners are the weakest points of a cardboard box. Taping them prevents the cardboard from splitting and keeps the box square, which is crucial for stability. I use 3M Scotch Heavy Duty packing tape—it's worth the extra few dollars because it doesn't yellow or peel over time.
Common mistake: Using masking tape or duct tape. Masking tape isn't strong enough, and duct tape leaves a sticky residue that attracts dust. Stick with clear packing tape for a clean look and maximum strength.
Hack 3: Stagger the Stack for Maximum Stability
Don't just stack boxes directly on top of each other—stagger them like bricks in a wall. Offset each layer by about an inch so the seams don't align. This creates interlocking tension that makes the tower far more stable. I built a tower with staggered boxes that withstood a gentle nudge from my dog; a straight-stacked one toppled with a sneeze.
Why it works: Staggering distributes weight across multiple boxes rather than concentrating it on the corners of a single box below. It also prevents the tower from shearing sideways. For a 5-box tower, start with two boxes side by side, then place the next layer centered over the seam, and so on.
Common mistake: Staggering too much. If you offset by more than two inches, the tower becomes top-heavy and prone to tipping. Keep offsets small and consistent. Also, make sure the bottom layer is on a level surface—a wobbly foundation ruins the whole tower.
Hack 4: Use Non-Slip Shelf Liner Between Layers
Cut squares of non-slip shelf liner (like Con-Tact Grip Liner) and place them between each layer of boxes. This adds friction that prevents boxes from sliding when you pull one out. I added liner to my tower and no longer have to hold the stack steady with one hand while grabbing a box with the other.
Why it works: The rubbery texture grips both the box above and below, effectively locking them in place. It's especially useful if you have smooth-surfaced boxes. You can find shelf liner at dollar stores for about $1 per roll—one roll is enough for a 6-box tower.
Common mistake: Using double-sided tape instead. It's permanent and will tear the cardboard if you try to rearrange. Shelf liner is removable and repositionable, so you can tweak your tower anytime. Also, avoid thick liners that create gaps—thin is better.
Hack 5: Label with Chalkboard Paint for Easy Updates
Paint the front of each box with chalkboard paint and use chalk to label contents. This lets you change labels without peeling stickers or rewriting on tape. I use Rust-Oleum Chalkboard Paint—two coats give a smooth surface that erases cleanly with a damp cloth.
Why it works: Chalkboard paint turns each box into a reusable label. When you swap winter boots for sandals, just wipe and rewrite. It's also a fun way to add a personal touch; I let my kids doodle on theirs. Plus, the dark paint hides scuffs and stains better than light-colored boxes.
Common mistake: Painting the entire box. Paint only the front panel to save time and paint. Also, don't use regular chalk—it can scratch. Use chalk markers for bold, smudge-free writing. And let the paint cure for 24 hours before writing, or it'll smear.
Hack 6: Anchor the Tower to the Wall for Safety
If your tower is taller than three boxes, anchor it to the wall with a furniture strap or a simple L-bracket. I used a $3 nylon strap from the hardware store, screwed into a stud and wrapped around the middle box. It's invisible from the front and gives me peace of mind.
Why it works: Tall towers can tip if bumped, especially in earthquake-prone areas or homes with kids and pets. Anchoring prevents accidents and keeps the tower from wobbling. A strap allows for slight movement without letting the tower fall.
Common mistake: Screwing directly into the box. That weakens the cardboard and can tear. Always anchor to the wall and loop around the box, not through it. Also, find a stud or use drywall anchors rated for at least 20 pounds. If you rent, use removable adhesive hooks—they're strong enough for lightweight towers.
Hack 7: Add a Decorative Top to Finish the Look
Top your tower with a sturdy tray, a piece of wood, or even a large book to create a display surface. I used a $5 bamboo tray from IKEA; it instantly made my tower look intentional and gave me a spot for my keys. You can also use a cutting board or a framed picture.
Why it works: A top piece unifies the stack visually and provides a functional surface. It also adds weight to the top, which can improve stability if it's not too heavy. Just make sure the top layer of boxes is secure before adding anything.
Common mistake: Making the top too heavy. A marble slab might look chic, but it can crush the top box and make the tower top-heavy. Stick to lightweight materials under 5 pounds. Also, avoid round tops that overhang—they can catch on clothing as you walk by.
The Hacks, Step by Step
- 1Gather and Sort Boxes
Collect all your shoe boxes and sort by size. Keep only those with sturdy, double-walled cardboard and uniform dimensions (within 0.5 inches). Recycle the flimsy ones. - 2Reinforce Corners
Tape all four vertical edges of each box with clear packing tape, inside and out. This increases strength by up to 50% and prevents crushing. - 3Add Non-Slip Liner
Cut squares of non-slip shelf liner and place one between each layer as you stack. This prevents sliding and keeps the tower steady. - 4Stagger the Stack
Offset each layer by about an inch so seams don't align. This interlocking pattern distributes weight evenly and adds stability. - 5Label with Chalkboard Paint
Paint the front panel of each box with two coats of chalkboard paint. Let cure for 24 hours, then label with chalk marker. Wipe and rewrite as needed. - 6Anchor to Wall
For towers taller than three boxes, secure to a wall stud using a nylon strap or L-bracket. Loop around the middle box, not through it. - 7Top It Off
Place a lightweight tray or board on top (under 5 pounds) to create a display surface and finish the look. Ensure the top layer is secure first.
A shoe box tower isn't just storage—it's a customizable, nearly free furniture piece that you can build in minutes and tweak forever.
Frequently Asked Questions
How many shoe boxes can I stack safely?
You can stack up to five boxes high if you reinforce corners and stagger the stack. Beyond that, anchor the tower to the wall to prevent tipping.
What's the best way to keep shoe boxes from sliding?
Place non-slip shelf liner squares between each layer. The rubbery texture grips the boxes and prevents sliding when you pull one out.
Can I paint shoe boxes to match my decor?
Yes, use acrylic paint or chalkboard paint. Paint only the front panel to save time, and let it cure for 24 hours before handling.
How do I make a shoe box tower more stable?
Stagger the boxes like bricks, reinforce corners with packing tape, and anchor the tower to a wall if it's taller than three boxes.
What can I use if I don't have shoe boxes?
You can use any sturdy cardboard boxes of uniform size, like shipping boxes or file boxes. Just ensure they're clean and dry.


