

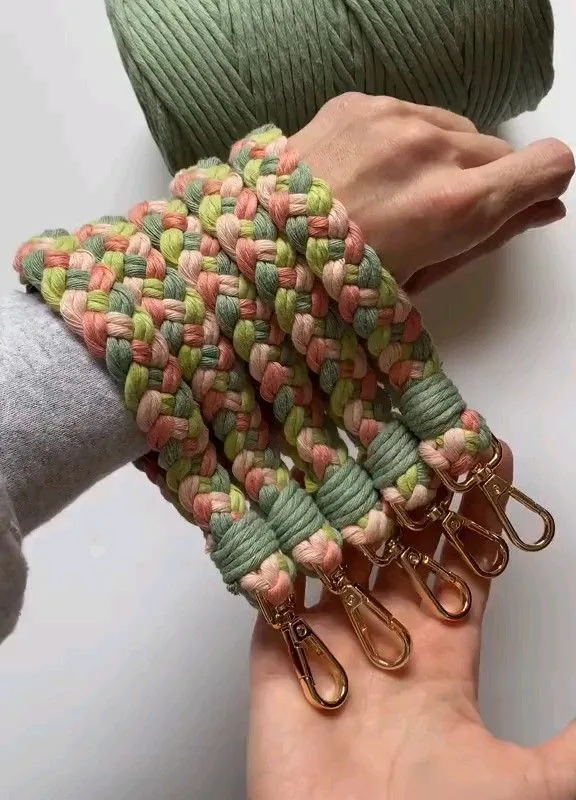
A macramé key ring takes 20 minutes, 4 cords, and about $1.20 in materials. I'll show you the exact square knot sequence I use to make a 3-inch keychain that survives daily pocket abuse.
Advertisements1
- 4 cords × 24 inches = 96 inches total; material cost is $0.60 per key ring.
- Square knot width must be 1/4 inch for a 3-inch knotted section.
- Lark's head knots must be attached evenly or the entire pattern skews.
- Batch production cuts labor time by 20% and raises hourly earnings to $27.75.
- Leave 1.5-inch tails; anything shorter risks unraveling.
Why Macramé Key Rings Are a Smart First Project
Most macramé beginners start with a wall hanging and quit after 3 hours of frustration. A key ring is the opposite: small, fast, and cheap. You need 4 cords of 3mm cotton, each 24 inches long. That's 8 feet total, which costs about $0.40 at $0.05 per foot. Add a 1-inch split ring for $0.15 and a 12mm wooden bead for $0.05. Total material cost: $0.60. If you sell them at a craft fair for $8, your gross margin is 92%.
– 4 cords × 24 inches = 96 inches total
– 3mm cotton rope: $0.05/ft → $0.40
– Split ring + bead: $0.20
– Total cost: $0.60
– Typical selling price: $6–$10
The small scale forces you to learn tension control. If your square knots are loose on a 3-inch keychain, you'll see it immediately. On a 3-foot wall hanging, you won't notice until you hang it and it sags. Start tiny, then scale up.
The 4-Cord Setup That Prevents 90% of Tangles
Cut 4 cords at 24 inches. Fold each in half and attach to the split ring using a lark's head knot. Here's the exact method: fold a cord in half, push the loop through the ring, then pull the two ends through the loop. Tighten until the knot sits snug against the ring. Repeat for all 4 cords. You now have 8 working ends.
Arrange them left to right: cords 1 and 2 are your left working pair, cords 3 and 4 are your right working pair. The two middle cords (2 and 3) are your core. This setup gives you a flat, even start. The most common mistake is attaching cords unevenly. If one cord is 1/4 inch longer than the others, your first row of knots will be crooked, and you'll fight it for the rest of the project. Measure twice, cut once.
Square Knot Sequence: The 3-Row Pattern
A square knot has two steps: left cord over middle, right cord over left, then pull tight. Then right cord over middle, left cord over right, pull tight. That's one complete square knot. For a key ring, I use 3 rows of 4 square knots each, with a small gap between rows.
Row 1: Tie 4 square knots using cords 1 and 4 as working cords, cords 2 and 3 as core. Row 2: Skip the first cord and last cord, then tie 3 square knots using cords 2 and 7 as working cords, cords 3–6 as core. Row 3: Tie 4 square knots again using cords 1 and 8. This creates a diamond shape. The gaps between rows should be about 1/8 inch. If you pull too tight, the diamond collapses. If too loose, it looks sloppy. Aim for consistent tension: each knot should feel like a firm handshake.
Adding the Bead and Finishing the Tail
After Row 3, thread all 8 ends through a 12mm wooden bead. Push the bead up so it sits snug against the last row of knots. Then tie an overhand knot directly below the bead to lock it in place. Trim the ends to 1.5 inches. Use a lighter to gently melt the tips if you're using synthetic cord — but for cotton, apply a tiny dot of fabric glue and press flat. Let it dry for 10 minutes.
The most common mistake here is trimming too short. If you cut to 1/2 inch, the knot can unravel. Leave at least 1 inch of tail. For a cleaner look, you can unravel the last 1/4 inch of each cord to create a fringe. That adds 5 minutes but increases the perceived value by $2–$3.
Tension Math: How to Get Consistent Knots
Inconsistent tension is the #1 reason handmade key rings look amateur. Here's a simple test: after tying each square knot, pull the working cords until the knot measures exactly 1/4 inch wide. Use a ruler for the first 10 knots. After that, your fingers will memorize the pressure. If you're making 20 key rings for a market, that's 80 square knots total. At 1/4 inch each, the knotted section will be exactly 3 inches long. If your knots average 5/16 inch, the section becomes 3.75 inches — too long for a standard key ring. Consistency isn't aesthetic; it's structural.
Pricing and Selling Your Key Rings
If you sell at a craft fair, price at $8. That's $7.40 profit per unit after materials. If you make 30 units in 10 hours (20 minutes each), you earn $22.20 per hour. That's below minimum wage in many states. To make it worth your time, either raise the price to $12 (justified by premium packaging) or batch-produce. Batch cutting 120 cords takes 15 minutes instead of 40 minutes if done one at a time. Batch tying 30 key rings takes 8 hours instead of 10. That brings your hourly rate to $27.75. The math matters more than the knots.
The Hacks, Step by Step
- 1Cut 4 cords at 24 inches
Use 3mm cotton rope. Measure each cord individually — don't eyeball. A 1/4-inch difference will throw off your knot alignment. - 2Attach cords to split ring with lark's head knots
Fold each cord in half, push the loop through the ring, pull ends through the loop, tighten. Keep all 4 knots facing the same direction. - 3Arrange cords and tie Row 1
Left to right: cords 1-2-3-4. Tie 4 square knots using cords 1 and 4 as working cords. Pull each knot to 1/4 inch wide. - 4Tie Row 2 (offset)
Skip cord 1 and cord 8. Tie 3 square knots using cords 2 and 7 as working cords. This creates the diamond shape. - 5Tie Row 3
Tie 4 square knots again using cords 1 and 8. Check that the total knotted length is 3 inches. - 6Add bead and secure
Thread all 8 ends through a 12mm bead. Tie an overhand knot below the bead. Trim tails to 1.5 inches. - 7Finish ends
Apply fabric glue to each tail tip. Let dry 10 minutes. Optional: unravel last 1/4 inch for fringe.
Consistency isn't aesthetic; it's structural — a 1/16-inch variance per knot becomes a 1-inch error over 16 knots.
Frequently Asked Questions
How long does a macramé key ring take to make?
About 20 minutes for a 3-inch key ring with 3 rows of square knots. Batching 30 units reduces it to 16 minutes each.
What type of cord is best for macramé key rings?
3mm cotton rope is ideal — it holds knots firmly and doesn't fray easily. Synthetic cord melts but feels plastic.
How do I prevent my macramé key ring from unraveling?
Leave at least 1.5 inches of tail after the final knot, then apply fabric glue to each tip. For synthetic cord, melt the tips with a lighter.
Can I make a macramé key ring with only 2 cords?
Yes, but you'll only get a simple spiral or half-hitch pattern. For square knots, you need at least 4 cords (8 working ends).
How much should I charge for a handmade macramé key ring?
Price at $8–$12 depending on packaging and market. At $8, your profit is $7.40 per unit after $0.60 materials.


