

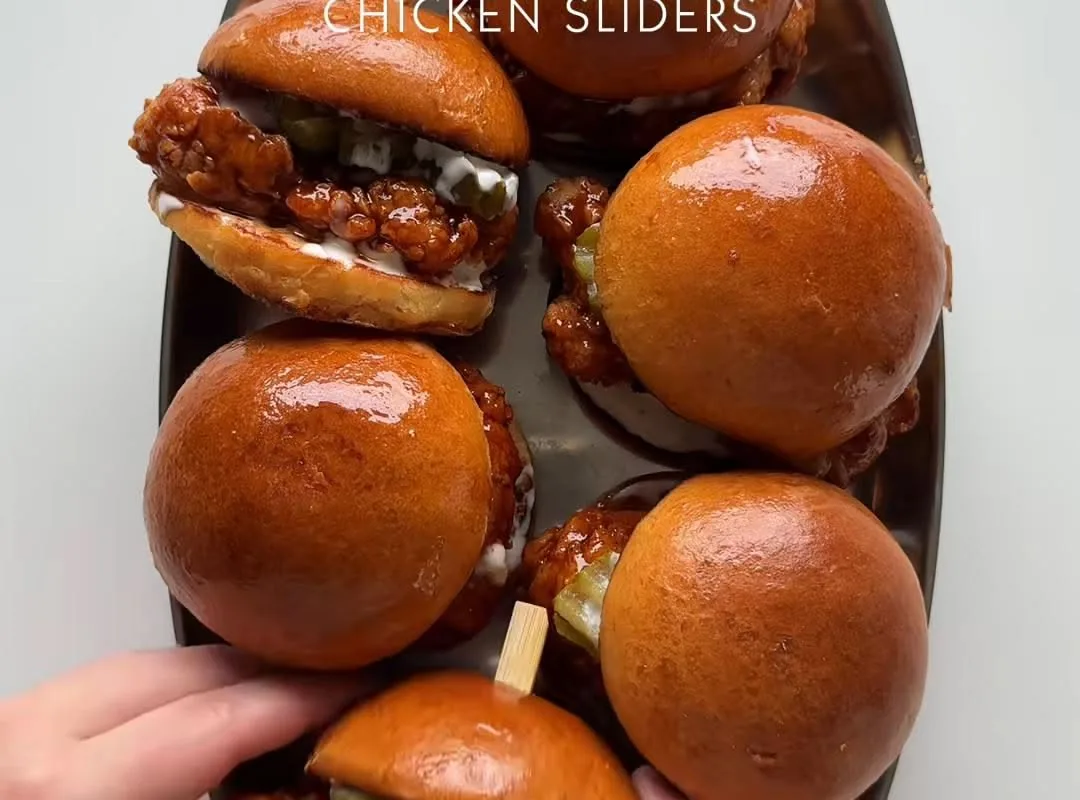
Honey BBQ Chicken Sliders are what happens when a bottle of barbecue sauce and a jar of honey decide to elope inside a pack of soft dinner rolls. Think of them as the sandwich version of a group hug: warm, a little sticky, and impossible to have just one. The chicken simmers in a glossy honey-BBQ glaze until it practically shreds itself, then gets piled onto buttery rolls with cheese that melts into every crevice.
Advertisements1
If you have ever watched a slider tray vanish at a party faster than free samples at a supermarket, you know the power of these little sandwiches. The trick is balance: honey brings sweetness, BBQ sauce brings smoke and tang, and a splash of cider vinegar keeps the whole thing from tipping into candy territory. Twenty-five minutes of hands-off simmering does most of the work while you butter the rolls.
No smoker, no grill, no fancy equipment. A skillet and an oven are all you need, which means these sliders are weeknight-friendly but still earn their spot on a game-day table. Stay curious, and get ready to butter some buns.
Why You'll Love This Recipe
About the Ingredients
1 1/2 pounds (680g) boneless, skinless chicken thighs
Thighs stay juicy through the simmer; chicken breast works too but pull it off the heat 5 minutes early so it does not dry out. Look for thighs with even thickness so they cook at the same rate.
3/4 cup (210g) barbecue sauce, plus 2 tablespoons for drizzling
Use a smoky-sweet sauce you would happily eat off a spoon; a vinegar-forward Carolina style cuts the honey nicely. Avoid sauces labeled 'extra sweet' since the honey already brings plenty of sugar.
1/3 cup (113g) honey
Clover or wildflower honey gives a clean floral sweetness; if your honey has crystallized, warm the jar in a bowl of hot water for 5 minutes. Maple syrup is a fine swap if you are out.
1 tablespoon apple cider vinegar
This is the acidity that keeps the glaze from tasting flat; white vinegar or a squeeze of lemon works in a pinch. Add it at the end so its brightness survives the simmer.
1/2 teaspoon smoked paprika
Smoked paprika adds a campfire note without lighting a fire; regular paprika is milder but still fine. Buy fresh paprika yearly, as it fades in flavor after about a year.
12 slider rolls (about 3 inches/7.5cm wide), connected if possible
Connected rolls hold the filling in place and make pull-apart portions; Hawaiian sweet rolls are the classic choice. If using separate rolls, nestle them tightly in the dish.
6 slices (about 6 ounces/170g) provolone or cheddar cheese
Provolone melts smoothly and mildly; sharp cheddar brings more punch but can turn oily, so shred it instead of slicing. Smoked gouda is a fantastic upgrade if you want extra depth.
3 tablespoons (42g) salted butter, melted
Salted butter keeps the topping seasoned; unsalted works if you add a pinch of salt. Brush while hot so it soaks into the tops rather than pooling.
1 teaspoon garlic powder
Garlic powder dissolves into the butter evenly; fresh minced garlic can burn on top, so stick with powder here. Onion powder makes a nice half-and-half swap.
1 tablespoon sesame seeds (optional)
Sesame seeds add a toasted crunch and a bakery look; poppy seeds or a pinch of flaky salt work equally well. Toast them in a dry pan for 1 minute first if you want more flavor.
Tips & Tricks
Do Not Overcook the Chicken
Simmer only until it shreds with light pressure, around 25 minutes; past that it turns stringy and dry. Check with an instant-read thermometer: 200F to 205F (93C to 96C) is the sweet spot for pull-apart tenderness.
Sauce Before and After
Reserve 2 tablespoons of BBQ sauce to drizzle on top after baking. The oven dulls sauces slightly, and that fresh drizzle brings the glaze back to life.
Watch the Roll Bottoms
Oven heat can scorch the underside of the rolls. Set the dish on the middle rack and check at 15 minutes; if the bottoms are browning fast, slide a sheet pan underneath as a heat shield.
Let Them Rest Before Slicing
Wait 5 minutes after baking so the cheese sets and the filling does not slide out. A serrated knife cuts cleanly through the connected rolls.
Pro Tips
Step-by-Step Instructions
1. Simmer the chicken
Combine the chicken thighs, 3/4 cup barbecue sauce, honey, cider vinegar, and smoked paprika in a 12-inch skillet over medium heat. Bring to a gentle simmer, then cover and cook at a low bubble for 22 to 25 minutes, until the chicken reaches 200F to 205F (93C to 96C) and shreds easily with a fork.
2. Shred and glaze
Transfer the chicken to a bowl and shred with two forks, then return it to the skillet and toss in the reduced sauce over low heat for 2 minutes, until glossy and thick enough to coat the back of a spoon. Taste and add a splash more vinegar if it needs brightness.
3. Heat the oven
Preheat the oven to 350F (175C) and set a rack in the middle position. A fully preheated oven is what gives you evenly melted cheese and golden tops instead of pale, gummy rolls.
4. Build the sliders
Slice the slab of rolls in half horizontally, keeping the tops and bottoms connected. Place the bottom half in a 9×13-inch baking dish, spread the chicken evenly across it, and layer the cheese slices on top, overlapping slightly so every bite gets melt.
5. Cap and butter
Set the top half of the rolls over the cheese. Stir the melted butter with the garlic powder and brush it generously over the tops, letting it seep into the seams, then sprinkle with sesame seeds if using.
6. Bake until golden
Bake for 15 to 18 minutes, until the cheese is bubbling at the edges and the tops are golden brown. If the tops brown faster than the cheese melts, tent loosely with foil for the last 5 minutes.
7. Rest and finish
Let the dish rest for 5 minutes, then drizzle the reserved 2 tablespoons of barbecue sauce over the top. Slice along the roll seams with a serrated knife and serve warm.
Delicious Variations
Buffalo Honey Twist
Swap half the BBQ sauce for buffalo sauce and use blue cheese crumbles instead of provolone for a tangy, spicy slider.
Bacon Cheddar Version
Add 6 slices of cooked bacon under the cheese and use sharp cheddar for a smoky, diner-style bite.
Pineapple Teriyaki Sliders
Replace the BBQ sauce with teriyaki glaze and tuck thin pineapple rings under the cheese for a tropical spin.
How to Store Honey BBQ Chicken Sliders
Refrigerator
Store cooled sliders in an airtight container in the refrigerator for up to 3 days; keep the chicken filling separate from the rolls if you can to prevent sogginess.
Freezer
Freeze the cooled chicken filling alone in a freezer-safe bag for up to 2 months; assembled sliders freeze less well because the rolls get mushy.
Reheating
Reheat assembled sliders covered with foil at 325F (165C) for 12 to 15 minutes, or microwave individual sliders for 45 to 60 seconds until steaming.
Frequently Asked Questions
Q: Can I use chicken breast instead of thighs?
Yes, chicken breast works, but pull it from the simmer at 165F (74C) to keep it juicy. Shred it right away and let it soak in the glaze for a few minutes before building the sliders.
Q: How do I keep slider rolls from getting soggy?
Use a slotted spoon to drain excess sauce from the chicken before piling it on the rolls. A layer of cheese against the bottom bun also creates a moisture barrier that keeps the bread firm.
Q: Can I make honey BBQ chicken sliders ahead of time?
Absolutely, assemble the sliders up to 24 hours ahead, cover, and refrigerate, then bake straight from cold with 5 extra minutes. You can also cook and shred the chicken up to 3 days in advance.
Q: What is the best cheese for these sliders?
Provolone is the safest bet because it melts evenly and mildly, letting the honey BBQ flavor lead. Cheddar, smoked gouda, or pepper jack all work if you shred them rather than slice them.
Q: Can I make these sliders in a slow cooker?
Yes, cook the chicken with the sauce ingredients on low for 4 hours, then shred and build the sliders as written. The oven step is still needed for melty cheese and golden tops.
Give these honey BBQ chicken sliders a spin at your next gathering and watch the tray disappear before you can say seconds. If you make them, snap a photo and tag me, because sticky fingers are proof of a job well done. Stay curious, stay safe.

Honey BBQ Chicken Sliders
Honey BBQ Chicken Sliders pack sticky-sweet pulled chicken and melty cheese into buttery rolls for a 50-minute crowd-pleaser everyone devours.
🧂 Ingredients
- 1 1/2 pounds (680g) boneless, skinless chicken thighs
- 3/4 cup (210g) barbecue sauce, plus 2 tablespoons for drizzling
- 1/3 cup (113g) honey
- 1 tablespoon apple cider vinegar
- 1/2 teaspoon smoked paprika
- 12 slider rolls (about 3 inches/7.5cm wide), connected if possible
- 6 slices (about 6 ounces/170g) provolone or cheddar cheese
- 3 tablespoons (42g) salted butter, melted
- 1 teaspoon garlic powder
- 1 tablespoon sesame seeds (optional)
📋 Instructions
- 1Simmer the chicken — Combine the chicken thighs, 3/4 cup barbecue sauce, honey, cider vinegar, and smoked paprika in a 12-inch skillet over medium heat. Bring to a gentle simmer, then cover and cook at a low bubble for 22 to 25 minutes, until the chicken reaches 200F to 205F (93C to 96C) and shreds easily with a fork.
- 2Shred and glaze — Transfer the chicken to a bowl and shred with two forks, then return it to the skillet and toss in the reduced sauce over low heat for 2 minutes, until glossy and thick enough to coat the back of a spoon. Taste and add a splash more vinegar if it needs brightness.
- 3Heat the oven — Preheat the oven to 350F (175C) and set a rack in the middle position. A fully preheated oven is what gives you evenly melted cheese and golden tops instead of pale, gummy rolls.
- 4Build the sliders — Slice the slab of rolls in half horizontally, keeping the tops and bottoms connected. Place the bottom half in a 9×13-inch baking dish, spread the chicken evenly across it, and layer the cheese slices on top, overlapping slightly so every bite gets melt.
- 5Cap and butter — Set the top half of the rolls over the cheese. Stir the melted butter with the garlic powder and brush it generously over the tops, letting it seep into the seams, then sprinkle with sesame seeds if using.
- 6Bake until golden — Bake for 15 to 18 minutes, until the cheese is bubbling at the edges and the tops are golden brown. If the tops brown faster than the cheese melts, tent loosely with foil for the last 5 minutes.
- 7Rest and finish — Let the dish rest for 5 minutes, then drizzle the reserved 2 tablespoons of barbecue sauce over the top. Slice along the roll seams with a serrated knife and serve warm.

Kwame writes about technology and digital privacy for everyday users. He breaks down complex topics like data tracking and encryption into simple, relatable terms.


