

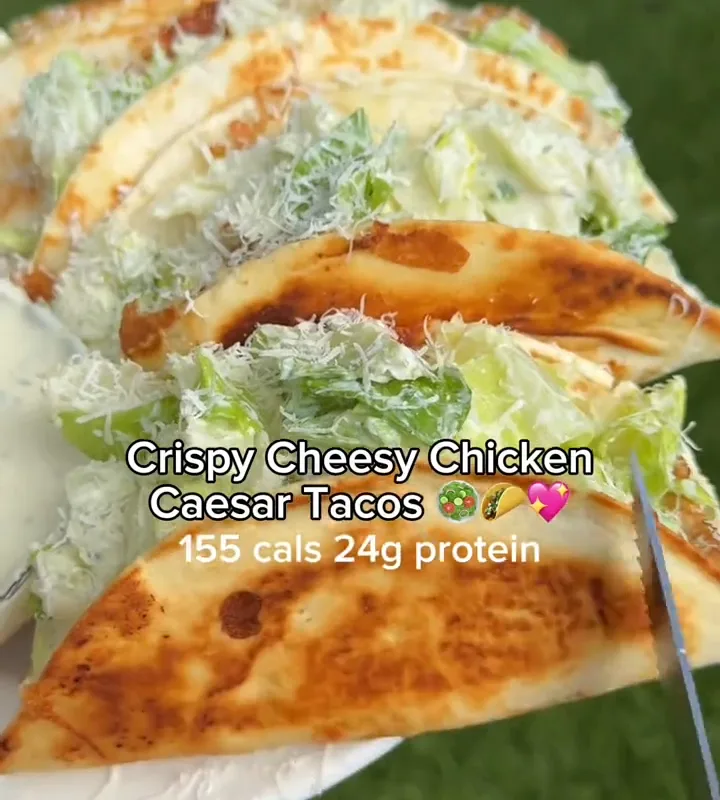
These Crispy Cheesy Chicken Caesar Tacos are my favorite trick for turning a boring Tuesday into something everyone fights over. You get a crunchy, golden tortilla shell, a melty cheese crust, and a creamy Caesar chicken filling that tastes like your favorite salad went on vacation and came back crispy. Prep is 15 minutes and the whole thing is on the table in about 50 minutes flat.
Advertisements1
The magic happens in a skillet. You sprinkle cheese straight onto a tortilla, let it sizzle into a lacy crust, then fold and flip until both sides are crisp. The chicken gets tossed with Caesar dressing, a little Parmesan, and crisp romaine so every bite stays bright instead of heavy.
No fancy equipment, no marinating, no stress. Grab a rotisserie chicken on the way home and you're already halfway there. Improvise with what's in your fridge, these tacos are very forgiving.
Why You'll Love This Recipe
About the Ingredients
6 (8-inch/20cm) flour tortillas
Flour tortillas fold and crisp best here because they flex without cracking. Look for ones labeled soft and pliable; corn tortillas work but need a quick 10-second microwave warm-up to avoid tearing.
2 cups (225g) shredded mozzarella
Low-moisture mozzarella melts into that golden crust without releasing water. Monterey Jack or a pizza-blend bag is a perfect swap if that's what you have.
3 cups (about 12 oz/340g) shredded cooked chicken
Grab a rotisserie chicken and pull the meat while it's still warm, it shreds in seconds. Leftover roasted chicken thighs are even juicier than breast meat.
1/2 cup (120ml) creamy Caesar dressing
Use a refrigerated creamy dressing, not a thin vinaigrette-style one, so the filling holds together. Ranch dressing is the easiest crowd-pleasing substitute.
1/2 cup (50g) finely grated Parmesan
Freshly grated Parmesan melts more smoothly than the pre-shredded stuff in the green can. Pecorino Romano gives a sharper, saltier punch if you like that.
2 cups (about 4 oz/115g) thinly sliced romaine lettuce
Keep the lettuce dry after washing or the filling turns soupy. Iceberg or shredded cabbage adds extra crunch and holds up even better.
1/4 cup (25g) crumbled cooked bacon
Bacon adds smoky contrast to the creamy dressing. Skip it entirely or swap in crispy fried onions for a meat-free version.
1/4 cup (30g) thinly sliced red onion
Soak the slices in cold water for 5 minutes to mellow the bite. Pickled red onion is a tangy upgrade if you have a jar.
1 tbsp (15ml) olive oil, plus more as needed
Oil helps the tortilla crisp instead of sticking or burning. Avocado oil or even melted butter works just as well.
1/4 tsp freshly ground black pepper
Fresh-cracked pepper wakes up the creamy filling. Skip the salt, the Parmesan and dressing are already plenty salty.
Tips & Tricks
Dry the lettuce well
Wet lettuce steams the filling and makes the tortillas soggy, so spin it dry and pat it with paper towels before tossing.
Watch the cheese, not the clock
Shredded cheese goes from golden to bitter in under a minute, so stay at the skillet and pull it the second the edges look lacy and deep golden.
Fill on one half only
Piling filling across the whole tortilla makes folding impossible and spills cheese into the pan, so keep everything on one side.
Warm your tortillas first
A 15-second spin in the microwave makes them flexible so they fold without cracking at the seam.
Pro Tips
Step-by-Step Instructions
1. Prep the filling
In a large bowl, toss the shredded chicken with the Caesar dressing and black pepper until evenly coated. Fold in the romaine, red onion, and bacon at the very end so the lettuce stays crisp.
2. Warm the tortillas
Microwave the tortillas in a clean kitchen towel for 20 to 30 seconds, or until warm and pliable, about 49 to 54C (120 to 130F) to the touch. This prevents cracking when you fold.
3. Heat the skillet
Set a large nonstick skillet over medium heat for 2 to 3 minutes and add 1 teaspoon of olive oil. It's ready when a drop of water sizzles and evaporates within a second.
4. Build the cheese crust
Sprinkle about 1/3 cup (38g) of mozzarella in a rough 6-inch (15cm) oval on one half of the skillet. Let it melt for 20 to 30 seconds, then immediately press a tortilla on top so the cheese sticks to it.
5. Add the filling
Spoon about 1/2 cup of the chicken mixture and 1 tablespoon of Parmesan onto the bare half of the tortilla, keeping it 1 inch (2.5cm) from the edge. Work quickly so the cheese doesn't overcook.
6. Fold and crisp
Fold the empty half over the filling and press gently with a spatula. Cook for 2 to 3 minutes per side, until the shell is deep golden brown and the cheese at the edges is bubbling and crisp, about 190C (375F) on an instant-read thermometer at the seam.
7. Repeat and keep warm
Slide the taco onto a wire rack in a 93C (200F) oven while you cook the rest, adding a little oil to the pan between batches. Wipe out stray cheese bits so they don't burn.
8. Serve hot
Serve immediately with extra Caesar dressing for dipping and a squeeze of lemon. These are best eaten within 10 minutes of coming out of the pan.
Delicious Variations
Buffalo Chicken Version
Swap half the Caesar dressing for buffalo sauce and use pepper jack cheese for a spicy, tangy twist.
Vegetarian Crunch
Replace the chicken with 3 cups of crispy chickpeas and add extra Parmesan for a meat-free taco that still feels hearty.
Greek-Style Caesar
Use feta instead of mozzarella, add chopped cucumber and Kalamata olives, and finish with a squeeze of lemon.
How to Store Crispy Cheesy Chicken Caesar Tacos
Refrigerator
Store assembled tacos in an airtight container for up to 2 days, but know the tortilla will soften. Keep the chicken filling separate from the lettuce for up to 3 days for the best texture.
Freezer
Freeze the cooled chicken filling (without lettuce) in a freezer bag for up to 2 months. Do not freeze assembled tacos, the lettuce turns mushy and the crust goes limp.
Reheating
Reheat the filling in a skillet over medium heat for 3 to 4 minutes, then rebuild fresh tacos in a hot pan for 2 minutes per side. Never microwave an assembled taco if you want crunch.
Frequently Asked Questions
Q: Can I make these Crispy Cheesy Chicken Caesar Tacos ahead of time?
You can prep the chicken filling up to 2 days ahead, but assemble and crisp the tacos right before serving. The cheese crust loses its crunch within about 15 minutes, so fresh is always better. Keep the lettuce separate until the last minute.
Q: What cheese is best for the crispy shell?
Low-moisture mozzarella is the best all-rounder because it melts smoothly and browns into a lacy crust without turning greasy. Monterey Jack, pepper jack, or a Mexican blend all work well, and a little Parmesan mixed in adds extra crispness.
Q: Can I use corn tortillas instead of flour?
Yes, but warm them for 20 seconds in the microwave first so they fold without cracking. Corn tortillas give a nuttier flavor and an even crunchier shell, though they're slightly more fragile when flipping.
Q: How do I keep the tacos from getting soggy?
Dry the lettuce thoroughly and dress the chicken just before filling, not hours ahead. Also avoid overfilling, since extra dressing pools at the bottom of the tortilla and softens the crust.
Q: Are these tacos spicy?
No, this recipe is mild and creamy thanks to the Caesar dressing. If you want heat, add 1/4 teaspoon of crushed red pepper flakes to the chicken or serve with sliced jalapeños on the side.
Give these Crispy Cheesy Chicken Caesar Tacos a shot this week and tag me in your photos, I love seeing your twists. Swap the cheese, add pickled onions, go wild with it. Cook smart, eat happy.

Crispy Cheesy Chicken Caesar Tacos
Crispy Cheesy Chicken Caesar Tacos turn rotisserie chicken and Caesar dressing into golden, bubbly weeknight tacos the whole family devours fast.
🧂 Ingredients
- 6 (8-inch/20cm) flour tortillas
- 2 cups (225g) shredded mozzarella
- 3 cups (about 12 oz/340g) shredded cooked chicken
- 1/2 cup (120ml) creamy Caesar dressing
- 1/2 cup (50g) finely grated Parmesan
- 2 cups (about 4 oz/115g) thinly sliced romaine lettuce
- 1/4 cup (25g) crumbled cooked bacon
- 1/4 cup (30g) thinly sliced red onion
- 1 tbsp (15ml) olive oil, plus more as needed
- 1/4 tsp freshly ground black pepper
📋 Instructions
- 1Prep the filling — In a large bowl, toss the shredded chicken with the Caesar dressing and black pepper until evenly coated. Fold in the romaine, red onion, and bacon at the very end so the lettuce stays crisp.
- 2Warm the tortillas — Microwave the tortillas in a clean kitchen towel for 20 to 30 seconds, or until warm and pliable, about 49 to 54C (120 to 130F) to the touch. This prevents cracking when you fold.
- 3Heat the skillet — Set a large nonstick skillet over medium heat for 2 to 3 minutes and add 1 teaspoon of olive oil. It's ready when a drop of water sizzles and evaporates within a second.
- 4Build the cheese crust — Sprinkle about 1/3 cup (38g) of mozzarella in a rough 6-inch (15cm) oval on one half of the skillet. Let it melt for 20 to 30 seconds, then immediately press a tortilla on top so the cheese sticks to it.
- 5Add the filling — Spoon about 1/2 cup of the chicken mixture and 1 tablespoon of Parmesan onto the bare half of the tortilla, keeping it 1 inch (2.5cm) from the edge. Work quickly so the cheese doesn't overcook.
- 6Fold and crisp — Fold the empty half over the filling and press gently with a spatula. Cook for 2 to 3 minutes per side, until the shell is deep golden brown and the cheese at the edges is bubbling and crisp, about 190C (375F) on an instant-read thermometer at the seam.
- 7Repeat and keep warm — Slide the taco onto a wire rack in a 93C (200F) oven while you cook the rest, adding a little oil to the pan between batches. Wipe out stray cheese bits so they don't burn.
- 8Serve hot — Serve immediately with extra Caesar dressing for dipping and a squeeze of lemon. These are best eaten within 10 minutes of coming out of the pan.

Elena focuses on healthy cooking and meal prep for people with limited time and budget. She shares flexible recipes and shortcuts that don’t sacrifice flavor.


