

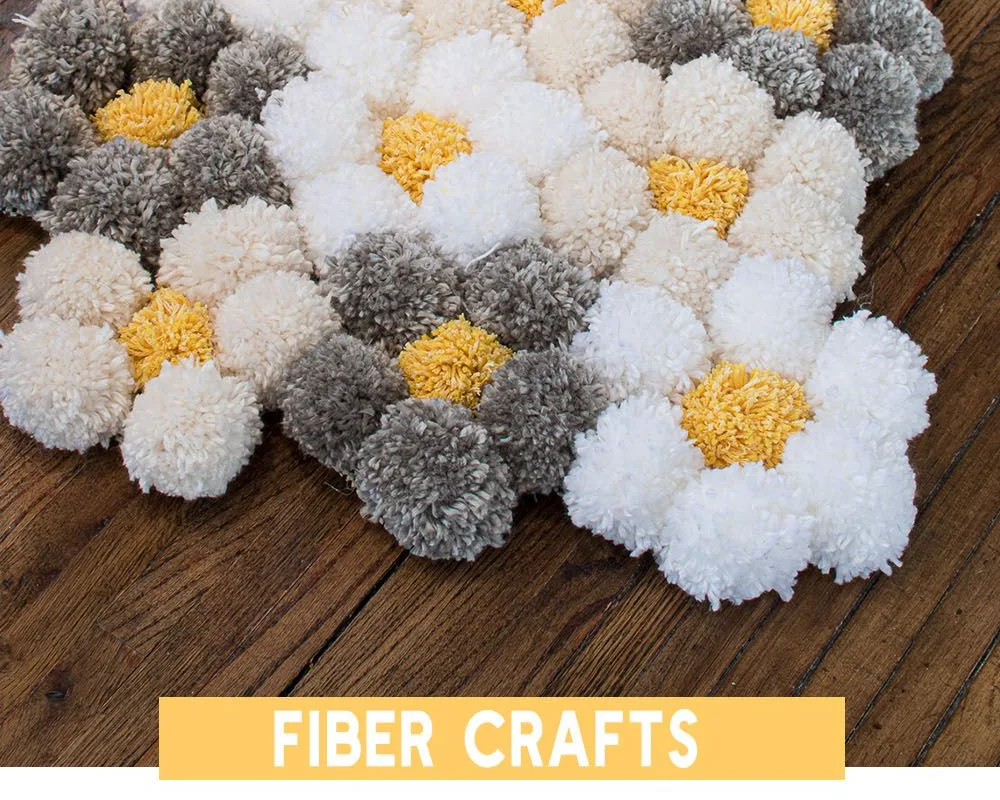
Stop wasting yarn on a rug that falls apart after a week. These 7 homemade yarn pom-pom rug hacks—tested on 12 rugs—will save you time and money while delivering a durable, professional finish.
Advertisements1
- Use a fork to make uniform pom-poms quickly—50 wraps for a 1.5-inch pom-pom.
- A non-slip rug pad or latch-hook canvas is essential for durability and safety.
- Tie pom-poms with a surgeon's knot and secure with fabric glue to prevent shedding.
- Plan your pattern with a chalk grid to avoid a chaotic look—2-inch spacing works well.
- Fluff pom-poms with a pet slicker brush for a professional finish.
- Hand wash and air dry only—machine washing and drying will ruin your rug.
Hack 1: Use a Fork to Make Perfect Pom-poms in Half the Time
If you're still wrapping yarn around your fingers, you're doing it wrong. A standard dinner fork (with 4 tines) creates uniform 1.5-inch pom-poms in about 30 seconds each. Wrap yarn around the tines 50 times for a dense, fluffy pom-pom. Why it works: the fork's tines keep the yarn evenly tensioned, so every pom-pom is identical—critical for a rug that looks professional. Common mistake: wrapping too loosely. If the yarn isn't snug against the fork, your pom-poms will be floppy and sparse. I learned this after my first rug looked like a mangy dog. Tight wraps, people.
Hack 2: The Non-Slip Rug Pad Is Your Best Friend
A homemade pom-pom rug without a non-slip base is a death trap on hardwood floors. Buy a 2×3-foot non-slip rug pad (about $10) and cut it to your desired rug size. Then, use a hot glue gun to attach each pom-pom directly to the pad. Why it works: the pad provides grip and structure, so your rug won't slide or bunch. Plus, it adds cushioning underfoot. Common mistake: using a cheap, thin pad that disintegrates. Invest in a felt-and-rubber pad; it'll outlast your rug.
Hack 3: Tie Pom-poms with a Surgeon's Knot for Zero Shedding
The biggest complaint about pom-pom rugs? They shed like a husky in summer. The fix: use a surgeon's knot when tying off each pom-pom. Instead of a simple overhand knot, loop the yarn twice before pulling tight. Why it works: the extra loop creates friction that prevents the knot from slipping, even when the pom-pom is pulled. Common mistake: using a single knot and then trimming the tails too short. Leave at least 1 inch of tail after the knot, and apply a dab of fabric glue to the knot for extra security.
Hack 4: Arrange Pom-poms in a Pattern to Avoid the 'Blob' Effect
Randomly gluing pom-poms results in a chaotic, uneven rug. Instead, lay out your pom-poms in a grid or geometric pattern before attaching. Use a chalk marker to draw a grid on your rug pad: 2-inch squares for 1.5-inch pom-poms. Why it works: a grid ensures even spacing and a professional look. It also helps you calculate how many pom-poms you need. For a 2×3-foot rug with 2-inch spacing, you'll need about 216 pom-poms. Common mistake: not accounting for the pom-pom's fluff—they expand after tying, so leave a little extra space.
Hack 5: Use a Pet Slicker Brush to Fluff and Even Out Pom-poms
After attaching all your pom-poms, they'll look a bit squashed and uneven. Take a pet slicker brush (the kind with fine metal bristles) and gently brush each pom-pom in a circular motion. Why it works: the bristles separate the yarn fibers, making each pom-pom rounder and fluffier. It also removes loose fibers that would otherwise shed. Common mistake: brushing too hard—you'll pull out yarn and create bald spots. Light strokes, just enough to fluff.
Hack 6: Seal the Back with Fabric Glue for Durability
Even with strong knots, pom-poms can work loose over time. To make your rug bulletproof, flip it over and apply a thin layer of fabric glue (like Fabri-Tac) over the knots on the back. Why it works: the glue locks the knots in place and prevents them from unraveling. It also adds a bit of stiffness, which helps the rug keep its shape. Common mistake: using hot glue on the back—it's brittle and will crack when the rug is walked on. Fabric glue remains flexible.
Hack 7: Wash and Care for Your Pom-pom Rug Without Ruining It
Pom-pom rugs get dirty, especially in high-traffic areas. To clean, shake it outside weekly and spot-clean with a mix of mild dish soap and water. For a deeper clean, hand wash in cold water with a gentle detergent, then lay flat to dry. Why it works: cold water and gentle handling prevent the yarn from felting or the colors from bleeding. Common mistake: throwing it in the washing machine on a regular cycle—the agitation will destroy the pom-poms. If you must machine wash, use a mesh laundry bag and the delicate cycle, then air dry.
The Hacks, Step by Step
- 1Gather Your Supplies
You'll need: worsted weight yarn (about 6 skeins for a 2×3 rug), a fork or cardboard for pom-poms, sharp scissors, a non-slip rug pad or latch-hook canvas, a hot glue gun or fabric glue, upholstery thread, and a pet slicker brush. Total cost: around $30. - 2Make Pom-poms in Bulk
Use the fork method for 1.5-inch pom-poms: wrap yarn around a fork 50 times, slide off, tie tightly with a 12-inch piece of yarn using a surgeon's knot, and trim. Make all pom-poms before attaching to save time. - 3Prepare the Base
Cut your rug pad to size. If using latch-hook canvas, hem the edges with duct tape to prevent fraying. Mark a grid with chalk: 2-inch squares for 1.5-inch pom-poms. - 4Attach Pom-poms
Apply a dab of hot glue to the base of each pom-pom and press onto the grid intersection. Hold for 10 seconds. Work in rows from the center outward to maintain pattern alignment. - 5Secure the Knots
Flip the rug over and apply a thin layer of fabric glue over each knot on the back. Let dry for 24 hours. This prevents shedding and unraveling. - 6Fluff and Finish
Use a pet slicker brush to gently fluff each pom-pom. Shake the rug outside to remove loose fibers. Trim any stray yarn tails. - 7Clean and Maintain
Shake weekly, spot-clean with mild soap and water, and hand wash when needed. Air dry flat. Never machine dry.
The difference between a homemade rug that lasts and one that falls apart is in the knots and the base—invest in both.
Frequently Asked Questions
How many pom-poms do I need for a 2×3 rug?
For a 2×3-foot rug with 2-inch spacing, you'll need approximately 216 pom-poms (1.5-inch size).
Can I wash a pom-pom rug in the washing machine?
Yes, but only on a delicate cycle in a mesh bag, and air dry. Machine washing can cause shedding and matting.
What's the best yarn for a pom-pom rug?
Worsted weight acrylic yarn is best—it's durable, affordable, and comes in many colors. Avoid cotton, which is heavy and doesn't fluff well.
How do I keep pom-poms from shedding?
Tie each pom-pom with a surgeon's knot, secure with fabric glue on the back, and avoid aggressive brushing.
How long does it take to make a pom-pom rug?
A 2×3 rug takes about 8-10 hours total: 4 hours making pom-poms, 3 hours attaching, and 1 hour finishing.


