

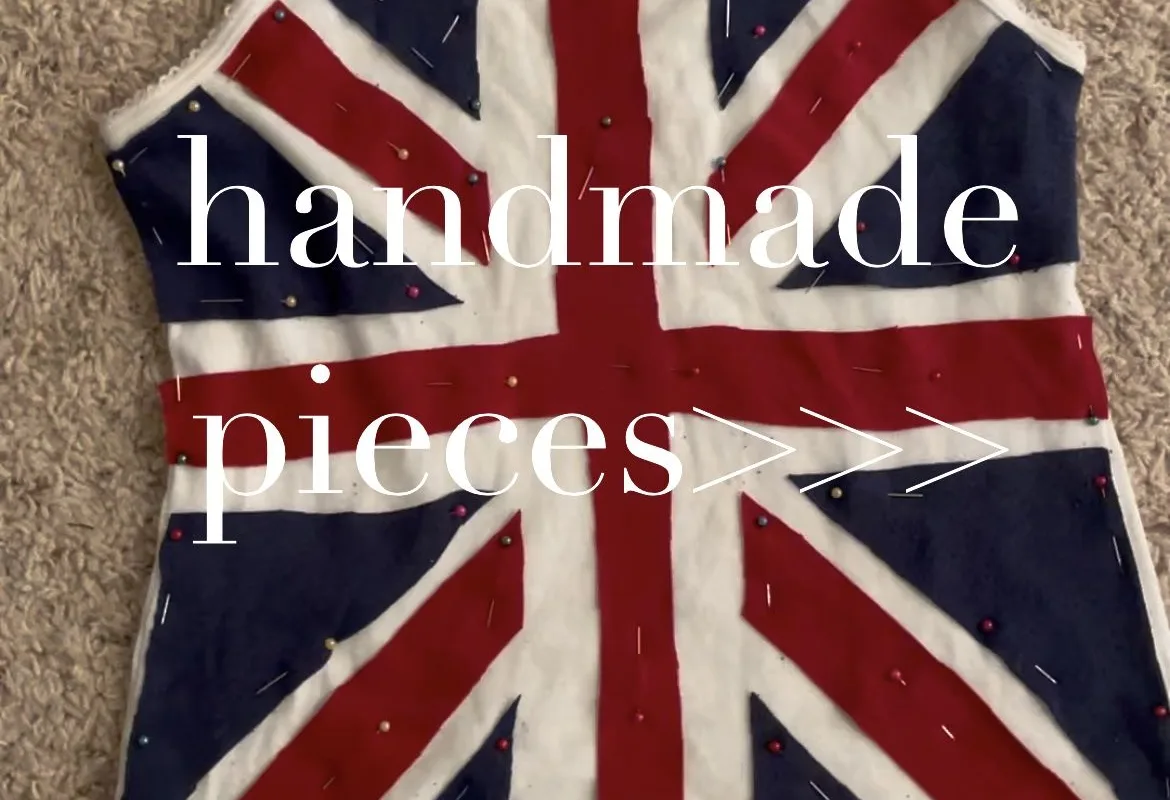
Ever scrolled past a handsewn Union Jack cami on Pinterest and thought, 'I could never sew that'? Well, grab a cuppa and your needle—I'm about to show you how with seven hacks that make it not just possible, but practically foolproof.
Advertisements1
- Choose lightweight woven fabric (110–130 gsm) like cotton lawn or silk-cotton for a cami that drapes and stitches beautifully.
- Always pre-sketch the Union Jack with a water-soluble marker to ensure accurate proportions and straight lines.
- Use a short backstitch with silk thread for crisp, strong lines that mimic machine stitching.
- Stabilize diagonal lines with lightweight fusible interfacing to prevent stretching and distortion.
- Finish seams with French seams for a clean interior that won't fray and adds a couture touch.
- Block your finished cami to relax fibers and achieve a polished, professional finish.
Hack 1: Choose the Right Fabric—It's the Secret Sauce
Picture this: you've spent hours meticulously stitching the Union Jack, only for the fabric to pucker like a prune. The culprit? Wrong fabric. For a cami, you need a lightweight woven with a bit of give—cotton lawn, voile, or a silk-cotton blend (around 110–130 gsm). These drape beautifully and take hand-stitching without fighting back. Avoid stiff quilting cotton; it'll make you look like a patriotic cardboard box.
Why it works: Lightweight fabrics allow for smaller, tighter stitches that disappear into the seam, giving a clean finish. They also press crisply, which is crucial for those sharp diagonal lines of the flag. A common mistake is grabbing any old cotton from your stash—test a scrap first by hand-sewing a small seam. If it rips or looks bulky, save it for tote bags.
So, before you cut, ask yourself: does this fabric whisper 'elegant cami' or scream 'picnic tablecloth'? Trust your fingers—they know.
Hack 2: Pre-Sketch Your Union Jack with a Washable Marker
Imagine trying to paint a masterpiece without a sketch—chaos, right? Same with sewing a Union Jack. Use a water-soluble fabric marker (I swear by the Dritz Mark-B-Gone) to draw the flag directly onto your fabric before you sew a single stitch. The Union Jack is all about precise geometry: the central cross is 1/3 the width of the flag, and the diagonals are offset. Get the proportions right by measuring your cami's front panel and dividing accordingly.
Why it works: Having a visible guide keeps your stitches straight and your angles true, especially on the bias where fabric can shift. It also lets you plan the order of stitching—always start with the central cross, then add diagonals. A common mistake? Using a marker that doesn't fully wash out (test on a scrap first) or drawing on the right side of the fabric when you plan to sew from the wrong side. Always sketch on the side that will be hidden.
What if you're a freehand rebel? Even then, a light sketch saves you from wonky lines. Your future self will thank you.
Hack 3: Master the Backstitch for Crisp Lines
The backstitch is your secret weapon for a handsewn Union Jack cami. It's strong, looks like a machine stitch from the front, and gives you ultimate control. For the flag's lines, use a short backstitch (about 1/8 inch per stitch) with a fine needle (size 9 or 10 sharps) and silk thread (50 wt). Why silk? It's strong, has a slight sheen that mimics embroidery, and knots securely.
Why it works: The backstitch overlaps each stitch, creating an unbroken line that won't gap. It's perfect for the straight edges of the cross and the diagonals. A common mistake is pulling the thread too tight, which causes puckering. Let the thread lie flat—tension should be snug but not strangling. Practice on a scrap: stitch a 2-inch line, then run your finger along it. If it ripples, you're pulling too hard.
Remember, slow and steady wins the race. Each stitch is a tiny brushstroke on your fabric canvas.
Hack 4: Use Interfacing to Stabilize Diagonals
Diagonals are the divas of the Union Jack—they demand attention and can go off-script if not supported. Fusible interfacing (like Pellon SF101) is your backstage crew. Cut a strip slightly wider than your diagonal lines and fuse it to the wrong side of the fabric before stitching. This prevents stretching and keeps those 45-degree angles sharp.
Why it works: Interfacing adds body without bulk, so your stitches don't distort the fabric. It's especially crucial if you're using a slippery fabric like silk. A common mistake is using heavy interfacing—it'll make the cami stiff and uncomfortable. Always choose a lightweight fusible and test on a scrap. Also, don't skip the pressing: fuse with a hot iron (no steam) for 10 seconds, then let it cool completely before sewing.
Think of interfacing as the foundation of a house—without it, the walls (your stitches) might crack.
Hack 5: Finish Seams with a French Seam for a Couture Look
You've sewn the flag, now hide the mess. French seams enclose raw edges, making the inside of your cami as beautiful as the outside. They're perfect for lightweight fabrics and add a professional touch. To do it: sew your seam with wrong sides together (1/4 inch allowance), trim to 1/8 inch, press, then turn right sides together and sew again with a 1/4 inch allowance, enclosing the raw edges.
Why it works: French seams prevent fraying and give a clean finish, which is essential for a garment that might be seen from the inside (like a cami). A common mistake is trying this on thick fabric—it creates bulk. Stick to lightweight wovens. Also, trim carefully; a uneven trim leads to a lumpy seam.
It's like giving your cami a secret hug—no scratchy bits, just smooth elegance.
Hack 6: Embellish with Beads or Embroidery for Extra Sparkle
Want your cami to stand out? Add tiny seed beads along the flag's lines or embroider a few stars (if you're feeling extra). Use a beading needle and silk thread to attach beads with a backstitch, spacing them evenly. This adds texture and catches the light—perfect for a night out. Why it works: Beads draw the eye and elevate a simple design to something special. A common mistake is using too many beads, which makes the fabric heavy and can cause sagging. Start with a few accents and build up.
Ask yourself: does this need a subtle shimmer or full-on dazzle? Let your inner magpie decide.
Hack 7: Block Your Finished Cami for a Perfect Fit
After all that hand-sewing, don't skip blocking. Spritz your cami with water, pin it to a blocking mat (or ironing board) in the desired shape, and let it dry completely. This relaxes the fibers, evens out stitches, and gives a polished finish. Why it works: Blocking sets the stitches and ensures the garment holds its shape. A common mistake is ironing directly—it can flatten beads or scorch delicate fabrics. Always use a pressing cloth and low heat if you must iron.
Think of blocking as the final bow on a gift—it makes everything look intentional and refined.
The Hacks, Step by Step
- 1Gather your supplies
Collect lightweight fabric (cotton lawn or silk-cotton), silk thread, size 9 sharps needles, water-soluble marker, lightweight fusible interfacing, and beads (optional). Why: Having everything on hand prevents mid-project scrambles. - 2Pre-wash and press fabric
Wash fabric to pre-shrink, then press flat. Why: Prevents your cami from shrinking after you've sewn it perfectly. - 3Sketch the Union Jack
Using a water-soluble marker, draw the flag on the wrong side of the front panel, ensuring correct proportions (central cross 1/3 width). Why: A guide ensures accuracy and symmetry. - 4Fuse interfacing to diagonals
Cut lightweight interfacing strips and fuse to the wrong side along where diagonals will be. Why: Stabilizes bias and prevents stretching. - 5Backstitch the flag
Starting with the central cross, use a short backstitch (1/8 inch) to sew along the lines. Then stitch diagonals. Why: Backstitch is strong and gives a clean line. - 6Sew side seams with French seams
With wrong sides together, sew 1/4 inch seam, trim to 1/8 inch, press, turn right sides together, sew 1/4 inch. Why: Encloses raw edges for a couture finish. - 7Add embellishments
If desired, sew beads along lines using a beading needle and silk thread. Why: Adds sparkle and personal flair. - 8Block and finish
Spritz with water, pin to shape, let dry. Why: Relaxes fibers and evens stitches for a professional look.
The secret to a handsewn Union Jack cami isn't just skill—it's choosing the right fabric and letting your stitches breathe.
Frequently Asked Questions
What's the best fabric for a handsewn Union Jack cami?
A lightweight woven like cotton lawn, voile, or silk-cotton (around 110–130 gsm) is ideal. It drapes well and takes hand-stitching without puckering.
How do I prevent my stitches from puckering?
Use the right needle and thread size, and don't pull the thread too tight. Let it lie flat—tension should be snug but not strangling. Practicing on a scrap first helps.
Can I machine-sew a Union Jack cami instead?
Yes, but hand-sewing gives you more control and a unique look. If machine-sewing, use a walking foot and slow speed to manage the bias.
How do I wash a handsewn cami with beads?
Hand wash in cold water with mild detergent, then lay flat to dry. Avoid wringing or machine drying to protect the beads and stitches.
What if I make a mistake in the flag pattern?
Don't panic—carefully unpick the stitches with a seam ripper. If the fabric is marked, re-draw with a water-soluble marker. Mistakes are just part of the journey.


