

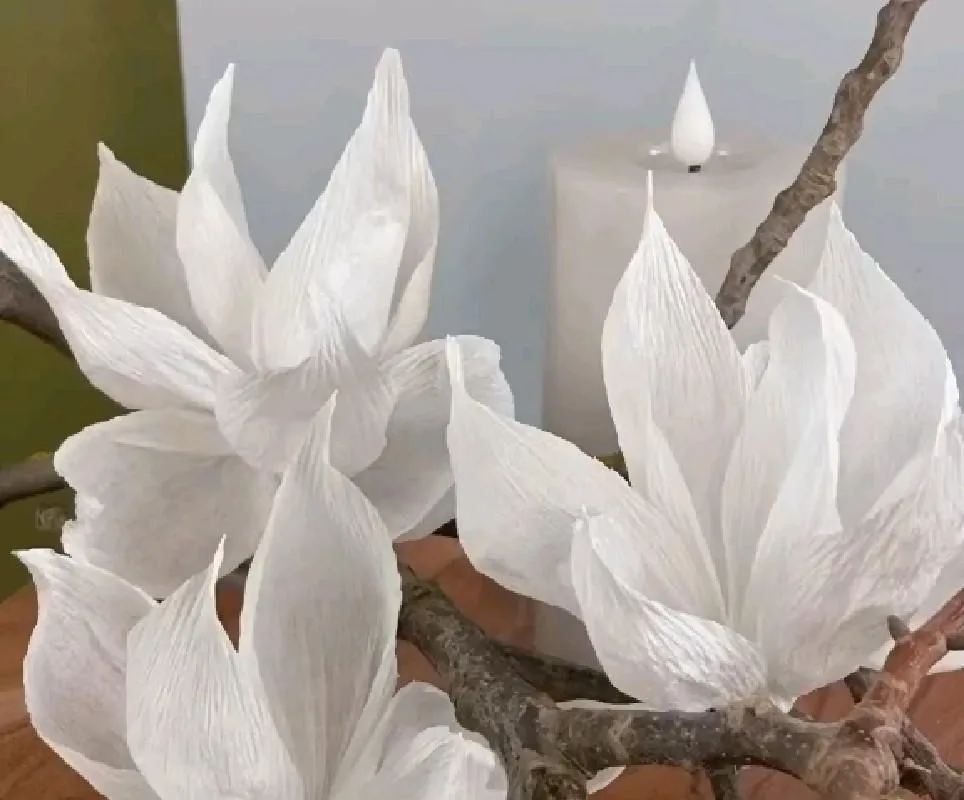
Ever scrolled through Pinterest, seen those stunning tissue paper flowers, and thought, 'I could never make that'? Well, you can—and I'm about to show you seven hacks that will take your handmade tissue paper flowers from 'meh' to 'wow' in minutes.
Advertisements1
- Use 6-8 layers of tissue paper for full, fluffy blooms—don't skimp on layers.
- The accordion fold (1-inch pleats) creates uniform petals that are easy to shape.
- Shape petals with your fingers—gentle curls make a big difference.
- Floral tape on stems adds realism and durability; stretch it slightly to activate adhesive.
- A small center (tissue paper, bead, or button) completes the look—use glue sparingly.
- Mix sizes and colors for a natural bouquet; store upright to avoid crushing.
Hack 1: Layer, Don't Flatten—The Secret to Full, Fluffy Blooms
Here's the thing: most people use a single sheet of tissue paper per flower, but that's like making a sandwich with just one slice of bread—it's flat and sad. The magic happens when you stack multiple sheets. I typically use 6-8 sheets of 20" x 20" tissue paper for a standard peony. Why? Because layers create depth, and depth creates realism. Each sheet adds another dimension, so when you separate them, you get a voluminous bloom that looks like it just popped out of a garden.
But here's the common mistake: people separate the layers too aggressively. You need to gently pull them apart, one at a time, like you're peeling a delicate fruit. If you rush, you'll tear the paper, and then your flower looks like it got into a fight with a cat. Take your time, and your flower will thank you.
Hack 2: The Accordion Fold—Your Ticket to Perfect Petals
Ever tried to fold tissue paper into a fan and ended up with a crumpled mess? The accordion fold is your friend. Fold the stack of tissue paper back and forth in 1-inch intervals, like you're making a paper fan. This creates uniform pleats that, when separated, become petals with natural curves. It's like giving your flower a built-in skeleton. I learned this from a florist who said, 'If you can fold a fan, you can make a flower.' And she was right.
The mistake? Folding too tightly. If your folds are too narrow, the petals will be stiff and unnatural. Aim for folds that are about the width of your thumb—roughly 1 inch. That gives you petals that are flexible and organic, not rigid and papery.
Hack 3: Shape the Petals with Your Fingers—No Tools Needed
You don't need fancy tools to shape petals; your fingers are the best sculpting instruments you own. After you've separated the layers, gently curl the edges of each petal outward by running your thumb and index finger along the edge. This mimics the natural curl of real flower petals. For a rose, curl them inward slightly; for a daisy, outward. It's like giving your flower a little personality. I call it 'finger styling'—and it's the difference between a craft project and a work of art.
But don't overdo it. The common mistake is curling too much, making the petals look like they're trying to escape. A gentle curl is all you need. Think of it as a light suggestion, not a command.
Hack 4: Use Floral Tape for Stems—It's a Game-Changer
If you're still using plain wire for stems, you're missing out. Floral tape—that stretchy, green stuff—wraps around wire and gives it a textured, natural look. It also holds everything together securely. I use 18-gauge wire for most flowers, and wrap it with floral tape from the base of the flower down to the end. Why? Because it looks like a real stem and prevents the wire from poking through. Plus, it's easy to bend, so you can pose your flowers however you like.
The mistake? Stretching the tape too much. Floral tape needs to be stretched slightly to activate its adhesive, but if you pull too hard, it breaks. A gentle stretch is all it takes. Wrap it tightly around the wire, overlapping as you go, and you'll have a stem that looks professionally made.
Hack 5: Add a Center—The Details Make the Difference
A flower without a center is like a face without a nose—it just looks off. For centers, you can use anything from a small circle of contrasting tissue paper to a button, a bead, or even a dab of hot glue painted yellow. I like to use a small piece of yellow tissue paper, crumpled into a tiny ball, and glued in the center. It adds a pop of color and realism. For a more textured look, I'll use a few strands of embroidery floss, knotted and glued in the middle. It's a small detail, but it's what makes people say, 'Wait, is that real?'
The common mistake? Using too much glue. A tiny dot is enough. If you slather it on, the center will look messy and the paper will wrinkle. Less is more, my friend.
Hack 6: Mix Sizes and Colors for a Natural Bouquet
Nature isn't uniform, so your bouquet shouldn't be either. Mix flowers of different sizes and colors to create a realistic arrangement. For example, combine large peonies with smaller roses and tiny filler flowers like baby's breath (which you can make with small squares of tissue paper). Vary the colors—maybe a gradient from pale pink to deep magenta. This creates depth and interest, just like a real garden. I once made a bouquet with 12 flowers in 5 different sizes, and it looked like it was picked from a florist's shop.
The mistake? Making all flowers the same size. It looks artificial. So, embrace variety. Your bouquet will thank you.
Hack 7: Store and Revive—Keep Your Flowers Looking Fresh
Tissue paper flowers are delicate, so storage matters. Don't just toss them in a box—they'll get crushed. Instead, store them upright in a vase or a tall container, or wrap them loosely in tissue paper and lay them flat. If they get squished, you can revive them with a hair dryer on low heat. Hold the dryer about 6 inches away and gently fluff the petals. The warm air relaxes the paper fibers, and they'll perk up like they just had a spa day. I've revived flowers that were flattened for weeks, and they looked good as new.
The mistake? Using high heat. It can scorch the paper or even catch fire. So keep it on low and keep it moving. Safety first!
The Hacks, Step by Step
- 1Stack and Fold
Stack 6-8 sheets of tissue paper and fold accordion-style in 1-inch intervals. This creates uniform pleats for petals. - 2Secure the Center
Wrap a wire around the middle of the folded stack and twist to secure. This forms the base of the flower. - 3Shape the Petals
Gently pull each layer of tissue paper apart, one at a time, and curl the edges with your fingers. This adds volume and realism. - 4Attach the Stem
Wrap floral tape around the wire from the base of the flower down to the end. This creates a natural-looking stem. - 5Add a Center
Glue a small crumpled ball of contrasting tissue paper or a bead in the center of the flower. This adds a realistic detail. - 6Arrange and Display
Combine flowers of different sizes and colors in a vase. This creates a natural, eye-catching bouquet.
The difference between a craft project and a work of art is in the details—like the curl of a petal or the texture of a stem.
Frequently Asked Questions
What kind of tissue paper is best for making flowers?
Standard gift-wrapping tissue paper works well, but for more durable flowers, use florist's tissue paper, which is slightly heavier. It holds its shape better and is less likely to tear.
How many sheets of tissue paper do I need for one flower?
For a medium-sized flower like a peony, use 6-8 sheets of 20" x 20" tissue paper. For smaller flowers, use 3-4 sheets. More sheets create a fuller bloom.
Can I make tissue paper flowers without wire?
Yes, you can use pipe cleaners, wooden skewers, or even rolled-up paper for stems. However, wire wrapped in floral tape gives the most realistic and bendable stem.
How do I keep tissue paper flowers from tearing?
Handle the paper gently, especially when separating layers. Pull each layer apart slowly and avoid sharp creases. If the paper is too thin, use a heavier weight or double up.
How long do tissue paper flowers last?
With proper storage, they can last for years. Keep them away from direct sunlight and moisture, and store them upright or flat to prevent crushing.


