

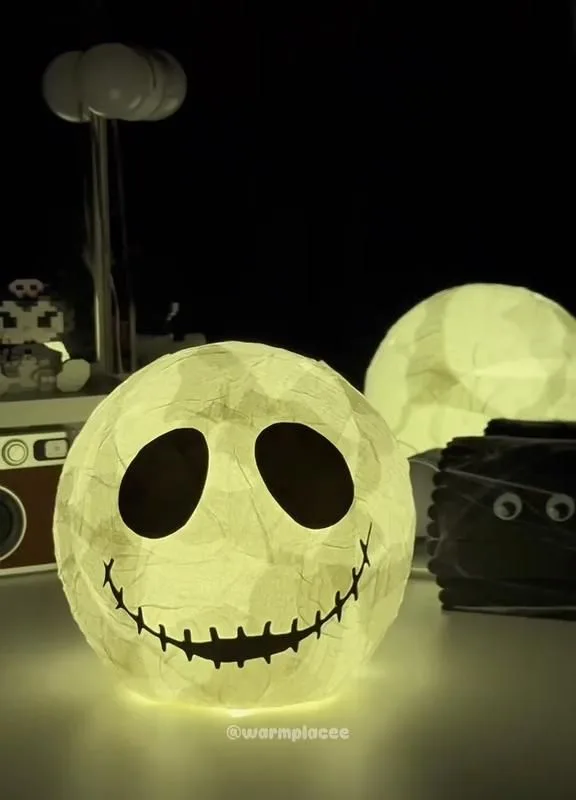
Want to turn your home into a spooky wonderland without spending a fortune? These 7 Halloween DIY night lamp hacks are easy, affordable, and will make your indoor decorations glow with eerie charm.
Advertisements1
- DIY Halloween night lamps are affordable, customizable, and safer than real candles.
- Simple materials like mason jars and tissue paper can create stunning ghostly glows.
- Floating witch hats and candles add a magical touch with just cardstock and fishing line.
- Always use LED lights to prevent fire hazards and keep decorations cool.
- Test your lamps before displaying to ensure the glow is just right.
Why DIY Night Lamps Are Perfect for Halloween
Halloween is all about atmosphere, and nothing sets the mood like a soft, flickering glow. Store-bought decorations can be pricey and generic, but a DIY night lamp lets you add a personal touch that matches your style. Plus, you can customize colors, shapes, and intensity to fit any room.
I've been crafting Halloween decor for years, and I've found that the best projects use simple materials you already have. For example, a mason jar, some tissue paper, and a battery-operated tea light can become a stunning ghostly lantern in minutes. The key is to focus on the glow—it's what makes the Halloween magic happen.
Another reason to go DIY: safety. Many traditional Halloween decorations use real candles, which can be a fire hazard. By using LED lights or battery-operated candles, you get the same spooky effect without the risk. So gather your supplies, and let's get started!
1. Mason Jar Ghost Lanterns
This is my go-to project because it's foolproof and looks adorable. You'll need clean mason jars, white tissue paper, glue diluted with water, and battery-operated tea lights. Tear the tissue paper into small pieces, brush the jar with the glue mixture, and layer the tissue paper until the jar is covered. Let it dry, then add a tea light inside. The light shines through the paper, creating a soft, ghostly glow.
Why it works: The tissue paper diffuses the light, making it look like a floating spirit. The jar acts as a safe container, so you can place these anywhere—on mantels, shelves, or as a centerpiece. I made a set of three in different sizes, and they look like a little ghost family.
Common mistake: Using too much glue can make the paper soggy and take forever to dry. Use a light hand and thin layers. Also, don't use real candles—they can overheat the jar and crack it.
2. Floating Witch Hat Lamps
This hack is a showstopper. You'll need black cardstock or felt, a small LED light (like a fairy light or a small puck light), and clear fishing line. Cut two witch hat shapes from the cardstock, glue them together leaving an opening at the bottom, and insert the LED light inside. Hang the hat from the ceiling with fishing line at different heights. When the lights are on, the hats appear to float in mid-air.
Why it works: The dark hat contrasts with the glowing light, and the invisible line creates an illusion of levitation. It's perfect for a Harry Potter-themed party or just to add a magical touch. I hung five hats above my dining table, and my guests couldn't stop talking about them.
Common mistake: Using heavy materials can make the hats droop or spin. Stick to lightweight cardstock or felt. Also, make sure the fishing line is securely attached—you don't want a hat falling on someone's head!
3. Glowing Eyeball Centerpiece
For a creepy-crawly vibe, try this glowing eyeball centerpiece. You'll need ping pong balls, a red marker, a sharp knife, and a string of fairy lights. Draw bloodshot veins on the ping pong balls with the red marker, then carefully cut a small slit in each ball. Push a fairy light bulb through the slit so it glows from within. Arrange the eyeballs in a bowl or on a tray.
Why it works: The red veins become more prominent when lit, and the glowing effect makes the eyes look alive. It's a fun, gross-out decoration that's still family-friendly. I placed mine on a bed of fake moss for an extra eerie touch.
Common mistake: Cutting the ping pong balls can be tricky—they can crack. Use a sharp craft knife and gentle pressure. Also, don't use hot lights; LED fairy lights stay cool and won't melt the plastic.
4. Pumpkin Glow Jars
These little pumpkin jars are cute and versatile. You'll need small glass jars, orange tissue paper, black paper for faces, and battery-operated tea lights. Cover the jar with orange tissue paper using the same glue method as the ghost lanterns. Once dry, cut out jack-o'-lantern faces from black paper and glue them on. Pop in a tea light, and you have a mini glowing pumpkin.
Why it works: The orange glow is quintessential Halloween, and the faces add personality. You can make a whole pumpkin patch to line your windowsill or staircase. I made ten of these last year and used them as party favors—everyone loved them.
Common mistake: Overlapping tissue paper too much can block the light. Keep layers thin, and make sure the face cutouts are large enough for the light to shine through.
5. Spooky Shadow Lamp
This project uses shadows to create a creepy effect. You'll need a small lamp with a plain shade, black paper, and scissors. Cut out spooky shapes—bats, spiders, witches—from the black paper and tape them to the inside of the lampshade. When the lamp is on, the shapes cast shadows on the wall.
Why it works: The shadows move and flicker slightly, creating a dynamic, unsettling atmosphere. It's a subtle way to add Halloween spirit to a living room or bedroom. I used a bat pattern and it looked like bats were flying around the room.
Common mistake: Using too many shapes can make the shadows cluttered. Stick to a few bold designs. Also, make sure the paper doesn't touch the bulb—it could be a fire hazard. Use LED bulbs that stay cool.
6. Glowing Potion Bottles
These potion bottles are perfect for a mad scientist or witch theme. You'll need small glass bottles, glow sticks, and water. Carefully cut open a glow stick and pour the contents into a bottle filled with water. Seal the bottle and shake. The liquid will glow for hours. You can also add food coloring for different colors.
Why it works: The chemical reaction in glow sticks creates a bright, long-lasting glow that looks magical. It's a fun science experiment and decoration in one. I made a set of blue and green potions and displayed them on a shelf with fake cobwebs.
Common mistake: Glow stick liquid can stain surfaces and is not edible. Handle with care and keep away from pets and small children. Also, don't use real potion bottles that you plan to drink from later—dedicate them to decoration only.
7. Floating Candle Wall Sconces
For a Hogwarts-inspired look, create floating candles. You'll need empty toilet paper rolls, white paint, battery-operated tea lights, and fishing line. Paint the rolls white and let them dry. Glue a tea light to the top of each roll. Then, attach fishing line to the top and hang them from the ceiling at varying heights.
Why it works: The white rolls mimic candle bodies, and the tea lights provide a warm glow. Hanging them at different heights creates the illusion of floating. I hung them above my staircase and it felt like the Great Hall.
Common mistake: The rolls can look like toilet paper rolls if not painted well. Use two coats of paint and consider adding fake wax drips with hot glue for realism. Also, make sure the fishing line is strong enough to hold the weight.
The Hacks, Step by Step
- 1Gather Your Supplies
Collect all materials before starting. For most projects, you'll need glass jars, tissue paper, glue, battery-operated tea lights, cardstock, and fishing line. Having everything on hand makes the process smooth and fun. - 2Choose Your Project
Pick one or two hacks that match your skill level and available time. If you're new to crafting, start with the mason jar ghost lanterns—they're nearly foolproof. As you gain confidence, try the floating witch hats. - 3Set Up a Craft Station
Cover your table with newspaper or a plastic tablecloth. Keep scissors, glue, and other tools within reach. Good lighting is essential—you'll be working with small details. - 4Follow the Instructions Carefully
Each hack has specific steps. Don't rush. For example, when making the ghost lanterns, apply thin layers of glue and let them dry completely before adding the light. This ensures a clean, professional look. - 5Test Your Lights
Before finalizing, turn on your LED lights or tea lights to see how they look. Adjust the placement or add more lights if needed. The glow should be soft and spooky, not harsh. - 6Display and Enjoy
Place your creations around your home—on mantels, shelves, or as centerpieces. Dim the room lights to let your DIY night lamps shine. Take photos and share your spooky setup with friends!
The best Halloween decorations are the ones you make yourself—they carry your personal touch and create memories that last.
Frequently Asked Questions
What kind of lights are safe for DIY Halloween lamps?
Battery-operated LED tea lights and fairy lights are the safest because they stay cool and don't pose a fire risk. Avoid real candles, especially around paper or fabric.
How long do glow stick potions last?
Glow stick liquid typically glows for 6 to 12 hours. Once it dims, you can replace the glow stick to refresh the effect. Keep in mind that the glow will fade over time.
Can I use these decorations outdoors?
Most of these projects are designed for indoor use, but you can adapt them for a covered porch. Just make sure they're protected from wind and rain, and use waterproof materials if needed.
Where can I find cheap craft supplies for these projects?
Dollar stores, thrift shops, and online retailers like Amazon or Oriental Trading carry affordable supplies. You can also reuse items you already have at home, like jars and cardboard tubes.
How do I make the floating candles look more realistic?
Add fake wax drips using hot glue along the top of the cardboard tube. Paint the tube with a slightly off-white color and use a flickering LED tea light for a realistic flame effect.


