

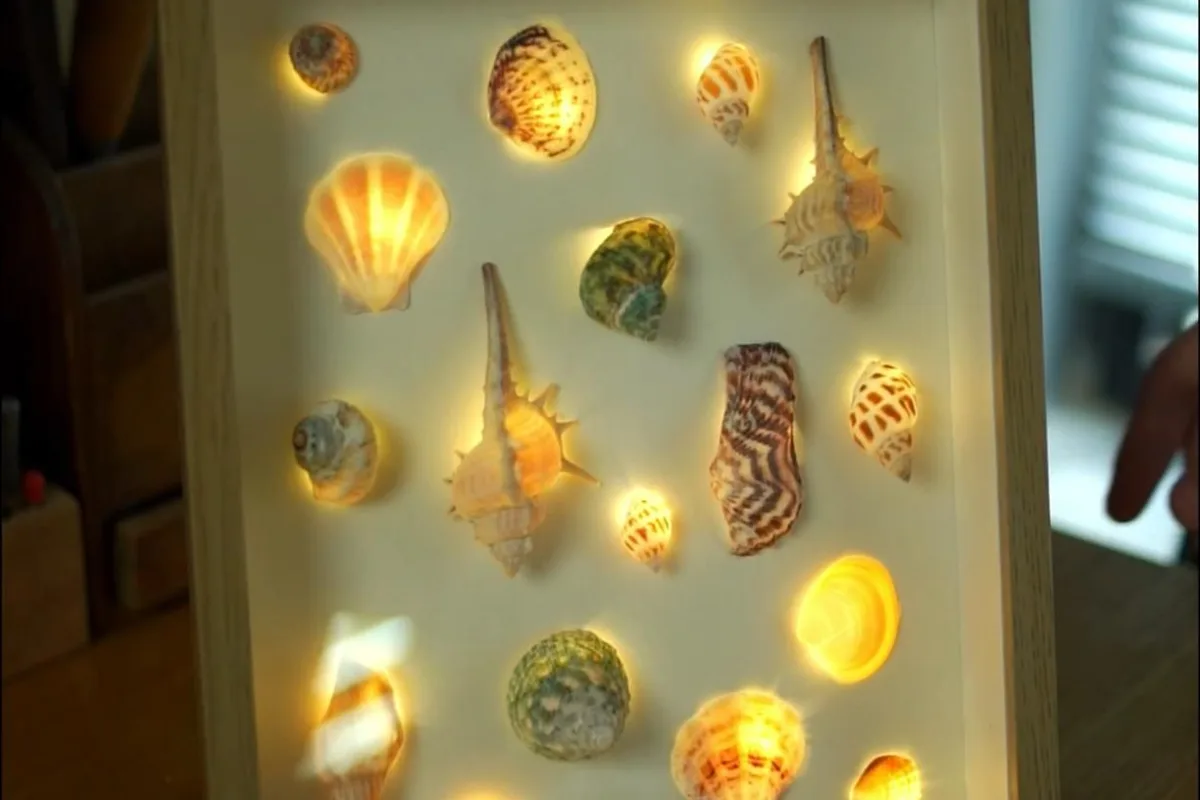
Ever picked up a seashell on the beach and wished you could keep that vacation feeling alive? You can—by turning those shells into stunning picture frames and decor. In this guide, I'll share 7 practical hacks to make your own coastal charm, with step-by-step instructions and expert tips.
Advertisements1
- Clean and sand your frame before gluing—prep is 80% of the battle.
- Use E6000 or epoxy, not hot glue, for a bond that lasts.
- Dry-fit your shell arrangement and snap a photo before committing to glue.
- Seal your finished piece with acrylic spray to prevent fading and damage.
- Think beyond frames: candle holders, garlands, and mirrors are easy wins.
- Display with complementary textures and soft lighting for a curated look.
Why Seashell Decor Isn't Just a Summer Fling
Seashell decor brings a slice of the ocean into your home, creating a calm, breezy vibe that works year-round. Think of it like adding a pinch of salt to a dish—it enhances without overpowering. But there's a science to making it look chic, not cluttered. The key is balance: mix textures like smooth shells with rough driftwood, and stick to a color palette of whites, blues, and sandy neutrals.
Common mistake: Overloading with too many shells. Instead, choose a focal point—like a large conch—and let smaller shells play supporting roles. This creates visual interest without chaos. Plus, using shells you collected yourself adds a personal story, making your decor truly one-of-a-kind.
Hack #1: The Perfect Frame Base—It's All About the Prep
Before you glue a single shell, you need a clean canvas. Start with a plain wooden or ceramic frame (I recommend a 5×7 or 8×10 size for beginners). Lightly sand the surface with 220-grit sandpaper to create tooth—that's just a fancy word for texture—so glue sticks better. Wipe away dust with a damp cloth.
Why it works: A clean, slightly rough surface gives adhesive something to grip, preventing shells from popping off later. Common mistake: Skipping the sanding step. It might seem unnecessary, but it's like trying to paint over a glossy wall—nothing sticks. Also, avoid using frames with intricate carvings; they make shell placement tricky.
Hack #2: The Glue That Won't Ghost You
Not all glues are created equal. For seashells, I swear by E6000 or a good epoxy. These are thick, gap-filling adhesives that bond porous surfaces like shell and wood. Hot glue? It's tempting for speed, but it gets brittle and shells will pop off within months—trust me, I learned the hard way.
Why it works: E6000 remains slightly flexible, so it absorbs shock and temperature changes without cracking. Apply a small dab (about the size of a pea) to the back of each shell, press firmly for 30 seconds, and let it cure for 24 hours. Common mistake: Using too much glue. It oozes out and looks messy. Less is more—you can always add a little more if needed.
Hack #3: Lay It Out Before You Glue It Down
This is the golden rule of any mosaic or shell project: dry-fit your design first. Arrange your shells on the frame without any adhesive. Play with patterns—spiral from the center, create a border, or cluster shells in one corner for an asymmetrical look. Take a photo with your phone so you can replicate it later.
Why it works: It prevents the dreaded 'glue panic' where you're stuck with a half-finished design you don't love. Plus, you can tweak the composition until it feels just right. Common mistake: Rushing this step. Spend 10-15 minutes arranging; it's the difference between 'meh' and 'wow'. Remember, shells come in all shapes and sizes, so embrace the organic feel.
Hack #4: The Art of Shell Placement—Think Like a Florist
When gluing, start with the largest shells as your anchors, then fill in gaps with smaller ones. Think of it like arranging flowers: you need focal points (big blooms) and filler (baby's breath). Use tweezers for tiny shells to place them precisely. Work in small sections to avoid glue drying before you're done.
Why it works: This method creates depth and visual flow. Overlapping shells slightly gives a layered, dimensional look. Common mistake: Leaving large empty spaces. If you see a gap, fill it with a tiny shell, a bead, or even a small piece of sea glass. But don't overcrowd—let some of the frame peek through.
Hack #5: Seal and Protect—Your Shells Deserve a Spa Day
Seashells can be fragile and may fade over time. After your glue is fully cured, seal the entire frame with a clear acrylic spray (matte or gloss, your pick). This adds a protective coat against dust, moisture, and UV rays. For an extra shine, brush on a thin layer of Mod Podge with a soft brush.
Why it works: Sealing locks in the shells' natural colors and prevents them from becoming brittle. It also makes cleaning a breeze—just wipe with a damp cloth. Common mistake: Spraying too close or too thick, causing drips. Hold the can 8-10 inches away and apply thin, even coats in a well-ventilated area.
Hack #6: Beyond Frames—Quick Shell Decor Wins
Don't stop at frames! Try these easy projects: 1) Shell candle holders: glue shells around a plain glass votive. 2) Shell shadow box: arrange shells in a shadow box with a photo. 3) Shell garland: drill tiny holes in shells and string them on twine. 4) Shell mirror: outline a mirror with shells for a statement piece.
Why it works: These projects use the same principles—clean surface, proper glue, and thoughtful placement—but take less time. They're perfect for using up leftover shells. Common mistake: Forgetting to seal them, especially if they'll be near water or heat. Always seal for longevity.
Hack #7: Display Like a Pro—Context Is Everything
Where you place your seashell frame matters. Group it with other coastal elements like driftwood, rope, or a blue vase. Use it as a focal point on a mantel or shelf. For a gallery wall, mix shell frames with beach photos and nautical art. Lighting is key: soft, warm light enhances the texture of shells.
Why it works: Contextual display tells a story and makes the decor look intentional. Common mistake: Placing it in a dark corner where details get lost. Also, avoid direct sunlight to prevent fading, even with sealant. Rotate your decor seasonally to keep it fresh.
The Hacks, Step by Step
- 1Gather and Clean Your Shells
Collect shells from a beach or buy them. Soak in a 1:1 water and bleach solution for 24 hours to remove organic matter, then scrub with a brush and let dry. This prevents odors and bacteria. - 2Prepare Your Frame
Sand the frame lightly with 220-grit sandpaper, wipe with a damp cloth, and let dry. This creates a rough surface for better adhesion. - 3Arrange Shells Without Glue
Lay out your design on the frame. Take a photo for reference. Tweak until you love it—this is your blueprint. - 4Glue Shells in Place
Using E6000 or epoxy, apply a small dab to each shell and press onto the frame. Start with largest shells, then fill gaps. Let cure for 24 hours. - 5Seal the Finished Piece
In a ventilated area, spray with clear acrylic sealer in thin coats. Let dry completely. This protects against dust and moisture. - 6Display and Enjoy
Place your frame where it gets soft light. Group with other coastal decor for maximum impact. Clean with a dry or slightly damp cloth.
The secret to beautiful seashell decor isn't the shells themselves—it's the patience you put into every step, from cleaning to sealing.
Frequently Asked Questions
How do I clean seashells for crafts?
Soak them in a 1:1 solution of water and bleach for 24 hours, then scrub with a brush and rinse. This removes dirt and organic matter. Let them dry completely before using.
What kind of glue works best for seashells?
E6000 or epoxy are best because they bond porous surfaces and remain flexible. Hot glue is not recommended as it becomes brittle and shells may fall off.
Can I use seashells I collected from the beach?
Yes, but clean them thoroughly first. Also, check local regulations—some areas prohibit taking live shells or have collection limits.
How do I prevent my seashell frame from falling apart?
Proper prep and sealing are key. Sand the frame, use strong adhesive, and seal with acrylic spray. Avoid dropping or exposing to extreme heat.
What other decor can I make with seashells?
You can make candle holders, garlands, mirrors, shadow boxes, and even jewelry. The same techniques apply: clean, glue, and seal.


