

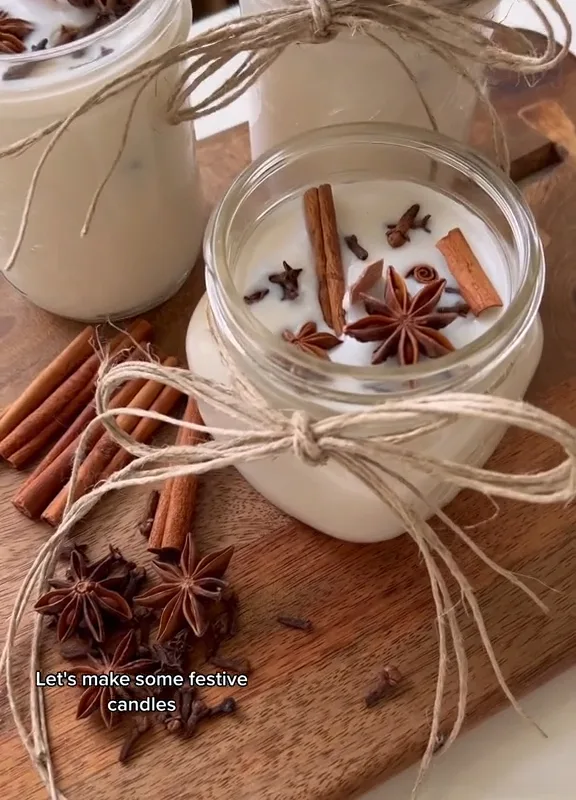
My first DIY scented candle smelled like a birthday cake that had been left in a hot car. Seven batches later, I finally cracked the code: temperature, ratios, and a couple of cheap tricks that make a huge difference. Here are the hacks I wish someone had handed me before I ruined my favorite soup pot.
Advertisements1
- Fragrance load is 6–8% of wax weight — weigh it, don't eyeball it.
- Add fragrance at 185°F and pour at 135°F for a smooth top and strong throw.
- Warm jars and slow cooling prevent sinkholes and soy frosting.
- Match wick size to jar diameter, then test-burn to confirm.
- Cure 5–7 days before the first light for a noticeably better hot throw.
- Keep a batch log so you can repeat your wins instead of guessing.
1. Skip the double boiler and use a heat-safe pitcher in a simmering pan
Melt your wax in a large glass measuring pitcher or a stainless pouring pitcher set inside a saucepan with 2 inches of simmering water. The pitcher's spout makes pouring clean, and the handle keeps your fingers away from 180°F wax. I use a $12 restaurant supply pitcher and it has outlasted two fancy melting pots.
Why it works: wax needs gentle, indirect heat, and a pitcher gives you control without buying single-use equipment. Keep the water at a low simmer, not a rolling boil, and clip a candy thermometer to the pitcher so you can watch the temperature climb.
Common mistake: melting wax directly in a pot over high heat. Soy wax can scorch above 200°F, and once it smells burnt, no fragrance oil will cover it up.
2. Measure fragrance at 6–8% of wax weight, not by the capful
Weigh your wax on a kitchen scale in grams, then multiply by 0.06 for a light scent or 0.08 for a strong throw. For 300 grams of wax, that's 18–24 grams of fragrance oil. My first candles used a random glug and smelled great cold but nearly disappeared once lit.
Why it works: fragrance load is a ratio, not a guess. Too little and the hot throw vanishes; too much (above 10%) and the wax can sweat oil, clog the wick, and burn poorly. A $15 digital scale is the single best upgrade for a beginner.
Common mistake: adding fragrance to wax that's too hot. Add it at 185°F, stir gently for 2 minutes, then pour at 135°F. Adding at 200°F+ burns off the volatile top notes.
3. Warm your jars before you pour
Pop your clean jars in a 170°F oven for 10 minutes while the wax melts. Pour into warm glass, then let the candles cool slowly at room temperature, covered loosely with a cardboard box.
Why it works: sudden temperature changes cause sinkholes, cracks, and that ugly white frosting on soy wax. Warm glass helps the wax adhere to the sides and cool evenly. I learned this after three batches with craters in the middle that looked like tiny moonscapes.
Common mistake: putting hot candles in the fridge to speed things up. It feels efficient, but rapid cooling causes wet spots and uneven tops. Give them 24 hours on the counter instead.
4. Size your wick to the jar diameter, not the candle height
Match your wick to the widest point of your container: roughly a CD-4 or ECO-4 for a 2-inch diameter, up to a CD-12 for a 3.5-inch jar. When in doubt, test two wicks in identical jars and compare after a 3-hour burn.
Why it works: the flame needs to melt wax out to the edge in 2–3 hours. An undersized wick tunnels; an oversized one gets a tall flame, soot, and a too-hot jar. Wick charts from suppliers like CandleScience are a solid starting point, but every wax and fragrance combo behaves a little differently.
Common mistake: trimming the wick before the first burn. Let the initial cure and first burn happen with the full wick, then trim to 1/4 inch before relighting.
5. Cure for 5–7 days before you light it
Tuck your finished candles in a cabinet for at least five days (a week for soy) before the first burn. Label the date on the bottom with a Sharpie so you don't forget.
Why it works: fragrance oil binds with the wax over time, and curing noticeably improves the hot throw. In my side-by-side test, a day-old candle smelled flat next to a seven-day-old one from the same batch. It's the easiest upgrade you can make and costs nothing.
Common mistake: judging scent strength from the cold sniff right after pouring. Fresh candles often smell overpowering and then mellow. Wait the full cure before you decide to adjust your ratio.
6. Do a full 3-hour test burn on the first light
The first burn sets the memory of your candle. Burn for 2–3 hours, or until the melt pool reaches the edge of the jar, then extinguish and let it cool completely.
Why it works: wax has a memory. If you only burn for 30 minutes on the first light, the candle learns to tunnel and will keep doing it. I keep a timer by the couch now, because "just a quick light" is how you get a wax volcano with a deep well in the middle.
Common mistake: burning longer than 4 hours. The jar overheats, the wick mushrooms, and the scent turns sharp. Trim, cool, and relight later.
7. Keep a batch log — even a messy one
Write down wax type, wax weight, fragrance and percentage, pour temp, wick size, cure days, and a one-line verdict. A cheap notebook or a note on your phone is plenty.
Why it works: candle making is repeatable only if you can repeat it. My log helped me spot that my lavender candles always tunneled with a CD-6 and burned perfectly with a CD-8. Without notes, I would have kept guessing.
Common mistake: chasing a perfect recipe on the first try. Progress over perfection — your third batch will be better than your first, and the log is how you get there.
The Hacks, Step by Step
- 1Weigh your wax
Use a digital scale in grams so your fragrance ratio is accurate. - 2Melt gently
Use a pitcher in a simmering water bath and keep wax under 200°F. - 3Add fragrance at 185°F
Stir for 2 minutes so the oil binds evenly. - 4Warm the jars
10 minutes in a 170°F oven prevents sinkholes and frosting. - 5Pour at 135°F
Pour slowly down the side of the jar to avoid bubbles. - 6Cure 5–7 days
Label the date and let the scent develop before burning. - 7Test burn 3 hours
Set the melt pool memory and check for tunneling.
The difference between a hobby candle and one that fills a room is usually temperature control and patience, not expensive ingredients.
Frequently Asked Questions
What wax is best for beginners making DIY scented candles?
Soy wax (specifically 464 or 444 blend) is the most forgiving for beginners. It melts at a low temperature, cleans up with soap and water, and holds fragrance well at a 6–8% load.
How much fragrance oil do I add to candle wax?
Use 6–8% of your wax weight, measured on a scale. For 300 grams of wax, that's 18–24 grams of fragrance oil; stay under 10% to avoid wick clogging and oil sweating.
Why does my soy candle have white spots or cracks on top?
That's frosting or a sinkhole caused by rapid cooling and cold glass. Warm your jars, pour at 135°F, and cool slowly at room temperature covered with a box.
How long should I let a DIY candle cure before burning?
Cure 5–7 days for soy wax and 3–5 days for paraffin. Curing lets the fragrance bind to the wax, which improves the scent throw once lit.
How do I stop my candle from tunneling?
Size the wick to the jar diameter and do a full 2–3 hour first burn until the melt pool reaches the edge. Trimming to 1/4 inch before each relight also helps.


