

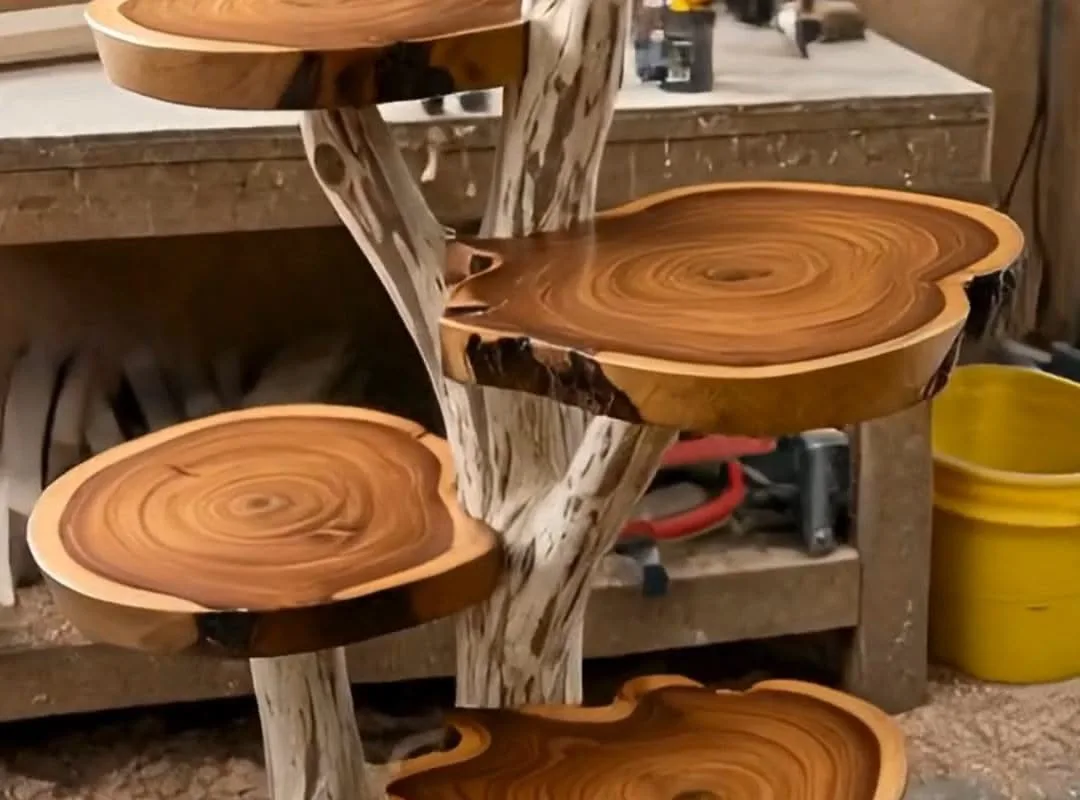
Create a stunning natural tree display stand with these 7 DIY hacks that are cheap, easy, and instantly elevate your decor. I've tried them all in my own home, and they work.
Advertisements1
- A DIY natural tree display stand costs under $5 and adds organic charm to your decor.
- Hardwood branches like oak or birch are best; avoid softwoods like pine.
- Sealing with tung oil or beeswax protects the wood and makes it last for years.
- Tripod, driftwood base, and hanging designs are all no-tool and beginner-friendly.
- Stabilize with non-slip pads or weights to prevent tipping.
- Decorate with natural elements like pinecones and fairy lights for a cohesive look.
Why a Natural Tree Display Stand Beats Store-Bought
Store-bought stands can cost $40 or more and often look generic. A DIY natural stand made from a fallen branch or driftwood costs nothing and adds organic texture that blends with any decor. I made my first one from a birch branch I found on a walk, and it's now the centerpiece of my living room. It's also a conversation starter.
Natural materials bring warmth and uniqueness. Each piece has its own shape and grain, so no two displays are alike. Plus, you can customize the size and style to fit your space perfectly.
Best of all, it's sustainable. You're repurposing something that would otherwise decompose, reducing waste and adding character.
Choosing the Right Branch: 3 Key Factors
Not all branches are created equal. Look for a sturdy hardwood like oak, maple, or birch—they're less likely to crack. Avoid softwoods like pine, which can be sappy and brittle. The branch should be 1-2 inches in diameter and at least 12 inches long for stability.
Check for signs of rot or insect damage. Tap it—if it sounds hollow, it's probably rotten. Also, make sure it's completely dry. Fresh green wood will shrink and crack as it dries, ruining your stand.
I learned this the hard way when my first stand split after a week. Now I let branches dry for at least a month in my garage before using them.
Prepping Your Branch: Clean, Cut, and Seal
Start by scrubbing the branch with a stiff brush and warm soapy water to remove dirt and bugs. Rinse and let it dry completely in the sun. If you want a smoother look, sand it with 120-grit sandpaper, then 220-grit. This also removes splinters.
Cut the branch to your desired length using a handsaw or pruner. For a flat base, make a straight cut at the bottom. If you want it to stand upright, you can drill a hole in the bottom and insert a dowel, or simply set it in a weighted base like a bucket of stones.
Seal the wood with a food-safe finish like tung oil or beeswax to protect it and enhance the grain. This also makes it easier to clean. Let it dry for 24 hours before use.
Building the Stand: 3 No-Tool Designs
Design 1: The Tripod. Use three branches of equal length, about 3 feet tall. Tie them together at the top with jute twine, leaving a few inches for the tree to rest. Spread the legs for stability. This works great for small tabletop trees.
Design 2: The Driftwood Base. Find a flat piece of driftwood or a wide slice of a log. Drill a hole slightly larger than your tree trunk in the center. Insert the tree and secure it with wedges or hot glue. This is perfect for a minimalist look.
Design 3: The Hanging Branch. Suspend a sturdy branch from the ceiling using eye hooks and rope. Hang your tree upside down for a dramatic effect. Make sure it's securely anchored—I used a stud finder to locate a ceiling joist.
Stabilizing Your Stand: Avoid Wobbles
A wobbly stand is a disaster waiting to happen. For tripod designs, ensure the legs are spread evenly and the twine is tight. You can also add a small screw at the top to hold the branches together.
For base designs, use a non-slip pad underneath. If your tree is top-heavy, add weights to the base—a bag of sand or a few stones hidden inside work well. I once used a zip-tie to secure the tree to the stand, and it held perfectly.
Test the stability by gently nudging the tree. If it moves more than an inch, reinforce it. Better safe than sorry.
Decorating with Natural Elements
Enhance your display with natural ornaments: pinecones, dried oranges, cinnamon sticks, and small birch slices. Use twine or ribbon to hang them. This ties the whole look together and smells amazing.
Add fairy lights with a warm white glow to highlight the branch's texture. Battery-operated ones are safest and easiest. I wrap them loosely to avoid looking cluttered.
For a seasonal touch, tuck in fresh greenery like eucalyptus or rosemary. Not only does it look good, but it also adds a lovely scent.
Maintenance and Storage Tips
Dust your stand regularly with a dry cloth. If it's sealed, you can wipe it with a damp cloth. Avoid direct sunlight to prevent fading and cracking.
When not in use, store it in a cool, dry place. Wrap it in a breathable cloth or bubble wrap to prevent scratches. I keep mine in a closet with a cedar block to deter pests.
Inspect it each season for signs of wear. A quick touch-up with oil or wax can extend its life for years.
The Hacks, Step by Step
- 1Find a sturdy branch
Look for a hardwood branch 1-2 inches in diameter, at least 12 inches long, free of rot or cracks. Dry it for a month. - 2Clean and sand
Scrub with soapy water, rinse, dry, then sand with 120 and 220 grit sandpaper for a smooth finish. - 3Cut to size
Use a handsaw to cut the branch to your desired length, ensuring a flat bottom for stability. - 4Seal the wood
Apply tung oil or beeswax to protect and enhance the grain. Let dry for 24 hours. - 5Assemble the stand
Choose a design: tripod with twine, driftwood base with drilled hole, or hanging branch with eye hooks. - 6Stabilize
Add non-slip pads, weights, or screws to prevent wobbling. Test by nudging gently. - 7Decorate
Add natural ornaments like pinecones, dried oranges, and fairy lights for a festive look. - 8Maintain
Dust regularly, store in a dry place, and re-oil annually to keep it looking new.
The best displays aren't bought—they're foraged, crafted, and tell a story of your own.
Frequently Asked Questions
What type of branch is best for a DIY tree display stand?
Hardwood branches like oak, maple, or birch are best because they're sturdy and less likely to crack. Avoid softwoods like pine, which can be sappy and brittle.
How do I prevent my DIY stand from tipping over?
Ensure a wide, stable base and add non-slip pads or weights like sandbags. For tripod designs, spread the legs evenly and secure the top tightly.
Can I use a fresh branch for my stand?
No, fresh branches will shrink and crack as they dry. Always use thoroughly dried wood, which takes about a month in a dry area.
How do I clean and maintain my natural tree stand?
Dust regularly with a dry cloth and avoid direct sunlight. If sealed, wipe with a damp cloth. Reapply oil or wax annually to protect the wood.
What tools do I need to make a DIY natural tree display stand?
You'll need a handsaw or pruner, sandpaper (120 and 220 grit), a brush for cleaning, and optionally a drill for base designs. No special tools required.


