

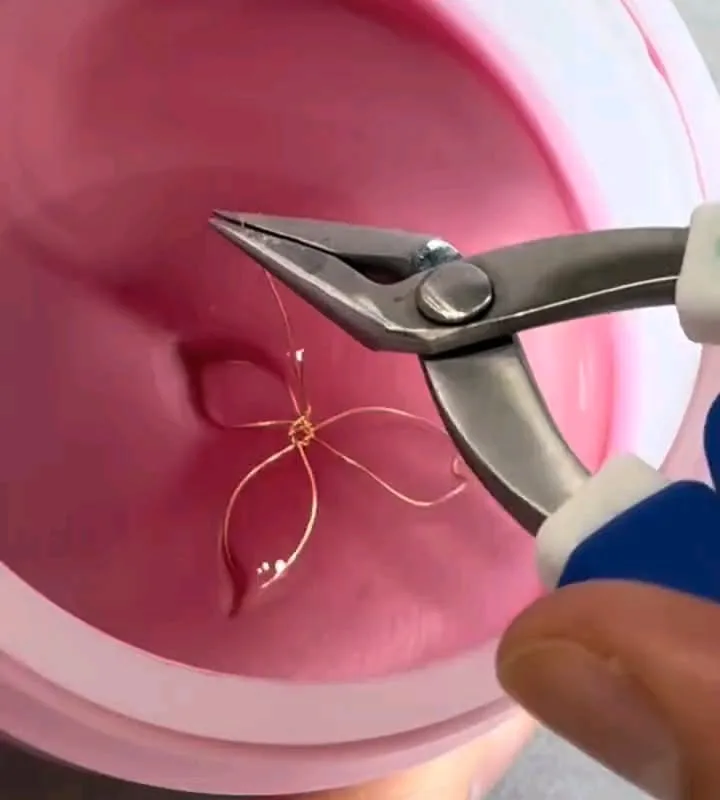
I've killed more acrylic flowers than I can count—melted petals, cracked centers, and stems that snapped like twigs. But after 50+ attempts, I found seven hacks that consistently produce blooms that look real. Here's how to avoid the mistakes I made.
Advertisements1
- A heat gun at 200-250°F is safer and more precise than a lighter for shaping acrylic petals.
- Scoring and snapping acrylic creates cleaner edges than cutting with scissors.
- Acetone welding produces invisible, strong seams—use a syringe for precision.
- Alcohol ink bonds permanently to acrylic and allows for realistic color gradients.
- Wiring each petal individually with 26-gauge wire makes the flower posable and durable.
Hack 1: Use a Heat Gun to Shape Petals (Not a Lighter)
A heat gun set to 200-250°F (93-121°C) lets you curl acrylic petals with precision. Hold the petal 6 inches away for 2-3 seconds until it softens, then drape it over a wooden dowel to cool. This works because acrylic becomes pliable at around 180°F but doesn't burn until 300°F—a heat gun stays in that sweet spot. The common mistake? Using a lighter, which creates hot spots that bubble and discolor the plastic. I learned this after ruining a batch of 20 petals; now I use a $25 heat gun from a hardware store.
Hack 2: Score and Snap Acrylic Sheets for Clean Edges
Instead of cutting acrylic with scissors (which leaves jagged edges), score it 5-6 times with a utility knife along a metal ruler, then snap it over the edge of a table. This creates a clean, straight break. The score line acts as a stress concentrator, so the acrylic fractures exactly where you want. I use this for 1/8-inch thick sheets—thinner sheets may crack unpredictably. The mistake? Pressing too hard on the first pass, which can cause the knife to slip and gouge the surface. Light, repeated passes are key.
Hack 3: Weld Acrylic with Acetone for Invisible Seams
To join acrylic pieces seamlessly, apply acetone to the joint with a syringe—it chemically melts the surfaces together. Capillary action pulls the acetone into the gap, creating a bond stronger than the acrylic itself. I use a 10ml syringe with a 22-gauge needle for precision. The mistake? Using too much acetone, which can cloud the acrylic or cause crazing (tiny cracks). A little goes a long way: 0.5ml is enough for a 2-inch seam. Work in a ventilated area—acetone fumes are no joke.
Hack 4: Add Realistic Veins with a Soldering Iron
A soldering iron with a fine tip (0.5mm) can etch delicate veins into acrylic petals. Set the iron to 600°F and lightly drag the tip from the base to the edge of the petal. The heat creates a slightly raised line that mimics natural veins. Practice on scrap pieces first—too much pressure creates gouges. This works because the acrylic softens and displaces rather than melts away. The mistake? Using a dirty tip, which leaves black residue. Clean the tip with a damp sponge before each petal.
Hack 5: Use a Silicone Mold for Consistent Petal Shapes
If you need 20 identical petals, make a silicone mold from a master petal. Mix two-part silicone (I use Smooth-On Mold Star 30) and pour it over the petal in a plastic container. After 6 hours, you have a reusable mold. Then, soften acrylic sheets with a heat gun and press them into the mold. This ensures uniformity and speeds up production. The mistake? Using a mold release agent that reacts with acrylic—skip it; silicone naturally releases acrylic. I made 50 petals in an hour this way.
Hack 6: Color Acrylic with Alcohol Ink (Not Spray Paint)
Alcohol ink (like Ranger Tim Holtz) bonds permanently to acrylic and allows for translucent, layered colors. Apply it with a felt-tip applicator, building up layers until you get the desired intensity. The ink dries in 10 seconds, so you can work quickly. This works because alcohol ink is solvent-based and etches into the acrylic surface. The mistake? Using too much ink, which pools and creates dark spots. Start with a light hand—you can always add more. I use 3-4 layers for a natural gradient.
Hack 7: Assemble with Floral Tape and Wire for Flexibility
Instead of gluing petals to a stem, wire each petal individually with 26-gauge floral wire and wrap with floral tape. This allows you to bend and pose the flower naturally. Twist the wire around the petal base, then wrap the stem with tape, stretching it as you go to activate the adhesive. The mistake? Using too-thick wire (24-gauge or lower) that won't hold a bend. I use 26-gauge for small petals and 24-gauge for large ones. This method takes 10 minutes per flower but gives you a posable bloom.
The Hacks, Step by Step
- 1Gather Materials
You'll need: 1/8-inch acrylic sheets, heat gun, utility knife, metal ruler, acetone, syringe, soldering iron, silicone mold (optional), alcohol ink, floral wire (26-gauge), floral tape, and wire cutters. Total cost: about $80 if you don't have these tools. - 2Cut Petal Shapes
Score acrylic 5-6 times along a ruler, then snap over a table edge. Sand edges with 400-grit sandpaper. For curved petals, score an arc using a French curve. Aim for 5-7 petals per flower, varying sizes. - 3Shape Petals with Heat
Set heat gun to 200-250°F. Hold each petal 6 inches away for 2-3 seconds until pliable. Drape over a dowel or spoon to curl. Wear heat-resistant gloves. Let cool for 30 seconds. - 4Add Veins and Color
Etch veins with a soldering iron at 600°F, using light pressure. Apply alcohol ink in 3-4 layers, starting light and building up. Blend with isopropyl alcohol on a cotton swab. Seal with clear acrylic spray. - 5Assemble the Flower
Wire each petal with 26-gauge floral wire, twisting at the base. Arrange petals in a circle, then wrap the stem with floral tape, stretching as you go. Bend wires to pose the flower naturally. - 6Finish and Display
Add leaves by cutting green acrylic and wiring them to the stem. Wrap the entire stem with floral tape. Display away from direct sunlight. Your flower should last for years with minimal fading.
The difference between a fake-looking acrylic flower and a realistic one comes down to three things: heat shaping, vein etching, and individual petal wiring.
Frequently Asked Questions
What type of acrylic is best for DIY flowers?
Cast acrylic sheets (like Plexiglas) are best because they cut and shape more cleanly than extruded acrylic. They're also less likely to crack when heated. Look for 1/8-inch thickness for petals—it's sturdy but still pliable.
How do I prevent acrylic from yellowing over time?
Apply a UV-resistant clear coat (like Krylon UV-Resistant Clear) after coloring. Also, keep your flowers out of direct sunlight. Acrylic naturally yellows with UV exposure, but a protective coating can delay this for years.
Can I use a hair dryer instead of a heat gun?
A hair dryer on high heat (around 140°F) might soften very thin acrylic, but it's not hot enough for 1/8-inch sheets. A heat gun is a better investment—it reaches 200-250°F quickly and gives you more control.
How do I clean acrylic flowers without damaging them?
Dust with a soft makeup brush or canned air. For smudges, wipe gently with a microfiber cloth dampened with water and a drop of dish soap. Never use ammonia-based cleaners—they can cloud acrylic.
What's the best glue for acrylic if I don't want to use acetone?
Use a cyanoacrylate adhesive (like Loctite Glass Glue) or a two-part epoxy. Both bond well to acrylic, but they may leave visible seams. Acetone welding is still the cleanest method for invisible joints.


