

Cute Halloween DIY lives or dies on restraint — a single pumpkin, a length of black ribbon, one good light source. These seven hacks are the ones I return to every October, each with a reason it works and the mistake that quietly ruins it.
Advertisements1
- Three colours maximum — cream, charcoal, and one warm accent — keeps every project looking intentional.
- Matte black card stock at 220 gsm holds a crease and reads as a silhouette; glossy paper flattens under lamplight.
- Chalk-finish paint grips faux pumpkins without primer and dries in 45 minutes per coat.
- Beeswax poured at 70°C into pre-warmed cups sets clear in about 40 minutes and burns four hours.
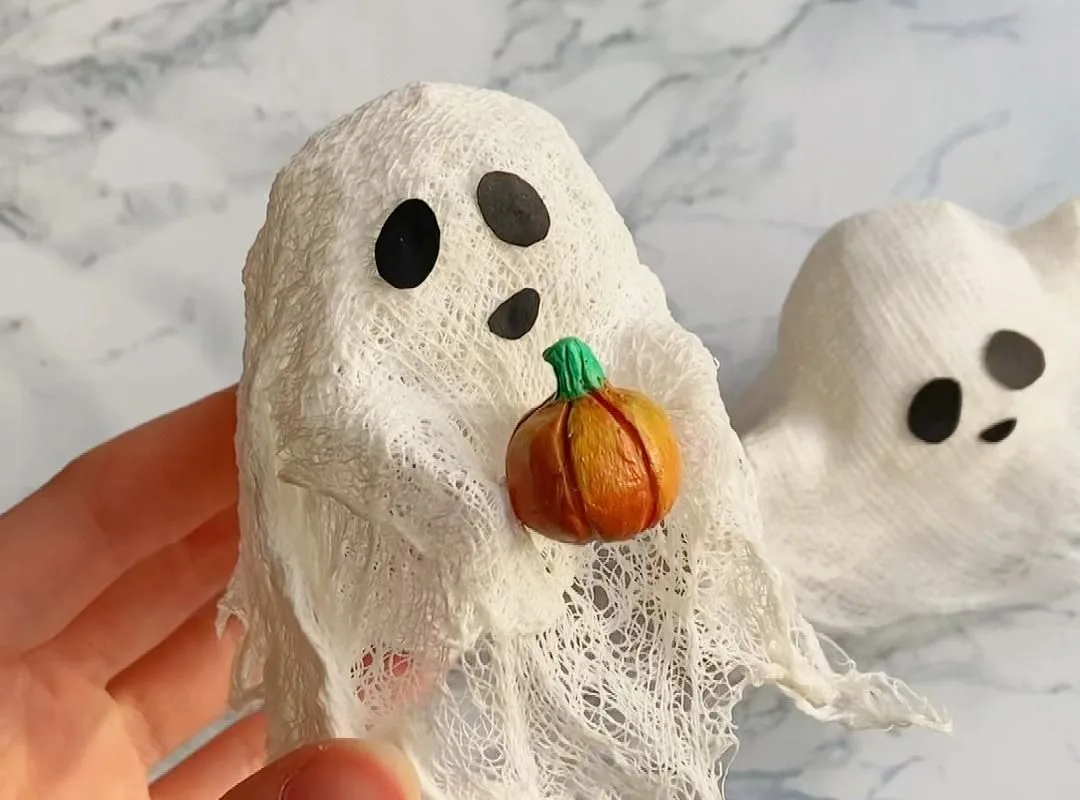
- Two layers of cheesecloth in a 1:1 glue-and-water mix is the minimum that holds a ghost's shape.
- One velvet ribbon and three wraps of twine finish a project better than any purchased ornament.
Why Cute Beats Creepy: The Case for Restraint
Every October I watch the same thing happen on my kitchen table. A bowl of orange plastic spiders arrives, then a bag of googly eyes, and by the twenty-eighth the whole thing looks like a craft shop exploded. The projects that survive the month are always the quiet ones — a white pumpkin with a single black ribbon, a row of paper bats hung at eye level.
Cute Halloween DIY works because it borrows the visual language of autumn rather than fighting it. Linen, twine, warm bulbs, matte black. When you keep the palette to three tones — say cream, charcoal, and one burnt orange — everything you make looks intentional. Add a fourth and it starts to look like clutter.
The mistake I made for years was buying materials before deciding on a palette. Now I choose the three colours first, then buy only within them. Half the supplies stay in the drawer, and the house looks calmer for it.
The 20-Minute Paper Bat Mobile
Cut nine bats from matte black card stock — I use 220 gsm, which holds its shape without curling. Fold each in half along the body, crease firmly with a bone folder, then unfold so the wings lift slightly. That single crease is what makes paper read as a living thing under a warm bulb.
Hang them from a 60 cm embroidery hoop with black cotton thread at staggered lengths: 12 cm, 18 cm, 24 cm. Staggering is the whole trick. Even spacing looks like a school project; uneven spacing looks like weather.
The common mistake is using glossy paper. Gloss catches the light in one hard stripe and flattens the silhouette. Matte card absorbs light and keeps the shape soft.
Bleached and Painted Pumpkins That Last
A real pumpkin lasts two to three weeks indoors at 18°C; a faux one lasts a decade. I buy the cheap foam-and-fabric kind from craft shops and paint them with two coats of chalk-finish paint in off-white, drying 45 minutes between coats. Chalk paint grips the textured surface without primer.
For the face, skip the marker. Use matte black acrylic and a fine brush, or cut features from black vinyl and press them on — vinyl gives you clean edges that a brush never will. A single crooked tooth, drawn slightly off-centre, is what makes a face charming rather than corporate.
The mistake: painting the stem. Leave it natural, or wrap it in twine. A painted stem is the fastest way to make a pumpkin look plastic.
Beeswax Candles in Teacups
Melt 200 g of beeswax pellets in a double boiler at around 70°C — never direct heat, and never above 80°C or the wax discolours. While it melts, warm your teacups with hot tap water and dry them; wax poured into a cold cup pulls away from the sides and looks cloudy.
Set a wick in the centre with a dab of wax, hold it straight with two chopsticks laid across the rim, and pour to 1 cm below the edge. They set in about 40 minutes. Beeswax smells faintly of honey and burns clean for roughly four hours per cup.
The mistake is using a cup you love. Wax is stubborn to remove. Use the mismatched ones from the back of the cupboard — the chips and the faded gilt are exactly the charm you want.
The Cheesecloth Ghost That Reads as Mist
This is the oldest trick in the book and still the best. Drape two layers of cheesecloth over a balloon or a wire armature, soak it in a 1:1 mix of white glue and water, and let it dry 24 hours near a radiator. Two layers hold the shape; one layer collapses.
When it's dry, the cloth goes stiff and translucent, and a warm LED inside turns it into something that looks like breath on a window. Keep the light at 2700K — anything cooler turns the ghost grey and slightly sad.
The mistake is soaking the cloth too heavily. Wring it until it stops dripping. Saturated cloth sags into a shapeless lump, and no amount of drying rescues it.
Ribbon and Twine: The Five-Minute Finishing Touch
Most cute Halloween DIY fails at the last metre. A plain glass jar, a pillar candle, and a length of 2 cm black velvet ribbon tied in a single loose knot will out-charm anything you can buy. Velvet absorbs light; satin throws it back and looks cheap under lamplight.
Wrap twine three times around a stack of books, tie it off, and tuck in a sprig of dried eucalyptus. Three wraps, not two — odd numbers read as deliberate. This takes about four minutes and costs almost nothing.
The mistake is over-tying. One knot, tails left long and uneven. The moment you add a bow on top of a bow, the whole thing tips into fussy.
Storing It So Next October Is Easy
Wrap the paper bats flat between two sheets of baking parchment in a shallow box. Store pumpkins stem-up in a single layer — stacked, the paint dents and the stems snap. Keep the beeswax cups in a cool cupboard, never the attic; wax softens above 25°C and the wicks lean.
Label the box with a single word on masking tape: Bats. Pumpkins. It sounds excessive until the following October, when you open the cupboard and everything is ready in four minutes instead of four hours.
The mistake is storing things you didn't love. If a piece didn't earn its place on the mantel, it won't next year either. Let it go.
The Hacks, Step by Step
- 1Choose three colours before you buy anything
Pick cream, charcoal, and one warm accent. Every supply must fit the palette — this single constraint prevents the cluttered look that kills cute decor. - 2Crease every paper bat down the centre
Fold in half and press firmly with a bone folder, then unfold. The crease lifts the wings and makes flat card read as something alive under a warm bulb. - 3Use matte card and matte paint only
Glossy surfaces catch light in hard stripes and flatten silhouettes. Matte absorbs light and keeps edges soft — the difference between handmade and homemade-looking. - 4Warm your cups before pouring wax
Rinse teacups with hot water and dry them fully. Wax poured into a cold cup contracts and clouds against the glaze. - 5Wring cheesecloth until it stops dripping
Soak in 1:1 glue and water, then squeeze hard. Oversaturated cloth sags and won't hold the ghost's shape as it dries. - 6Leave pumpkin stems unpainted
Paint the body, wrap the stem in twine if you like. A painted stem is the fastest way to make a real-looking pumpkin read as plastic. - 7Tie one loose knot, not a bow
Use 2 cm velvet ribbon with uneven tails. A single knot looks composed; layered bows tip the whole arrangement into fussy. - 8Store flat, single layer, labelled
Bats between baking parchment, pumpkins stem-up, wax in a cool cupboard. A one-word label saves hours next October.
The projects that survive the month are never the loudest ones — they are the ones that borrowed autumn's own palette and then stepped quietly aside.
Frequently Asked Questions
How do I stop paper bats from curling?
Use 220 gsm matte card stock and crease each bat firmly down the centre with a bone folder before unfolding. The crease controls the curl so the wings lift evenly instead of twisting.


