

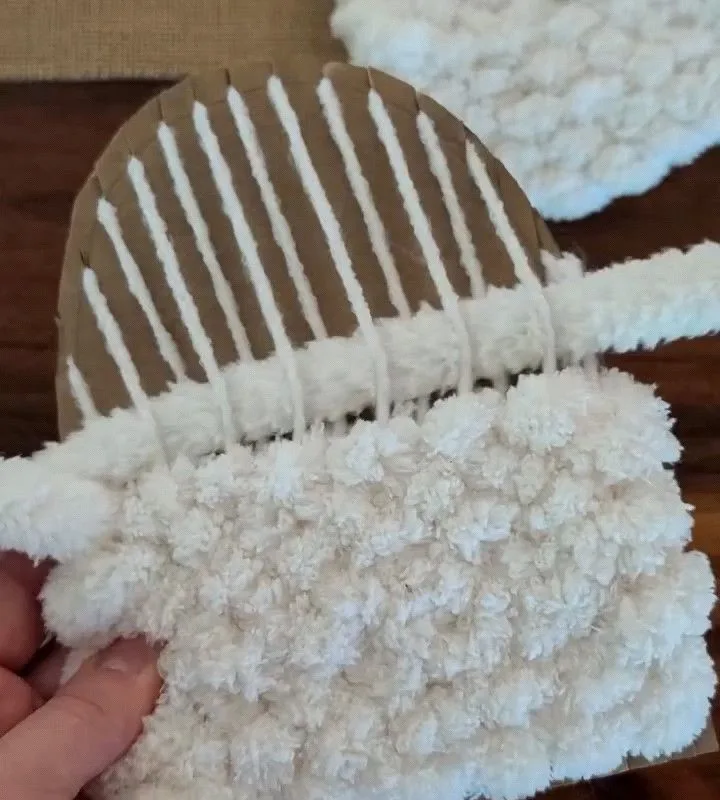
A scrap of cardboard, a ball of yarn, and one quiet evening are all you need to make your first woven treasure — and a Halloween one at that. Let me walk you through exactly how to build and use a cardboard loom woven piece you'll actually want to hang on your wall.
Advertisements1
- An 8 by 10 inch cardboard loom with 1/2-inch notches gives you about 16 warp threads — the ideal beginner count.
- Three colors beat five every time; charcoal, burnt orange, and bone white make an instant Halloween palette.
- Beat each row gently like tucking in a child, not hammering a nail, or your edges will pull inward.
- A five-thread weft-faced patch is all it takes to 'draw' a pumpkin or a bat into your weave.
- Cut warp threads on the back and tie them in pairs — the knots become your fringe, not a mistake.
Why a Cardboard Loom Is the Kindest Way to Start Weaving
I still remember my first wooden loom. I saved for months, oiled it lovingly, and then froze — too afraid to make a mistake on something so expensive. That's exactly why I now teach every beginner on cardboard. A sturdy shipping box cut to 8 by 10 inches costs nothing, and when you're done, you can recycle it without a single pang of guilt.
Cardboard also teaches your hands the real rhythm of weaving: over, under, over, under. The tension is forgiving, the warp threads stay put, and you can finish a small piece in about 90 minutes. My students who start on cardboard consistently finish their first project; the ones who start on fancy equipment often don't.
Before you cut anything, take one slow breath and ask yourself: what do I want this piece to feel like? Spooky and moody? Cozy and autumnal? That single question will guide every color choice that follows.
Building Your Loom: The 1/2-Inch Rule That Changes Everything
Cut a piece of corrugated cardboard to 8 by 10 inches — corrugation should run vertically so your notches are strong. Along the top and bottom edges, mark notches every 1/2 inch, leaving a 1-inch margin on each side. That gives you roughly 16 warp threads, which is the sweet spot for a beginner: enough to see a pattern, few enough to finish before your patience runs out.
Snip each notch about 1/4 inch deep with sharp scissors. Dull blades crush the corrugation and your warp will slip — I learned that the hard way on a rainy October afternoon with three kids waiting. Then wrap cotton string or fine yarn around the back of the cardboard and through each notch, front to back, keeping an even, gentle tension. Pluck a warp thread like a guitar string: it should give a soft 'thrum,' not a tight twang.
Tape the tail to the back and you're ready. Notice how the cardboard already feels different in your hands — that's the beginning of making.
Choosing Halloween Yarn Without Breaking the Bank
For a Halloween piece, I reach for a palette of three: charcoal gray, burnt orange, and a pop of bone white. Three colors is plenty — more than four and beginners tend to freeze at the loom, unsure what goes next. Worsted-weight acrylic or cotton yarn in 4-ounce skeins works beautifully; you'll use maybe a third of each for an 8 by 10 piece.
Avoid fuzzy novelty yarn for your first attempt. That sparkly black eyelash yarn looks irresistible in the store, but it tangles in the warp and hides your mistakes in a way that makes learning harder. Save it for a fringe or an accent stripe once you've found your rhythm.
Here's a small mindfulness prompt: lay your three yarns side by side in daylight before you begin. Do they feel like Halloween to you? If one feels off, swap it now — trust that quiet first impression.
The Plain Weave: Slow Down and Let the Pattern Emerge
Cut a length of yarn about an arm's length — roughly 30 inches — and thread it through a tapestry needle or a simple plastic weaving needle. Leave a 4-inch tail hanging on the back. Starting at the bottom, go over the first warp thread, under the second, over the third, and so on across the row. On the next row, reverse it: under, over, under, over. That alternation is called plain weave, and it's the foundation of nearly everything.
After each row, use a fork or a spare piece of cardboard to gently push the weft down — weavers call this beating. Gentle is the word. If you beat too hard, the piece narrows like an hourglass and your edges pull inward. I tell my students to imagine tucking a child into bed, not hammering a nail.
Leave your edges loose. A slightly wobbly first edge is a signature, not a flaw — every weaver's early rows look like that, and yours will too.
Adding a Halloween Motif: Pumpkins, Bats, and Simple Shapes
Once you've woven about 2 inches of your base color, you can introduce a shape. For a pumpkin, count five warp threads in the middle of your row and weave orange across just those five, then return — that's called a weft-faced patch, and it lets you 'draw' with yarn. Build the pumpkin two rows tall, then narrow to three threads for the top, and finish with a single row of green for the stem.
Bats are even easier: a single row of black across seven threads, then three threads on the next row, then one. Their little pointed wings appear almost by themselves. I wove a row of tiny bats across a gray background last October and my neighbor asked if I'd bought it — the highest compliment a handmade piece can receive.
The common mistake here is pulling the accent color too tight, which puckers the background. Keep the same easy tension you used everywhere else, and if the shape looks a bit lumpy, that's the charm.
Finishing: Cutting Off the Loom and Hanging Your Work
When your piece is the length you want — usually 6 to 7 inches of weaving on an 8 by 10 loom — it's time to free it. Flip the cardboard over and carefully cut the warp threads across the middle of the back, then tie them in pairs, snug but not strangling, in a simple double knot. Those knots become your fringe, and they're part of the design.
Slide the loops off the top notches and you'll feel the piece relax in your hands — a small, satisfying moment I never tire of. Trim the fringe to an even length, or leave it ragged for a witchier look. To hang it, slip a small dowel or a twig through the top loops and tie a length of twine on either end. A found twig from your yard is perfect and costs nothing.
Before you hang it, hold your weaving up to the window. Notice the light coming through the gaps. That's your hands, your evening, your small act of making — and it's worth pausing over.
The Hacks, Step by Step
- 1Cut and notch the cardboard
Cut an 8 by 10 inch rectangle with vertical corrugation, then mark notches every 1/2 inch along the top and bottom edges, leaving 1-inch margins. Snip each notch 1/4 inch deep with sharp scissors. - 2String the warp
Wrap cotton string around the back and through each notch, front to back, keeping even, gentle tension. Pluck a thread — it should give a soft thrum, not a tight twang. Tape the tail to the back. - 3Pick three Halloween colors
Choose charcoal, burnt orange, and bone white in worsted-weight yarn. Skip fuzzy novelty yarns for your first piece — they tangle in the warp and hide your learning. - 4Weave the first rows in plain weave
Thread a 30-inch length of yarn on a needle, leave a 4-inch tail, and go over-under across the warp. Reverse the pattern on the next row. Beat each row down gently with a fork. - 5Add a simple motif
Weave a pumpkin across five center warp threads in orange, narrowing to three and then one for the stem. Keep your tension identical to the background so the piece stays flat. - 6Cut off and tie the fringe
Flip the loom over, cut the warp threads across the middle, and tie them in pairs with double knots. Slide the loops off the top notches. - 7Hang on a found twig
Slip a small dowel or yard twig through the top loops, tie twine to each end, and hang your piece where the morning light can catch it.
A slightly wobbly first edge isn't a flaw — it's the signature of a weaver who showed up and began.
Frequently Asked Questions
What kind of yarn is best for a cardboard loom?
Worsted-weight cotton or acrylic yarn works best because it slides smoothly through the warp without fraying. Avoid fuzzy novelty yarns for your first piece, since they tangle easily and hide your progress.
How long does it take to weave a small cardboard loom project?
Most beginners finish an 8 by 10 inch piece in about 90 minutes to two hours, spread over a couple of sittings. The setup takes 20 minutes; the weaving itself is the slow, pleasant part.
Can I reuse a cardboard loom?
You can reuse it two or three times if you keep the notches intact and don't bend the board. Once the corrugation crushes or the notches tear, cut a fresh one — it takes five minutes and costs nothing.
How do I stop my weaving from getting narrower as I go?
Beat each row gently and keep your weft loose enough to arch slightly across the warp. If you pull every row tight, the sides will pinch inward like an hourglass.
What can I make with a small woven piece?
Small weavings make lovely wall hangings, coasters, bookmark-sized gifts, or Halloween ornaments when hung on a twig. A 6-inch piece also fits perfectly in a 5 by 7 inch frame.


