

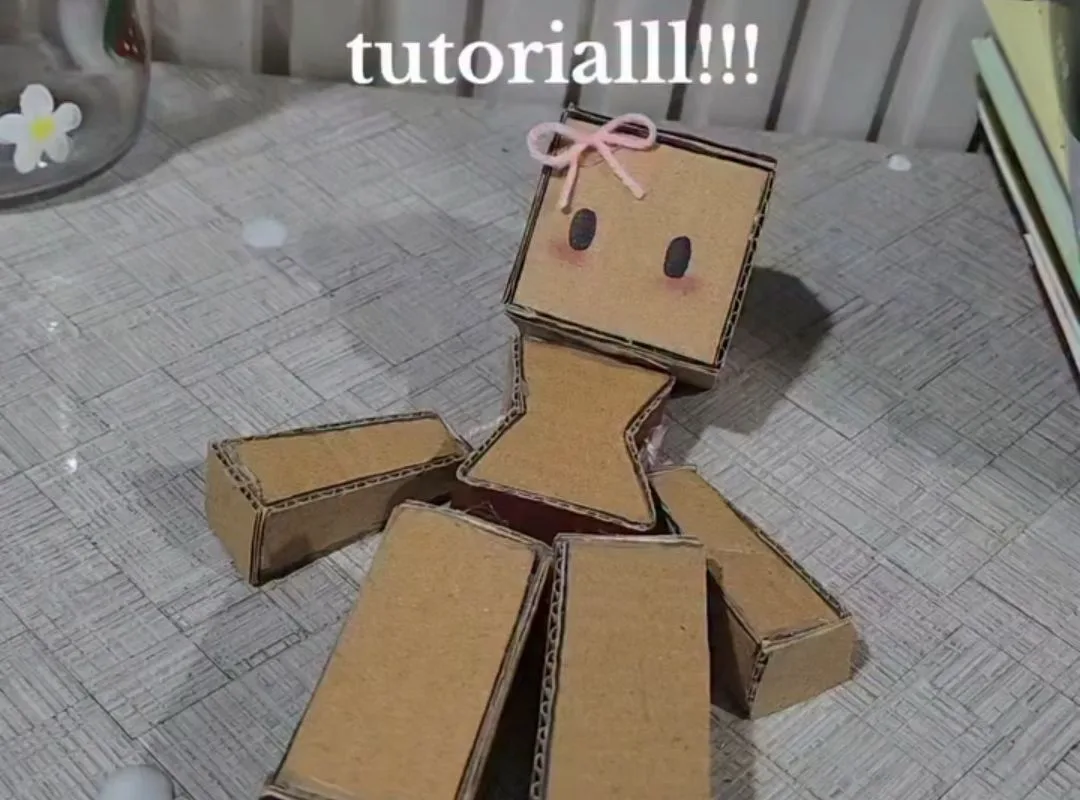
Ever spent an hour cutting out a cardboard doll, only to have it flop over like a wet noodle? I've been there—my daughter's first cardboard doll, 'Princess Wobble,' couldn't even stand for a tea party. After many trials (and a few glue-gun burns), I've nailed seven hacks that make a cardboard doll sturdy, posable, and totally adorable. Let's dive in.
Advertisements1
- Corrugated cardboard is the best choice for a sturdy doll; avoid flimsy chipboard for the main body.
- Reinforce joints with cardboard gussets to prevent tearing and extend play life.
- Sealing cardboard with a glue-water mix before painting makes colors pop and adds durability.
- A simple cardboard stand prevents tipping and makes display easy.
- Personalize with fabric and yarn to give your doll character without spending extra.
Hack 1: Pick the Right Cardboard (Corrugated vs. Chipboard)
Not all cardboard is created equal. For a doll that needs to stand and possibly move, corrugated cardboard (the kind with the wavy middle layer) is your best bet. It's lightweight yet rigid, and the flutes add strength. I grab clean shipping boxes from our recycling bin—just avoid greasy pizza boxes. Chipboard (like cereal boxes) is too flimsy for the main body but works great for accessories like hats or shoes.
Why it works: Corrugated cardboard has a high strength-to-weight ratio, so your doll won't topple over. The flutes also make it easy to poke holes for joints without tearing.
Common mistake: Using damp or warped cardboard. It'll never dry flat, and your doll will look like it survived a flood. Always let boxes dry completely before cutting.
Hack 2: Reinforce Joints with Cardboard Gussets
If you want your doll's arms and legs to move, simple brads or string joints can rip through the cardboard. The fix? Add small triangular gussets (corrugated triangles) at each joint. Cut 1-inch triangles from thin cardboard, glue them to the back of the limb where it attaches to the body, and punch your hole through both layers. This doubles the thickness and distributes stress.
Why it works: The gusset acts like a washer, spreading the force of movement over a larger area. I learned this after my son's robot doll lost an arm during a 'dance party.' Now, even after weeks of play, the joints hold strong.
Common mistake: Gluing gussets on the front. They'll be visible and ruin the doll's look. Always attach them to the back or inside.
Hack 3: Use a Template (and Modify It)
Freehand drawing a doll can lead to lopsided proportions. Instead, print a simple paper template from sites like Pinterest or draw one on graph paper. A basic doll shape: a rectangle body (4×6 inches), a circle head (2-inch diameter), and limbs (1×3 inches). Trace onto cardboard, then cut with a craft knife (adults only) or sturdy scissors.
Why it works: Templates ensure symmetry, so your doll looks intentional, not like a Picasso. Plus, you can reuse it for multiple dolls—my kids made a whole family.
Common mistake: Cutting exactly on the line. You'll lose the pencil marks, but more importantly, you need to cut slightly outside the line to account for any tracing errors. Better to trim later than to have a too-small doll.
Hack 4: Score and Fold for 3D Shapes
Flat dolls are fine, but a slightly 3D doll is way more fun. To create a curved body or a skirt that flares, score the cardboard along the fold line with a dull pencil or bone folder, then gently bend. For a skirt, cut a trapezoid, score a line 1 inch from the bottom, and fold outward to create a stand.
Why it works: Scoring breaks the internal fibers, allowing a clean fold without cracking the surface. This gives your doll dimension and stability.
Common mistake: Folding against the corrugation. Always fold with the flutes (the wavy lines) running vertically for a smoother curve. If you fold across, it'll crinkle.
Hack 5: Seal and Paint with a Base Coat
Cardboard is porous, so paint soaks in and looks dull. Before painting, seal the surface with a mix of white glue and water (1:1 ratio). Brush it on, let it dry for 30 minutes, then apply acrylic paint. This creates a smooth, vibrant finish. I use this trick for all our cardboard crafts—it makes colors pop and prevents warping.
Why it works: The glue fills the pores, creating a barrier that stops paint from bleeding. It also adds a bit of stiffness.
Common mistake: Using too much water. A watery mix will warp the cardboard. Stick to equal parts glue and water, and apply thinly.
Hack 6: Add a Stand for Stability
Even a well-made doll can tip over. Create a simple stand by cutting a cardboard rectangle (3×5 inches), folding it in half like a tent, and cutting a slit in the top to slide the doll's feet into. Or, glue a clothespin to a base for a quick stand. For a more permanent solution, use a wooden dowel inserted into a foam block.
Why it works: A stand widens the base of support, so the doll won't fall during play or display.
Common mistake: Making the slit too wide. The doll will wobble. Cut it just wide enough to snugly fit the cardboard thickness.
Hack 7: Personalize with Fabric Scraps and Yarn
Give your doll personality with fabric scraps for clothes and yarn for hair. Glue fabric directly onto the cardboard using fabric glue or hot glue (low-temp for kids). For hair, cut yarn strands, layer them, and glue along the head's edge. I love using old t-shirts and leftover yarn from knitting projects—it's eco-friendly and adds texture.
Why it works: Fabric and yarn add tactile variety and make the doll feel more like a toy than a craft project.
Common mistake: Using too much glue. It seeps through fabric and leaves stiff, shiny spots. Use a thin line and press gently.
The Hacks, Step by Step
- 1Gather Materials
Collect corrugated cardboard, scissors, craft knife, glue, acrylic paint, fabric scraps, yarn, and brads. Having everything ready avoids mid-project scrambles. - 2Cut the Doll Shape
Use a template to trace the body, head, and limbs onto cardboard. Cut slightly outside the lines, then trim for precision. - 3Reinforce Joints
Cut small triangular gussets from thin cardboard and glue them to the back of each limb where it attaches to the body. This prevents tearing. - 4Assemble with Brads
Punch holes through the gussets and body, then insert brads to connect limbs. This allows movement without glue, so arms and legs can pose. - 5Seal and Paint
Brush a 1:1 glue-water mix over the entire doll and let dry. Then paint with acrylics for a vibrant, durable finish. - 6Add a Stand
Create a tent-style stand from a folded cardboard rectangle, or use a clothespin base. Slide the doll's feet into the slit for stability. - 7Decorate
Glue fabric scraps for clothes and yarn for hair. Use a thin layer of glue to avoid stiffness.
The secret to a cardboard doll that lasts isn't fancy materials—it's reinforcing the joints and sealing the surface before you decorate.
Frequently Asked Questions
What kind of cardboard is best for a cardboard doll?
Corrugated cardboard is best because it's lightweight yet strong, and its flutes add rigidity. Chipboard is too flimsy for the main body but works for small accessories.
How do I make the arms and legs move?
Use brads or string joints, but reinforce the holes with cardboard gussets to prevent tearing. Punch through both layers for a secure pivot.
Can I paint cardboard without it warping?
Yes, if you seal it first with a 1:1 mixture of white glue and water. Let it dry completely before applying acrylic paint in thin coats.
How can I make the doll stand up?
Create a simple stand from folded cardboard or a clothespin base. Cut a slit to slide the doll's feet into, providing a wider base for stability.
What's the best glue for cardboard dolls?
Tacky glue or low-temp hot glue works well for assembly. For fabric, use fabric glue to avoid stiffness.


