

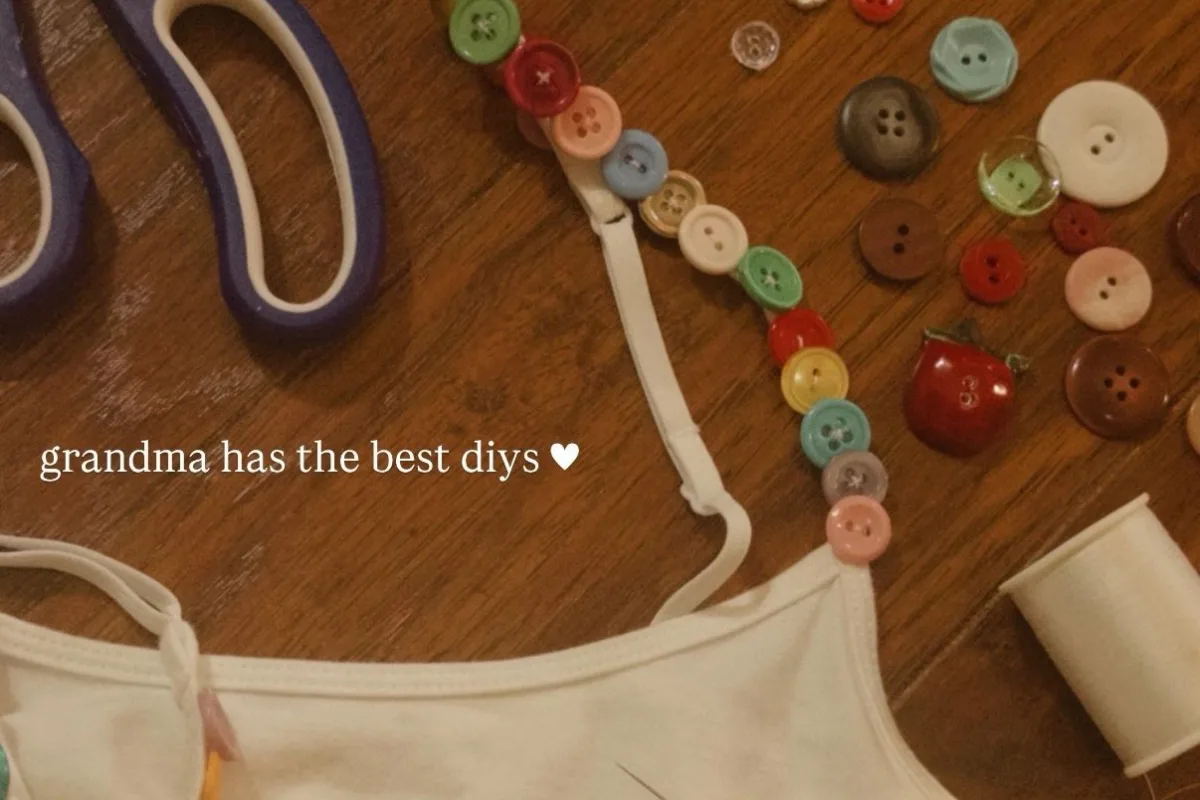
Ever found a button-strap tank top that's cute but the straps won't stay put? I've been there—after years of sewing and styling, I've cracked the code. Here are seven practical hacks to make your DIY button strap tank top fit like a dream.
Advertisements1
- Silicone gripper strips or fabric glue on the inside of straps prevent slipping without visible alterations.
- Angling straps 15 degrees inward and distributing button weight evenly keeps straps in place.
- Adjustable buttonholes allow you to customize strap length for a perfect fit.
- Reinforce the strap-bodice junction with interfacing and a bar tack to prevent tearing.
- Always do a wear test before finishing to catch fit issues early.
Why Button Straps Slip (And How to Fix It for Good)
Button straps are charming but notorious for slipping off shoulders. The main culprit? The weight of the buttons pulls the strap down, especially if the fabric is silky or the strap is too long. I learned this the hard way after making a linen tank that kept sliding during a picnic. The fix: add a small silicone gripper strip inside the strap. You can buy silicone tape or use a dot of clear fabric glue on the inside of the strap where it meets your shoulder. This creates friction without being visible. Another trick: angle the strap slightly inward when sewing it to the bodice. A 15-degree angle keeps it anchored. Avoid making the strap too tight—that causes discomfort and still slips. Test the angle with pins before sewing.
The Button Placement Trick That Balances Weight
Buttons add weight, so placement matters. Instead of putting all buttons at the front, distribute them evenly along the strap. I once made a top with three heavy wooden buttons clustered at the front—it constantly pulled forward. Now I space them: one near the shoulder, one mid-strap, one near the bodice. This balances the weight and reduces slipping. Also, choose lightweight buttons: resin or plastic instead of metal or wood. If you love a heavy button, reinforce the strap with interfacing. Cut a small piece of fusible interfacing and iron it to the wrong side of the strap before sewing. This adds structure without bulk. Test with a mock-up first—it's worth the extra 10 minutes.
Adjustable Straps: The Secret to a Custom Fit
Making straps adjustable is a game-changer. You can use small sliders (like bra straps) or create buttonholes at multiple points. I prefer buttonholes: sew three buttonholes along the strap and one button on the bodice. This lets you move the button to adjust length. It's simple and looks intentional. For a cleaner look, use a hidden button inside the strap. Start by making a test buttonhole on scrap fabric to check size. Remember, buttonholes stretch over time, so make them slightly smaller than the button. This method saved my favorite tank after it stretched out. Have you tried adjustable straps? It's a small change that adds versatility.
Fabric Choice: The Unsung Hero of Strap Stability
Not all fabrics are equal for button straps. Slippery fabrics like silk or rayon are beautiful but challenging. If you love them, line the strap with a stable fabric like cotton batiste. This adds grip and structure. For beginners, start with medium-weight woven fabrics like linen or chambray—they have natural texture that helps grip. I made a chambray tank with button straps that stayed put all day. Also, pre-wash your fabric to avoid shrinkage that can distort straps. And always cut straps on the straight grain, not bias, for less stretch. If you're using a knit, stabilize with a strip of interfacing. These small choices make a huge difference in wearability.
Reinforcing the Strap-Bodice Junction
The point where the strap meets the bodice takes the most stress. Reinforce it with a small triangle of fabric or a bar tack. I use a 1/2-inch square of fusible interfacing inside the bodice before sewing the strap. Then I sew a rectangle with an X inside for extra strength. This prevents the strap from tearing away. Also, backstitch at the beginning and end of your seam. If you're hand-sewing, use a backstitch for durability. I've seen too many store-bought tops fail at this junction. A little reinforcement now saves a repair later. Try it on your next make and feel the difference.
The Final Fit: Testing and Tweaking
Always do a fitting before finishing. Pin the straps in place and wear the top for a few minutes. Raise your arms, bend over, and move around. Does it stay put? If not, adjust. I keep a notebook of fit adjustments for future projects. Small tweaks like shortening the strap by 1/4 inch or moving a button can transform the fit. Also, consider adding a small snap or hook at the shoulder for security. It's invisible and gives peace of mind. Remember, DIY is about making it yours. Take your time and enjoy the process. With kindness, Sofia.
The Hacks, Step by Step
- 1Add silicone gripper strips
Cut small strips of silicone tape or apply dots of clear fabric glue to the inside of the strap where it rests on your shoulder. This increases friction and prevents slipping without being visible. - 2Angle straps inward
When pinning the straps to the bodice, angle them 15 degrees inward toward the neck. This counteracts the outward pull of buttons and keeps straps on your shoulders. - 3Distribute button weight
Space buttons evenly along the strap instead of clustering them. Use lightweight buttons (resin or plastic) and reinforce the strap with fusible interfacing if needed. - 4Create adjustable buttonholes
Sew three buttonholes along the strap and one button on the bodice. This allows you to move the button to adjust strap length for a perfect fit. - 5Reinforce strap-bodice junction
Add a small square of fusible interfacing inside the bodice where the strap attaches. Sew a rectangle with an X inside for extra strength to prevent tearing. - 6Do a wear test
Pin straps in place and wear the top for a few minutes. Move around, raise your arms, and bend over. Adjust as needed before final sewing.
The secret to button straps that stay put is balancing weight distribution and adding hidden grip—small tweaks that make a world of difference.
Frequently Asked Questions
How do I keep button straps from slipping off my shoulders?
Add silicone gripper strips or dots of clear fabric glue to the inside of the straps where they meet your shoulders. This creates friction and keeps them in place without being visible.
What's the best fabric for a DIY button strap tank top?
Medium-weight woven fabrics like linen, chambray, or cotton work best because they have natural texture that helps grip. If using slippery fabrics, line the straps with cotton batiste for stability.
Can I make button straps adjustable?
Yes, sew multiple buttonholes along the strap and one button on the bodice. This lets you move the button to adjust the length for a custom fit.
How do I reinforce the strap-bodice junction?
Fuse a small square of interfacing inside the bodice where the strap attaches, then sew a rectangle with an X inside for strength. This prevents the strap from tearing away.
What buttons are best for tank top straps?
Lightweight buttons like resin or plastic are best to avoid excess weight that pulls straps down. If using heavy buttons, reinforce the strap with interfacing.


