

You've got a plain denim jacket, a bag of rhinestones, and that tiny tube of glue staring back at you like a dare. By the end of this you'll know exactly which kit to buy in 2026 and the seven moves that separate a craft-store disaster from a piece people ask to borrow.
Advertisements1
- Match stone type to fabric—hotfix for cotton and denim, cold adhesive for leather and satin—before you buy a kit.
- Press hotfix stones for 10–15 seconds with no steam; longer pressing dulls the sparkle.
- Lay out every design on baking paper and photograph it before a single stone is glued.
- A wax pencil beats tweezers for placement and protects the foil backing that creates the shine.
- Buy a focused kit (500 stones, three sizes, one metallic family) over a 10,000-stone rainbow bargain bin.
- Cluster in odd numbers and leave negative space—sprinkled bling reads as craft, clustered bling reads as couture.
Hack 1: Match Your Rhinestone Type to Your Fabric Before You Buy Anything
The single biggest reason DIY bling fails isn't glue—it's buying the wrong stone for the surface. Hotfix (glue-backed) rhinestones are for heat-tolerant fabrics: cotton denim, canvas, polyester blends, and most tote bags. Non-hotfix (flat-back) rhinestones need adhesive and belong on leather, faux leather, satin, tulle, and anything you can't iron. If you're shopping a 2026 kit, look for one that includes both types plus a clear label on each bag—kits that dump everything into one unmarked jar are the ones that end in tears.
Why it works: hotfix glue is activated at roughly 160°C (320°F) and bonds deep into fibers, while cold adhesive sits on the surface and peels at the first wash. A 2026-era kit worth owning has stones in at least three sizes—SS10 (2.8mm), SS16 (3.9mm), and SS20 (4.7mm)—because mixing sizes is what reads as "expensive" from across the room. Monochrome same-size bling looks like a school project.
Common mistake: ironing hotfix stones onto a synthetic that melts at a lower temperature than the glue activates. Test a single stone on an inside seam first, with a pressing cloth, for 15 seconds.
Hack 2: The 15-Second Press Beats the 60-Second Press Every Time
Here's the counterintuitive one: pressing hotfix stones longer does not make them stick better—it makes them spread and dull. The correct motion is firm pressure for 10–15 seconds per cluster, lift, and move on. Use the flat soleplate of an iron on a medium-dry setting (no steam, ever—steam is the enemy of hotfix glue), or a dedicated hotfix applicator wand for single stones and tight curves.
Why it works: hotfix adhesive is a thermoplastic. It flows when hot, then locks as it cools. Hold the iron too long and the glue wicks up around the stone's facets, killing the sparkle. Let it cool 30 seconds before you touch it, and the bond sets hard.
Common mistake: ironing over a stone that has already cooled and set, which re-melts the glue and can shift the stone. Work in zones—left shoulder, then right—never go back over finished areas.
Hack 3: Lay Your Design Out on Baking Paper First
Before a single stone touches glue, spread your garment flat and lay the rhinestones face-up on a sheet of baking paper placed on top. Baking paper (not wax paper—wax leaves residue) lets you slide stones around with a toothpick and preview the whole pattern in real light. Photograph it with your phone, then work from the photo. This one habit cuts the "I hate where that ended up" regret rate dramatically.
Why it works: rhinestones are directional—they catch light at an angle—so a design that looks balanced on a table can look lopsided once the garment curves over a shoulder or hip. Seeing it on the actual 3D surface first is the only honest preview you'll get.
Common mistake: laying stones out on the floor or a dark table where you can't judge the sparkle. Natural daylight near a window is the honest judge.
Hack 4: Use a Wax Pencil, Not Tweezers, for Placement
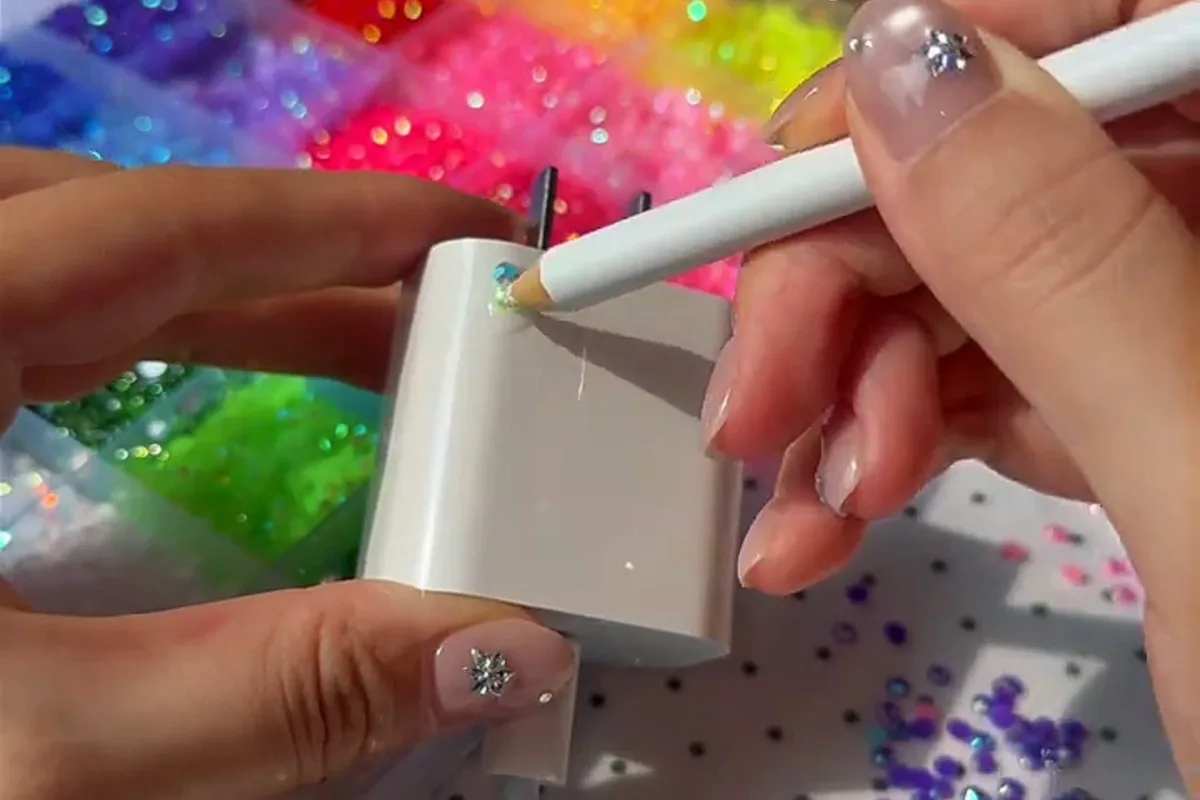
A rhinestone wax pencil (usually included in decent 2026 kits, or a few pounds separately) picks up a stone by its face and drops it exactly where you want it, hands-free. Tweezers squeeze the stone, which can send it pinging across the room—I've lost more SS10s to tweezers than to any other tool. The wax tip holds a stone until you press it into adhesive or place it on fabric, then releases cleanly.
Why it works: the wax grip is gentle enough not to scratch the foil backing (which is what actually creates the sparkle) and precise enough to place stones 2mm apart without nudging neighbours. Refill or re-sharpen the wax tip by rubbing it on a scrap of paper when it gets fuzzy.
Common mistake: pressing the wax pencil too hard into the stone, which embeds it and makes release impossible. A light touch picks it up; a hard press steals it.
Hack 5: Seal Every Cold-Glue Project With a Fabric Sealant
If you used fabric glue or E6000-style adhesive for non-hotfix stones, finish with a thin fabric sealant or a diluted fabric medium brushed around—not over—each stone once fully cured (24–72 hours depending on the glue). This is the difference between a piece that survives three wears and one that survives a season. Hotfix projects don't need this, but a gentle hand-wash inside-out in cold water extends both types.
Why it works: cold adhesives bond to the fabric surface and degrade with friction and moisture. A sealant layer locks the edges of the glue pool so it can't lift. Think of it like clear nail polish on a chipped manicure—same principle, better chemistry.
Common mistake: sealing too soon. If the glue is still tacky underneath, the sealant traps solvent and the stones slide off in a week. Wait the full cure time on the label, not the time you wish it took.
Hack 6: Build a Kit That Actually Fits Your Projects
A 2026-ready bedazzling kit should include: a hotfix applicator wand with interchangeable tips (flat, fine, and a 2mm point), 2,000+ mixed-size hotfix stones in a colour story you'll actually use, a wax pencil, tweezers, a small silicone mat, and a heat-resistant pressing cloth. Skip kits that promise 10,000 stones in 40 colours—you'll use six of them and the rest will live in a drawer. A focused kit with 500 stones in three sizes and one metallic family will get used far more.
Why it works: constraint breeds better design. Mixed-size stones in a tight palette (silver, gunmetal, and one accent like rose gold) read as intentional and expensive. Rainbow confetti reads as "birthday party craft." Buy the focused kit, then add one accent colour later.
Common mistake: buying a kit with no applicator wand and assuming a household iron will cover everything. An iron is fine for large flat areas; it's hopeless for curves, collars, and single-stone accents.
Hack 7: Design in Odd Numbers and Cluster, Don't Sprinkle
The pro move that makes DIY bling look boutique: cluster stones in groups of three, five, or seven, with the largest stone in the centre and smaller ones radiating out. Odd numbers read as natural; even numbers read as manufactured. Cluster along a seam, a pocket edge, or a collar rather than scattering evenly across a whole garment. One well-placed cluster at the shoulder beats 200 stones sprinkled like confetti.
Why it works: the eye reads clusters as a deliberate focal point and sprinkles as noise. Clustering also means fewer stones, less glue, and a faster project—which means you'll actually finish it.
Common mistake: covering the entire garment. Negative space is what makes the bling pop; if everything sparkles, nothing does.
The Hacks, Step by Step
- 1Test one stone on an inside seam
Press a single hotfix stone on an inconspicuous area for 15 seconds with a pressing cloth, then check the fabric hasn't melted or scorched. This 60-second test saves the whole garment. - 2Lay out the full design on baking paper
Place stones face-up on baking paper over the garment, adjust with a toothpick, and photograph the layout before gluing anything. - 3Work in zones, not all at once
Complete one area (shoulder, then collar, then pocket), let it cool fully, and never re-iron a finished zone. - 4Use a wax pencil for every placement
Pick up stones by the face, place them precisely, and re-sharpen the wax tip on scrap paper when it gets fuzzy. - 5Cure cold-glue projects for the full label time
Wait 24–72 hours before sealing or wearing anything glued with fabric adhesive—rushing this is the number-one cause of stone loss. - 6Seal cold-glue edges with fabric sealant
Brush a thin sealant around (not over) each cured stone to lock the glue pool and extend wear life. - 7Wash inside-out in cold water, hand-wash only
Turn the garment inside out, hand-wash cold, and air-dry flat to protect both hotfix and glued stones.
The difference between a craft-store project and a boutique piece isn't the stones—it's the restraint in where you put them.
Frequently Asked Questions
What should a good bedazzling kit include in 2026?
A hotfix applicator wand with interchangeable tips, 500+ mixed-size hotfix stones (SS10, SS16, SS20) in a tight colour palette, a wax pencil, tweezers, a silicone mat, and a pressing cloth. Skip kits with thousands of stones in dozens of colours—you'll use six and the rest will sit in a drawer.
Do I need a special iron for hotfix rhinestones?
No—a standard household iron on a medium-dry setting with no steam works for flat areas. But for curves, collars, and single-stone accents, a hotfix applicator wand is far more precise and worth the small extra cost.
How do I stop rhinestones falling off in the wash?
Hand-wash inside-out in cold water and air-dry flat, and seal cold-glue projects with a thin fabric sealant once fully cured. Hotfix stones that were pressed 10–15 seconds with no steam will survive gentle washing; glued stones without sealant often won't.
Can I bedazzle leather or faux leather?
Yes, but use non-hotfix flat-back rhinestones with a leather-appropriate adhesive—heat will damage or melt leather. Apply with a wax pencil, cure fully (24–72 hours), then seal the edges.
How many rhinestones do I need for a denim jacket?
A single shoulder or collar cluster uses 30–60 stones and reads as intentional; covering a whole back panel takes 300+. Start with one cluster, photograph it, and add more only if the design feels empty.


