

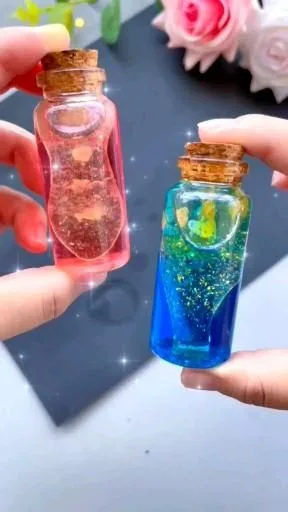
Want that perfect layered wishing sand bottle without the muddled mess? These seven hacks come straight from years of trial and error in my own craft studio. You'll learn the exact tools, techniques, and tricks to get crisp layers and vibrant colors every time.
Advertisements1
- Fine sand (0.3mm) gives the crispest layers—coarse sand bleeds.
- Tamp every layer with a dowel to keep lines sharp and even.
- Always dry the bottle completely before starting—moisture ruins sand.
- Use a funnel and spoon, not a bag, for precise pouring.
- Seal with hot glue or beeswax to keep the design intact.
- Display away from sunlight to prevent color fading.
Start with the Right Sand and Tools
The foundation of a beautiful wishing sand bottle is the sand itself. I've found that fine, play-grade sand (around 0.3mm grain) layers much more cleanly than coarse sand. Coarse sand creates gaps and lets colors bleed. You can buy pre-colored sand from craft stores, but I prefer to dye my own with acrylic paint and a splash of rubbing alcohol—it gives me exact shades and costs less.
You'll also need a few basic tools: a funnel with a narrow tip, a thin skewer or toothpick, and a clean, dry bottle. I use glass bottles with a wide mouth for easier layering, but any shape works. The key is to make sure the bottle is completely dry before you start—moisture makes sand clump and stick to the sides.
Layer with a Funnel and Spoon for Precision
Pouring sand directly from a bag is a recipe for disaster. Instead, use a small spoon or a measuring scoop to transfer sand into a funnel. This gives you control over the amount and speed. I use a teaspoon for thin layers and a tablespoon for thicker ones. Aim for layers between 1/4 inch and 1/2 inch thick—anything thinner gets lost when you add the next color.
Hold the funnel so its tip touches the side of the bottle, not the center. This lets you create angled layers and prevents the sand from landing in a messy heap. For a classic straight layer, keep the funnel centered and pour slowly. The trick is to let the sand fall in a thin, steady stream—if you dump it, you'll get air pockets and uneven lines.
Use a Skewer to Create Designs and Fix Mistakes
A simple bamboo skewer is your best friend for creating patterns. After you pour a layer, gently drag the skewer through the sand to make swirls or zigzags. You can also use it to push sand up the sides of the bottle for a wavy effect. The trick is to move slowly and with purpose—fast movements just smear the colors.
If you make a mistake, don't panic. Use the skewer to gently lift out the offending sand, or carefully pour it out and start that layer again. I've also used a toothpick to nudge stray grains away from the glass. This hands-on control is what separates a pretty bottle from a perfect one.
Tamp Each Layer with a Dowel for Crisp Lines
Here's the hack that changed my wishing sand game: after each layer, I tap the bottle gently on the table to settle the sand, then use a thin dowel or the handle of a paintbrush to press down the layer. This compacts the sand, so the next layer sits on a flat surface instead of sinking into the previous one. The result is sharp, clean lines that stay put.
You don't need to press hard—just enough to level the surface. I use a 1/4-inch dowel for narrow bottles and a wider one for bigger openings. This step also removes air pockets that can cause shifting later. Skipping it leads to wavy, uneven layers that lose their definition.
Seal the Top to Prevent Shifting
Once your bottle is full, you need to keep the sand in place. I use a cork or a tight-fitting lid, but if you're using a decorative bottle, you can seal it with a few drops of hot glue around the cork. This prevents moisture from getting in and keeps the sand from shifting during transport. Another option is to add a layer of clear craft glue on top of the sand before sealing—it dries clear and holds everything in a solid block.
I've also used beeswax to seal the cork, which adds a nice touch and is easy to remove if you ever want to change the sand. The key is to make sure the seal is airtight. A loose cap lets the sand settle and mix over time, ruining your design.
Display and Care for Your Bottle
Your finished wishing sand bottle deserves a good spot. I keep mine on a shelf away from direct sunlight, because UV rays can fade the colors over time. If you're gifting it, wrap it in tissue paper and place it in a box with padding—sand bottles are fragile and the layers can shift if jostled.
To clean the outside, use a dry microfiber cloth. Don't use water or glass cleaner—it can seep into the bottle and ruin the sand. If you notice the sand settling or shifting after a few weeks, you can gently tap the bottle to redistribute it, but if it's sealed properly, it should stay put.
Troubleshooting Common Wishing Sand Problems
One of the most common issues is colors bleeding into each other. This usually happens when the sand is too coarse or the layers are too thin. Switch to finer sand and make your layers at least 1/4 inch thick. Another problem is the sand sticking to the inside of the glass—this is almost always due to moisture. Dry your bottle thoroughly and avoid working in a humid room.
If your layers come out wavy, you're probably pouring too fast. Slow down and use a funnel with a narrower tip. And if the sand crumbles or has a chalky residue, it might be low-quality sand. I recommend washing and drying your sand before use, but if it's still dusty, you can sift it through a fine mesh strainer.
The Hacks, Step by Step
- 1Choose the right sand
Use fine, play-grade sand (0.3mm grain) for crisp layers. Avoid coarse sand which causes bleeding. - 2Dry the bottle completely
Any moisture will make sand clump. Wipe the inside with a dry cloth and let it air out for 10 minutes. - 3Use a funnel and spoon
Transfer sand with a teaspoon into a narrow funnel. Pour in a thin, steady stream for control. - 4Tamp each layer
After pouring, tap the bottle gently and press the sand down with a dowel to flatten it. - 5Create designs with a skewer
Drag a skewer through the sand to make swirls or zigzags. Move slowly for clean patterns. - 6Seal the bottle
Use a cork and hot glue or beeswax to create an airtight seal. This prevents shifting and moisture. - 7Display out of sunlight
Keep the bottle away from direct UV rays to prevent fading. Use a dry cloth for cleaning. - 8Fix mistakes immediately
If a layer looks off, use a skewer to lift out sand or pour it out and restart that layer.
The secret to a perfect wishing sand bottle isn't a steady hand—it's patience and a dowel to tamp every layer flat.
Frequently Asked Questions
How do I keep layers from mixing in a wishing sand bottle?
Tamp each layer down firmly before adding the next. This creates a flat surface and prevents the sand from shifting.
What is the best sand for wishing bottles?
Fine, play-grade sand with a grain size around 0.3mm works best. It layers cleanly and doesn't bleed.
Can I use regular colored craft sand?
Yes, but make sure it's fine and dry. If it's coarse or damp, you'll get messy layers.
How do I seal a wishing sand bottle?
Use a cork and seal it with hot glue or beeswax. This keeps the sand in place and prevents moisture.
Why is my sand sticking to the sides of the bottle?
It's likely due to moisture. Dry the bottle completely before pouring, and avoid working in a humid area.


