

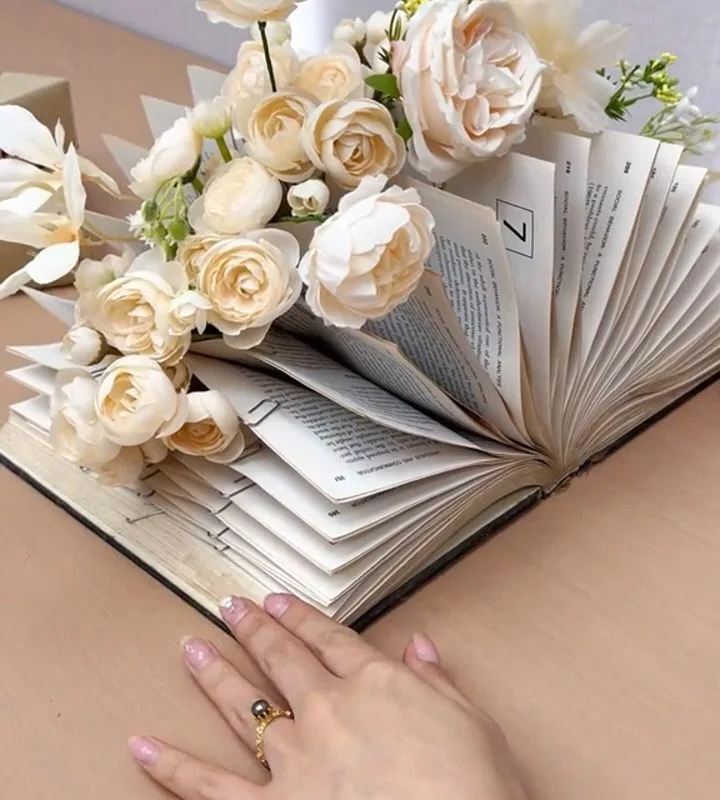
Ever looked at a shelf of forgotten paperbacks and thought, 'There's a story there—but not the one printed on the pages'? You're about to turn those dusty volumes into charming vases that spark conversations. In this guide, I'll show you seven specific hacks to transform old books into unique planters and vases, each with a why and a warning, so you can create a literary centerpiece that's both clever and beautiful.
Advertisements1
- Always use a waterproof liner—books and water don't mix.
- Choose damaged or unwanted books to avoid destroying valuable ones.
- Seal the inside of the hollowed pages with Mod Podge for extra protection.
- For tall arrangements, stack and drill through multiple books for stability.
- Get creative with no-cut methods like wrapping a jar with a book cover.
- Reinforce glued books with bookbinding tape for durability.
Why Old Books Make Surprisingly Great Vases
Old books are basically ready-made vessels: they're rigid, stackable, and come in a variety of sizes and colors. Their covers offer a ready-made decorative surface, and the hollow space inside is perfect for a small glass insert. Plus, upcycling books keeps them out of landfills—paperbacks can take years to decompose in a landfill because of their glue and plastic coatings.
But here's the catch: books are not waterproof. That's why every hack here uses a liner or a hidden container. Think of the book as the 'coat' and the liner as the 'umbrella'—without it, your vase will turn into a soggy mess.
I've been turning old books into planters for about five years, and I've learned that the best results come from choosing books that are already damaged or unwanted. Never sacrifice a rare first edition for a DIY project!
Hack #1: The Classic Hollow-Book Vase (No Cutting Required)
This is the easiest method: find a hardcover book that's at least 1.5 inches thick. Open it to the middle and use a craft knife to cut a rectangular hole through the pages, leaving a 1-inch border. Glue the pages together with Mod Podge as you go—this keeps them from shifting. Once the hole is deep enough (about 1 inch from the bottom), seal the inside with a coat of Mod Podge and let it dry.
Why it works: The glued pages create a solid block that holds the shape, and the Mod Podge seals the paper against minor moisture. But you must still use a liner—a small glass jar or a plastic cup—because Mod Podge is not fully waterproof.
Common mistake: Cutting too close to the spine. Leave at least 1 inch of pages attached to the spine, or the book will fall apart. Also, don't use a book with brittle pages; they'll crack and crumble.
Hack #2: The Stacked-Book Vase for a Tall Arrangement
Gather 3–5 hardcover books of similar size. Stack them and use a 1-inch Forstner bit to drill a hole straight through the center of all books at once (clamp them together). The hole should be wide enough to hold a glass test tube or a narrow vase. Then, glue the books together with strong craft glue, and insert the glass tube.
Why it works: The stack gives height and stability, and the glass tube holds water without touching the paper. It's perfect for single stems like tulips or rosemary.
Common mistake: Drilling without clamping. The books will shift, and your hole will be crooked. Also, don't use books with glossy covers—glue doesn't stick well to them. Sand the covers lightly first.
Hack #3: The Hinged-Book Vase with a Hidden Waterproof Insert
For a more refined look, choose a hardcover book and cut a hole in the pages as in Hack #1, but this time, also cut a hole in the front cover using a craft knife (or a scroll saw for clean edges). The hole in the cover should be slightly larger than the hole in the pages. Then, insert a small glass or ceramic cup that fits snugly. You can also add a rim of felt or cork to hide the cut edge.
Why it works: The cover hole allows you to see the insert, making it look intentional. The snug fit prevents water from seeping into the pages.
Common mistake: Cutting the cover hole too large. Measure twice, cut once. If the hole is too big, the insert will wobble. Also, don't use a book with a fragile cover—it may crack.
Hack #4: The No-Cut Trick: Use a Book Sleeve as a Vase Cover
If you're squeamish about cutting books, try this: find a large, sturdy book and wrap a glass jar or vase with its dust jacket or a piece of its cover. Use double-sided tape to secure the cover around the jar, and voilà—you have a book-themed vase without harming the book. You can also use a book sleeve (the cardboard case) and slip a jar inside.
Why it works: It's reversible and preserves the book. The cover acts as a decorative sleeve, and the jar holds the water.
Common mistake: Using a cover that's too flimsy. It won't stand up. Also, if the cover gets wet, it will warp. Keep the water level low and use a liner.
Hack #5: The Miniature Book Vase for Succulents
Small books (like pocket-sized paperbacks) can be turned into tiny vases for succulents or air plants. Cut a hole in the pages as in Hack #1, but make it shallow—just 1 inch deep. Then, place a small plastic liner (like a yogurt cup) inside and fill with soil. Plant a small succulent.
Why it works: Succulents need well-draining soil and little water, so the risk of moisture damage is low. The small size makes it a cute desk accessory.
Common mistake: Overwatering. Succulents hate soggy soil, and if water spills, it will ruin the book. Always use a liner and water sparingly.
Hack #6: The Floating Book Vase for a Whimsical Display
This one's a bit of magic: attach a small glass vase to the back of a book using strong magnets or Velcro, then hang the book on the wall. The vase can hold a few stems. Alternatively, use a book with a hollowed center and hang it from a sturdy hook. The illusion is that the flowers are growing out of the book.
Why it works: It's a surprising twist that draws the eye. The book acts as a backdrop, and the vase is hidden behind it.
Common mistake: Using weak magnets. The book will fall and break the vase. Use rare-earth magnets rated for at least 5 pounds. Also, make sure the wall can support the weight.
Hack #7: The Bookend Vase: Combine Two Books for a Functional Sculpture
Take two identical hardcover books and hollow them out as in Hack #1. Then, glue them back-to-back, leaving a gap in the middle for a glass vase. The result is a bookend that doubles as a vase. Place it on a shelf with books leaning against it.
Why it works: It's functional art—it holds books and flowers. The double thickness adds stability.
Common mistake: Not reinforcing the spine. When you glue two books together, the spines might not align. Use a strip of bookbinding tape to join them neatly. Also, don't overload with heavy flowers; the glue might give way.
The Hacks, Step by Step
- 1Choose the Right Book
Pick a hardcover book that's at least 1 inch thick and in poor condition (water damage, missing pages). Avoid rare or valuable books. The thicker the book, the deeper the hole you can cut. - 2Gather Your Tools
You'll need a craft knife (like an X-Acto), a cutting mat, Mod Podge, a brush, a ruler, a pencil, and a glass or plastic liner that fits inside. For drilling, a Forstner bit and clamp. - 3Mark and Cut the Hole
Open the book to the middle. Use a ruler to draw a rectangle on the page, leaving a 1-inch border. Cut along the lines with the craft knife, removing a few pages at a time. Glue the edges as you go to keep them together. - 4Seal the Inside
Brush a generous layer of Mod Podge on the inside walls and bottom of the hole. Let it dry completely (about 30 minutes). This protects against minor moisture. - 5Insert the Liner
Place a glass jar or plastic cup inside the hole. It should fit snugly. If it's loose, wrap it with a bit of felt or bubble wrap. Never pour water directly into the book. - 6Add Water and Flowers
Fill the liner with fresh water and arrange your flowers. For succulents, use soil instead. Change the water every few days to keep it fresh. - 7Display and Enjoy
Place your book vase on a stable surface away from direct sunlight and heat. Admire your upcycled creation!
Turning old books into vases is like giving them a second life—they get to hold beauty instead of just telling stories.
Frequently Asked Questions
Can I use a paperback book for this project?
Yes, but it's trickier because paperbacks are flimsier. You'll need to reinforce the spine with cardboard or glue multiple pages together. Hardcovers are more durable and easier to work with.
How do I prevent water from damaging the book?
Always use a separate liner—a glass jar, plastic cup, or test tube—to hold the water. Never pour water directly into the book. Also, seal the inside with Mod Podge or a similar sealant.
What kind of glue works best for gluing book pages together?
Mod Podge or PVA glue works well. They dry clear and flexible. For gluing books together, use a strong craft glue like E6000 or Gorilla Glue.
Can I use a book with a dust jacket?
Yes, but you might want to remove the dust jacket before cutting, as it can get in the way. You can always put it back on after, or use it to wrap a jar for a no-cut project.
How long does it take to make a book vase?
The hollow-book method takes about 1–2 hours, including drying time. The no-cut method takes about 10 minutes. Plan accordingly.


