

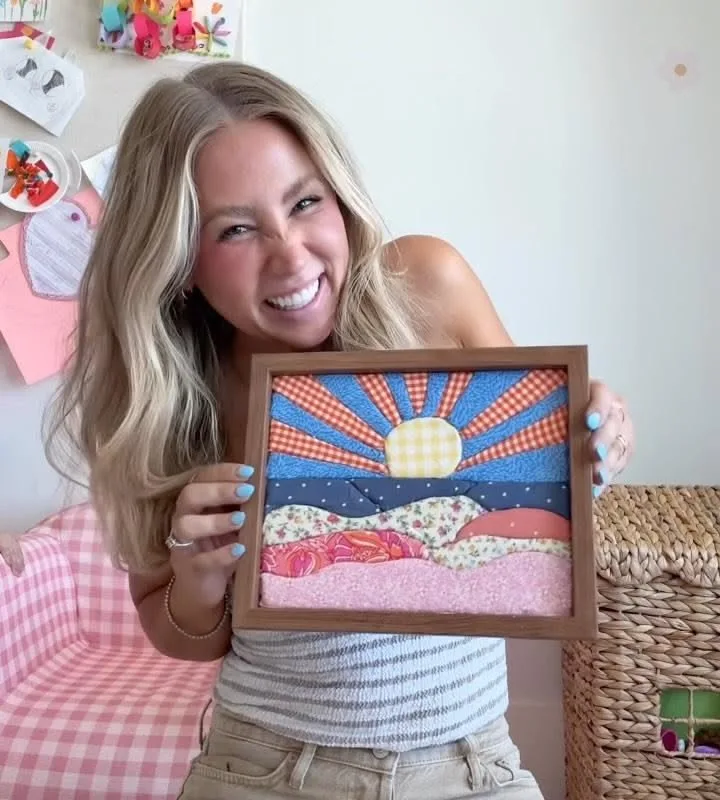
Ever dreamt of capturing the cozy warmth of a quilt in a shadow box? Quilt painting lets you do exactly that—no sewing machine required. Here are seven hacks to turn fabric scraps, acrylics, and a simple shadow box into a tiny textile treasure.
Advertisements1
- Mix acrylic paint with textile medium in a 2:1 ratio for flexible, crack-free fabric painting.
- Use a shadow box at least 1.5 inches deep to accommodate layered fabric and embellishments.
- Create faux quilting with dimensional fabric paint or by embossing damp paint with a stylus.
- Compose using the rule of thirds—place your focal point at an intersection for visual interest.
- Let painted fabric cure 48 hours before sealing the box to prevent moisture and mold.
- Host a shadow box quilt painting party: provide prompts and communal supplies for a creative gathering.
Choose the Right Shadow Box: Depth Matters More Than Size
A shadow box with at least 1.5 inches of interior depth gives your quilted layers room to breathe without squishing. I learned this the hard way after cramming a 2-inch-thick mini quilt into a 1-inch box—it looked like a fabric pancake. Look for boxes with a removable back and glass front; the glass protects your work from dust and UV rays (though avoid direct sunlight).
Acid-free backing is non-negotiable. Regular cardboard off-gasses and will yellow your fabric within a year. I use foam core board wrapped in unbleached muslin as a base. It’s sturdy, archival, and takes pins beautifully.
Don’t forget to measure your box’s interior opening before you start painting. A common mistake is buying a box that’s too small for your composition—always size up if you’re unsure. The extra space becomes part of the design, like a mat around a painting.
Paint Fabric with Acrylics + Textile Medium: The 2:1 Rule
Straight acrylic paint will crack and peel on fabric. Mix two parts soft-body acrylic with one part textile medium (like Liquitex or Golden). This keeps the paint flexible and washable—though you won’t be washing a shadow box, flexibility prevents flaking over time.
Apply thin layers with a soft synthetic brush. I like to water down the mixture slightly (a few drops of water) for a watercolor effect on cotton. Let each layer dry 10 minutes before adding more. For bold coverage, build up 3–4 layers rather than glopping it on.
A common mistake? Using heavy-body acrylics without medium. They sit on top of the fabric like plastic and look stiff. Also, test on a scrap first—some fabrics, like polyester, repel paint. Natural fibers (cotton, linen, silk) are your best friends here.
Create Quilted Texture Without a Sewing Machine
The secret to faux quilting is dimensional fabric paint and a steady hand. Use a fine-tip applicator (like Tulip’s slick paint) to draw stitch lines—dashes, zigzags, or swirls—directly onto your painted fabric. It dries raised, mimicking thread. For a softer look, try a stitch wheel or a blunt embroidery needle to emboss lines into damp fabric paint before it dries.
Another trick: layer thin batting behind your fabric and use a stylus to press quilted patterns from the back. The batting gives a puffy, trapunto effect. I once made a 4×4-inch mini quilt with 12 tiny quilted squares using this method—each square took about 3 minutes.
Avoid using a hot glue gun to attach embellishments; it stiffens the fabric and can melt synthetic fibers. Instead, use fabric glue (like Fabri-Tac) for beads, buttons, or tiny appliqués. Remember, less is more—too many 3D elements can crowd a small box.
Compose with the Rule of Thirds—Even in Miniature
A shadow box is a tiny stage. Divide the interior into a 3×3 grid and place your focal point (a painted quilt block, a miniature spool, or a tiny pair of scissors) at one of the intersections. This creates visual tension and interest. I often use a single quilt block as the hero, then add small painted details like a needle and thread in the lower third.
Balance color temperature: if your quilt is warm (reds, oranges), add a cool accent (teal, navy) to make it pop. For depth, layer elements: background fabric, mid-ground painted shapes, and foreground 3D objects. A common mistake is making everything the same scale—mix tiny buttons with larger painted motifs to create hierarchy.
Ask yourself: what story does this box tell? A half-finished quilt? A sewing basket? Let that guide your composition. Write a one-sentence narrative before you glue anything down.
Lighting and Hanging: The Finishing Touch
Shadow boxes look best with directional light. If you’re hanging it on a wall, consider a small LED picture light above it. Avoid direct sunlight—it will fade your painted fabric within months. I tested this with a swatch: after 6 weeks in a sunny window, the reds turned pink.
For hanging, use two nails or a French cleat for stability. A single nail lets the box tilt. If your box is heavy (glass + fabric + embellishments), anchor into a stud. Museum putty on the bottom corners prevents shifting.
A common mistake is sealing the box immediately. Let your painted fabric cure for 48 hours before closing it up. Trapped moisture can cause mold. Also, add a small silica gel packet inside if you live in a humid climate—just hide it behind the backing.
Gather Your Supplies: A Starter Kit for Under $30
You don’t need a studio. Here’s what I keep in my kit: a 5×7-inch shadow box ($8), a fat quarter of cotton fabric ($2), soft-body acrylics in 3 colors ($6), textile medium ($5), a fine-tip fabric paint pen ($3), and a pack of assorted buttons ($2). Total: $26. Add a glue stick and small brush from your junk drawer.
For fabric, look for tight-weave cotton like Kona cotton or quilting cotton. Thrifted men’s shirts are a goldmine—cut them into squares. I once made a whole series of shadow boxes from a single blue oxford shirt.
Don’t buy expensive brushes. A $2 synthetic round brush (size 2 and 6) handles all details. A common mistake is overbuying specialty tools before you know your style. Start simple, then add as you go.
Turn It into a Party: Host a Shadow Box Quilt Painting Night
Invite friends to bring their own shadow boxes and fabric scraps. Set up a communal table with paints, mediums, and brushes. Provide small cups for mixing and paper plates for palettes. I hosted a party for 6 people; each box took about 90 minutes, and everyone left with a unique piece.
Offer a prompt: “Paint a memory of a quilt you loved.” This sparks storytelling. Play soft music, serve tea, and let the creativity flow. A common mistake is making it too structured—let people experiment. Have a “mistake station” with scrap fabric to test colors.
At the end, take a group photo with all the boxes. It’s amazing how different they look. One friend painted a tiny quilt with glow-in-the-dark thread; another made a monochrome minimal piece. The variety is the magic.
The Hacks, Step by Step
- 1Measure your shadow box interior
Use a ruler to note width, height, and depth. Cut a piece of foam core 1/8 inch smaller than the opening for a snug fit. - 2Mix your paint
Combine 2 parts soft-body acrylic with 1 part textile medium. Stir with a toothpick until smooth. - 3Paint your fabric
Lay fabric flat on wax paper. Apply thin layers, letting each dry 10 minutes. Build color gradually. - 4Add quilted details
Use a fine-tip fabric paint pen to draw stitch lines. For texture, press a stylus into damp paint from the back. - 5Compose your scene
Arrange painted fabric and 3D elements on the backing. Use the rule of thirds to place your focal point. - 6Glue everything down
Use fabric glue for fabric and embellishments. Press gently and let cure for 24 hours. - 7Insert into shadow box
Slide the backing into the box. Secure with the provided tabs or tape. Add a silica packet if humid. - 8Hang and admire
Hang with two nails or a cleat. Avoid direct sunlight. Step back and enjoy your miniature quilt painting.
Quilt painting is like writing a tiny story with thread and color—every stitch, every brushstroke is a word in a visual poem.
Frequently Asked Questions
What kind of paint do you use for quilt painting?
Use soft-body acrylic paint mixed with textile medium in a 2:1 ratio. This makes the paint flexible and durable on fabric.
Can you paint on fabric and wash it?
Yes, if you use textile medium and heat-set the paint with an iron. However, for shadow boxes, washing isn't necessary.
How do you make a shadow box for a quilt?
Choose a shadow box with at least 1.5-inch depth, line it with acid-free backing, and mount your painted fabric or mini quilt using pins or fabric glue.
What is the best fabric for quilt painting?
Tight-weave natural fibers like cotton, linen, or silk work best. Avoid synthetic fabrics as they repel paint.
How long does quilt painting take?
A small shadow box project takes about 1–2 hours, plus drying time. Larger or more detailed pieces may take 3–4 hours.


