

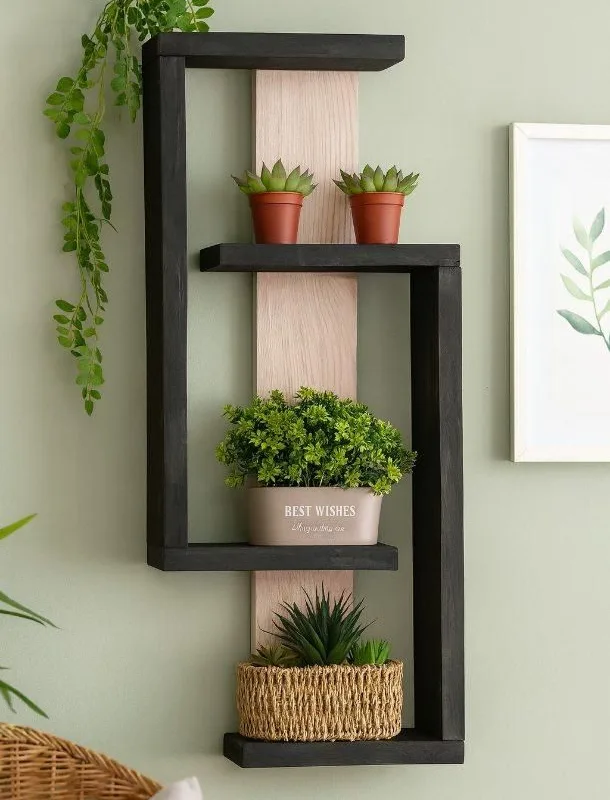
You see them behind warehouses, stacked and forgotten—rough wooden pallets that most people walk past. But with a little patience and a few clever tricks, those same pallets can become the centerpiece of a clean, modern living space. I’ve spent years transforming pallets into furniture that doesn’t look DIY, and I’m sharing the exact hacks that work, along with the mistakes to avoid.
Advertisements1
- Use HT pallets and avoid MB ones for indoor safety.
- Disassemble with a saw, not a crowbar, to save wood.
- Sand progressively up to 220-grit for a smooth, modern feel.
- Condition wood before staining to avoid blotches.
- Add hairpin legs or casters to modernize any pallet piece.
- Start with a small project like a planter to build confidence.
Why Pallet Projects Fail (and How to Avoid It)
The biggest reason pallet furniture looks rustic instead of modern is that we treat the wood as if it’s already finished. Most pallets are made of softwood like pine or poplar, which dents and stains easily. Without proper preparation, your sleek coffee table will look like a shipping crate.
Start by selecting heat-treated pallets (stamped with 'HT')—they’re safe for indoor use and free of chemical fumigants. Then, spend time on sanding. I always sand with 60-grit to remove rough spots, then 120-grit for smoothness, and finish with 220-grit for a silky touch. This extra half hour makes the difference between splinters and sophistication.
A common mistake is skipping the wood conditioner before staining. Pine absorbs stain unevenly, leaving blotchy patches. Apply a pre-stain conditioner, wait 15 minutes, and then stain—you’ll get a rich, even color that looks professionally done.
The Art of Disassembly: Save Your Wood (and Your Sanity)
Tearing apart a pallet with a crowbar is a recipe for cracked boards and broken nails. Instead, use a reciprocating saw to cut through the nails from the back, or a pallet buster tool if you have one. This preserves the full length of each board, which you’ll need for clean, modern lines.
Once disassembled, remove all nails and staples immediately. I use a claw hammer and pliers, but a magnetic nail finder speeds up the process. Then, sort the boards by width and condition—you’ll want the straightest ones for tabletops and frames.
A mistake I see often is trying to pull nails out with a pry bar from the side, which splits the wood. Always push the nail through from the opposite side, or cut it flush if it’s stubborn. Your future self will thank you when you’re not dealing with broken boards.
Sanding and Finishing: The Secret to a Modern Look
Modern design is all about smooth surfaces and subtle grain. After disassembling, sand each board thoroughly, starting with 80-grit to remove rough patches, then 120-grit, and finally 220-grit for a silky feel. This progressive sanding removes scratches and prepares the wood for an even finish.
For a modern aesthetic, I love a matte polyurethane or a hard wax oil. These protect the wood without a shiny, outdated gloss. Apply two thin coats, sanding lightly with 320-grit between coats. This gives a durable, hand-rubbed feel that’s perfect for coffee tables or shelves.
A common mistake is using a glossy finish—it highlights every imperfection and looks cheap. Also, don’t rush the drying time. Wait 24 hours before using the piece, or you’ll leave fingerprints in the finish.
Design Hacks: From Rustic to Refined
To make pallet furniture look intentional, focus on clean lines and minimal ornamentation. For a coffee table, use wide, straight boards for the top, and leave the sides open with a lower shelf—this adds function without visual weight. Paint or stain in a light gray or white to brighten a room, or use a dark walnut for contrast.
Incorporate modern elements like hairpin legs or metal casters to elevate the design. These are available at any hardware store and instantly transform a blocky pallet base into a sleek, mid-century-inspired piece.
A mistake is over-accessorizing. Keep the styling simple: a stack of books, a small plant, and a ceramic bowl. Let the wood’s natural beauty speak for itself.
Pallet Wood for Wall Art and Accents
Beyond furniture, pallet wood makes stunning wall art. Cut boards into uniform strips, arrange them in a herringbone pattern, and mount them on a plywood backing. This creates a textured feature wall that adds warmth without being rustic.
For a simpler project, create a floating shelf by attaching a single, sanded board to the wall with hidden brackets. Use it to display small plants or framed photos. The key is to keep the wood tone consistent—mix different shades for a curated look.
A common mistake is neglecting to seal the wood when using it in a humid environment, like a bathroom. Always apply a moisture-resistant finish to prevent warping.
Safety First: Tools, Precautions, and Pallet Selection
Before you start, equip yourself with safety glasses and a dust mask—sanding creates fine particles that are harmful to inhale. If you’re using power tools, read the manuals and keep your workspace well-ventilated.
Always source pallets that are marked 'HT' (heat-treated) and avoid those with 'MB' (methyl bromide), which is toxic. Inspect for spills or stains—if it smells like chemicals, don’t use it. I always wash pallets with a mild soap and water solution, then let them dry completely before sanding.
A mistake is using pallets that have been in contact with pesticides or unknown chemicals. When in doubt, leave it out.
Project Ideas: Start Small, Dream Big
If you’re new to pallet projects, start with a simple planter box or a small side table. These require minimal tools and give you a feel for the material. As you gain confidence, tackle a bench, a bed frame, or even a full wall panel.
For a modern planter, cut a pallet in half, add legs, and line the inside with landscape fabric. Fill it with herbs or succulents—it’s an instant conversation piece.
A mistake is taking on too large a project without experience. Measure twice, cut once, and remember that every expert was once a beginner.
The Hacks, Step by Step
- 1Choose the right pallets
Look for HT-stamped pallets, free of chemical treatments, and inspect for damage or stains. This ensures safety and better wood quality. - 2Disassemble with care
Use a reciprocating saw or pallet buster to cut nails, preserving board length. Remove all fasteners and sort the wood by condition. - 3Sand progressively
Start with 80-grit, then 120-grit, and finish with 220-grit for a smooth, splinter-free surface. This is crucial for a modern finish. - 4Condition and stain
Apply a wood conditioner before staining to prevent blotchiness. Use a matte polyurethane or wax oil for a contemporary look. - 5Add modern hardware
Incorporate hairpin legs, metal casters, or hidden brackets to elevate the design from rustic to refined. - 6Style minimally
Keep the decor simple—a few accent pieces let the wood shine. Avoid clutter to maintain a clean, modern aesthetic. - 7Seal for protection
Always finish with a protective sealant, especially for items used indoors or in humid areas, to prevent moisture damage.
The beauty of pallet wood lies not in its origin, but in the intention we bring to its transformation.
Frequently Asked Questions
Are pallets safe for indoor furniture?
Yes, if they are heat-treated (marked HT) and free of chemical spills. Avoid pallets with MB stamps, which indicate methyl bromide treatment.
How do you remove nails from pallets without splitting wood?
Use a reciprocating saw to cut the nails from the back, then push them out with a punch or pliers. This preserves the board's integrity.
What is the best finish for pallet wood to look modern?
A matte polyurethane or hard wax oil gives a smooth, low-sheen finish that highlights the natural grain without looking glossy.
Can I use pallet wood for outdoor furniture?
Yes, but you must seal it with an exterior-grade finish to protect against moisture and UV damage. Reapply annually for longevity.
How do I prevent pallet wood from splitting when screwing?
Drill pilot holes slightly smaller than your screw diameter, and countersink the heads. This reduces stress on the wood.


