

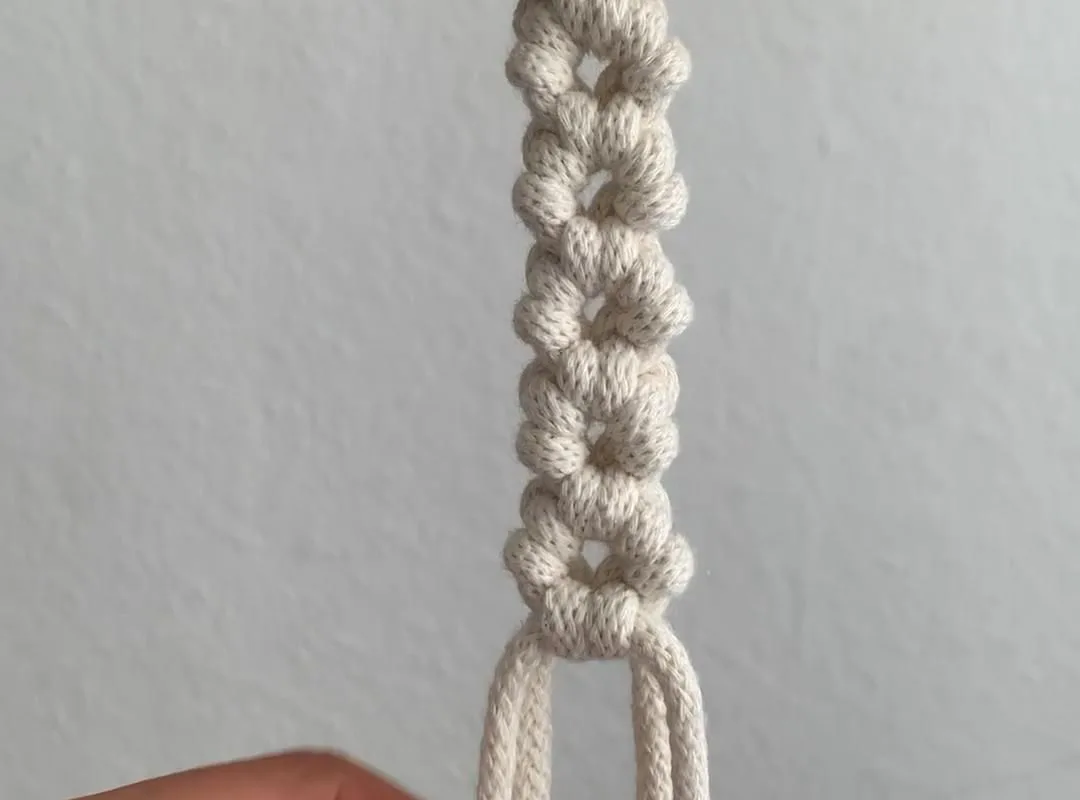
Most macrame looks homemade because of three fixable problems: loose knots, uneven tension, and cord that slips mid-project. Here are seven knot techniques I use after years of teaching workshops — each one changes how your piece hangs within a single row.
Advertisements1
- A lark's head knot slips because the dowel is too thin — the surface should be at least 4x your cord diameter.
- Twisting "square knot" panels are a direction error, not a tension error: alternate which cord crosses over.
- Cord length math: 4x finished drop for square knots, 6x for half hitches, 8x for wraps, plus 15cm.
- Pin holding cords at both ends or gravity will drift your tension by row ten.
- Steam only after the final row — mid-project steaming changes your tension and ruins consistency.
- Six tight gathering wraps beat twelve loose ones, and they don't need glue.
Why Your Lark's Head Knots Keep Slipping
A lark's head (also called a mounting knot) is the foundation of almost every wall hanging, and it's where most beginners lose the battle. The knot slips because you're mounting onto a dowel or ring that's too smooth and too thin for your cord weight — a 3mm cord on a 12mm dowel has almost no friction to grab. My rule: the mounting surface should be at least four times the cord diameter, and if it's bare wood, wrap it once with masking tape and peel it off to roughen the surface.
When you fold the cord in half, pin the loop flat against the dowel with your thumb and pull both tails simultaneously, not one at a time. Pulling one tail rotates the loop and creates that twisted, lopsided look you see in half the Pinterest fails. Test it: after mounting, the two tails should hang perfectly parallel. If they cross, you've rotated the loop — undo and redo it.
The common mistake is mounting cord with the loop facing the wrong way. The loop should sit behind the dowel with the tails coming toward you, so your first row of square knots sits flush against the front face.
The Tension Trick: Anchor, Don't Grip
Tension is the single biggest difference between a $15 Etsy piece and something that looks store-bought. Here's the analogy: think of your working cord as a fishing line and your holding cord as the rod. If you grip both tightly, the knot bunches. If you anchor the holding cord (the one you tie onto) and only tension the working cord (the one doing the tying), the knot slides into place cleanly and stays.
Practically: pin your holding cord to a corkboard or clip it to a C-clamp on a table edge. Then tie with your dominant hand and use your non-dominant hand only to guide, not squeeze. For square knots, pull the two working cords outward and down at a 45-degree angle, not straight down — this seats the knot without crushing the cord's twist.
A specific setting: if you're using 4mm cotton, your square knots should sit about 1cm apart in a tight pattern. If they're drifting to 2cm, your holding cord is moving. Re-anchor it. The mistake to avoid is compensating for loose knots by pulling harder on the next one — you'll just create a wavy column that never hangs straight.
Square Knot vs. Spiral: Know Which One You're Actually Tying
Half the tutorials online blur these together, and it matters. A square knot (also called a flat knot) alternates direction: left cord over, then right cord over. A spiral (half knot) always starts the same side, which is why it twists into a corkscrew. If your "square knot" panel is twisting, you've been tying half knots the whole time.
Here's the fix in one sentence: after your first half knot, the cord that was on the left must now go under and to the right for the second half. Watch the two filler cords in the middle — in a true square knot they stay parallel and flat; in a spiral they roll over each other. That's your visual tell.
The mistake: assuming a twisting panel is a tension problem. It's almost never tension — it's direction. Count your knots. If every single one starts with the left cord crossing over, you're making a spiral on purpose whether you meant to or not.
Use a Knotting Board and T-Pins (Yes, Really)
This sounds like craft-store upsell, but a foam knotting board with T-pins will improve your work more than any YouTube tutorial. The reason: macrame is a tension-and-gravity craft, and pinning your holding cords fixes both variables at once. You stop fighting the cord and start directing it.
Set up: a 30x40cm foam board, a pack of 5cm T-pins, and a clipboard for smaller pieces. Pin your dowel or ring at both ends so it can't rotate, then pin your holding cords every 10–15cm along their length. When you tie a row of square knots, the holding cord stays dead straight and your knots line up like a machine made them.
The mistake people make is pinning only the top and letting the bottom swing free. Gravity is not your friend here — a hanging project sags as you work, and by row ten your tension has drifted. Pin the bottom too, or work flat on the board and hang only at the end.
Cord Length Math That Stops You Running Short
Running out of cord two rows from the bottom is the most demoralizing thing in macrame, and it's entirely preventable with one formula. For a square knot pattern, each working cord needs to be about four times the finished length of the piece, plus 15cm for the tail. For a half-hitch or clove hitch pattern, use six times. For a full wrap or gathering knot, eight times.
Worked example: a 60cm wall hanging in square knots needs working cords of roughly 60 × 4 + 15 = 255cm each. Cut them longer than you think — cord is cheap, redoing a panel is not. Keep a scrap bin of 20cm+ offcuts; they're perfect for testing a new knot before you commit it to the real piece.
The mistake: measuring against the dowel instead of the finished drop. Your cord length is driven by how far the piece hangs, not how wide it is. I've watched people cut 2m cords for a 90cm-wide piece and then wonder why they have 60cm of waste per cord.
Gathering Knots and Finishing Without Glue
A gathering knot (also called a wrap knot) is how you bundle your tails into a clean tassel, and it's the move that makes a piece look finished. Lay all your tails together, cut a separate 30cm cord, fold one end into a loop pointing down, and wrap tightly upward six to eight times. Thread the working end through your loop and pull the top tail to lock it under the wraps. Trim the excess flush.
The reason this beats glue: it's structural, it's removable, and it doesn't yellow or crack. If you must secure it, a single drop of fabric glue on the back of the wrap — not the front — is all you need. Never glue the tassel ends; you'll get stiff, crusty tips that catch the light wrong.
The mistake: wrapping too loosely. Each wrap should sit snug against the last with no gaps. If you can see daylight between wraps, pull harder on the working cord as you go. Six tight wraps look better than twelve loose ones every time.
Fray Check and Steam: The Finishing Moves Nobody Mentions
Two minutes of finishing separates a piece that photographs well from one that doesn't. First, steam. Hold a garment steamer (or an iron on the lowest steam setting, 10cm away — never touching) over your finished piece for 20–30 seconds per section. Cotton relaxes, knots settle, and the whole thing hangs straighter. This is not cosmetic fluff; it's the same principle as blocking a knit.
Second, fray check on your cut ends if you're using cotton or jute. A thin bead on the very tip stops unraveling without stiffening the tassel. Let it dry flat for ten minutes before hanging.
The mistake: steaming before you've finished all your rows. Steam relaxes the cord, which changes your tension mid-project and makes the next row inconsistent. Finish the piece, then steam it once, top to bottom.
The Hacks, Step by Step
- 1Roughen your mounting surface
Wrap bare dowels or rings once with masking tape and peel it off to add friction — this stops lark's head knots from sliding before you tie a single square knot. - 2Pin both ends of every holding cord
Use T-pins on a foam board to lock holding cords every 10–15cm, top and bottom. This removes gravity and rotation as variables so your rows stay level. - 3Check knot direction every row
Watch the two center filler cords — parallel means square knot, rolling means spiral. Fix it on row one, not row ten. - 4Cut cord at 4x the drop length
For square knots, multiply finished hanging length by four and add 15cm. Use 6x for half hitches and 8x for wraps. - 5Pull working cords at 45 degrees
Seat square knots by pulling outward and down, never straight down, to avoid crushing the cord's twist. - 6Wrap gathering knots tight and upward
Six to eight snug wraps with no visible gaps, locked with the loop-pull method — no glue needed on the front. - 7Steam once, at the very end
Hold a steamer 10cm away for 20–30 seconds per section after all rows are complete, then let it dry flat.
Macrame isn't a tension problem you solve by pulling harder — it's a direction and anchoring problem you solve by pinning your holding cords and checking which way the knot actually went.
Frequently Asked Questions
Why do my macrame square knots keep twisting?
You're tying half knots, not square knots. Alternate the starting side every knot — left over, then right over — and watch the center filler cords stay parallel instead of rolling.
How much cord do I need for a macrame wall hanging?
Multiply your finished hanging length by four for square knot patterns and add 15cm per cord. Use six times for half hitches and eight times for wrap knots.
What's the difference between a lark's head knot and a square knot?
A lark's head knot mounts cord onto a dowel or ring; a square knot is a pattern knot tied with four cords. You mount with lark's heads, then build the design with square knots.
Do I need a knotting board for macrame?
No, but a foam board with T-pins will improve your tension more than any tutorial. Pinning holding cords at both ends stops rotation and gravity drift as you work.
How do I stop macrame cord from fraying?
Apply a thin bead of fray check to the cut tips and let it dry flat for ten minutes. Avoid gluing tassel ends — it stiffens them and they catch light badly.


