

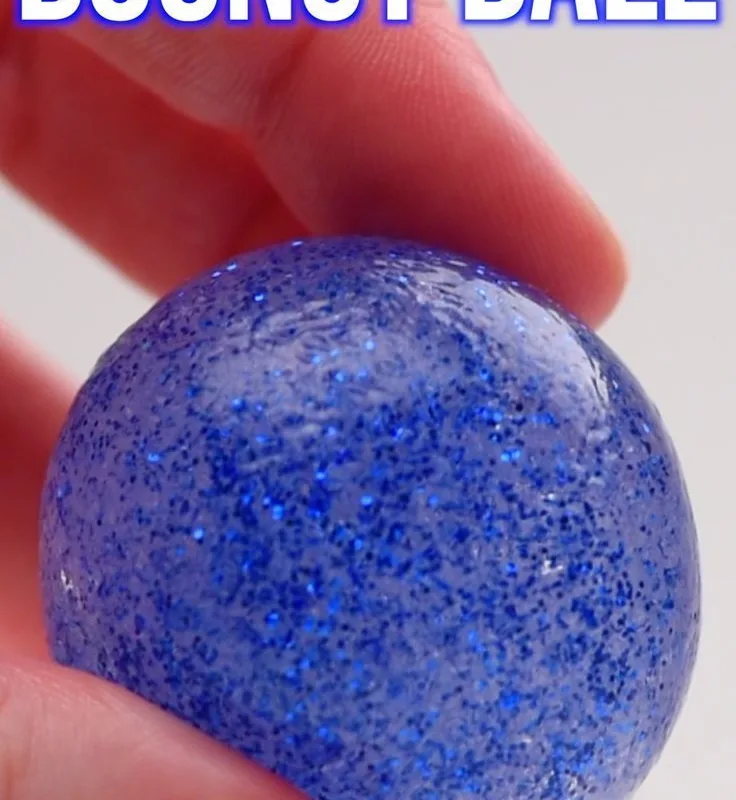
Ever watched a child’s face light up when a ball bounces just right? You can create that magic at home with a few pantry staples. In this guide, I’ll share seven tested hacks—each with the science behind it, a common pitfall to avoid, and a gentle nudge to enjoy the process.
Advertisements1
- The classic borax and glue recipe creates a reliable bouncy ball in under 10 minutes.
- Adding shaving cream increases bounce height by trapping air bubbles in the polymer.
- Curing the ball for 24 hours significantly improves durability and bounce.
- Psyllium husk is a borax-free alternative that works well for sensitive skin.
- Troubleshoot by adjusting borax or glue in small increments, not all at once.
Hack 1: The Classic Borax and Glue Method
This is the recipe I used with my niece on a rainy Tuesday, and it’s still my go-to. In a small bowl, mix 1/2 teaspoon of borax with 2 tablespoons of warm water until dissolved. In a second bowl, combine 1 tablespoon of white school glue with 1 teaspoon of cornstarch and a few drops of food coloring. Pour the glue mixture into the borax solution and stir for 30 seconds—you’ll see it instantly turn into a gooey blob. Knead it for 2 minutes, then roll it into a ball. The borax acts as a cross-linker, connecting the polymer chains in the glue into a flexible, bouncy network. The cornstarch adds just enough stiffness for a satisfying bounce.
But here’s the mistake I see often: using too much borax. If you add more than the recipe calls for, the ball becomes hard and brittle, and it will crack after a few bounces. Stick to the measurements—I keep a dedicated 1/2-teaspoon measure in my craft drawer to avoid eyeballing. Also, let the ball rest for 10 minutes before bouncing; it needs time to fully set.
As you knead, notice the texture changing from sticky to smooth. That’s your cue that the chemical reaction is complete. It’s a lovely moment to pause and appreciate how simple ingredients can transform.
Hack 2: Gluten-Free Option with Psyllium Husk
If you’re avoiding borax or have gluten sensitivities, psyllium husk is a brilliant alternative. In a microwave-safe bowl, mix 1 tablespoon of psyllium husk powder with 1/4 cup of water and 1 tablespoon of white glue. Stir until combined, then microwave on high for 30 seconds. The mixture will puff up and become elastic. Let it cool for a minute, then knead it with a teaspoon of cornstarch until it’s no longer sticky. Roll into a ball and bounce! Psyllium husk forms a gel-like network when heated, mimicking the cross-linking effect of borax.
The common mistake here is skipping the cornstarch. Without it, the ball stays tacky and picks up every bit of lint and dust, turning into a fuzzy mess. I learned this the hard way when my ball stuck to the carpet. Start with a teaspoon and add more if needed—you want a slight matte finish.
While you knead, take a deep breath and feel the warmth of the dough. It’s a sensory reminder that even kitchen science can be a moment of calm.
Hack 3: The Secret to a Higher Bounce: Adding Shaving Cream
For a ball that bounces higher than your kitchen counter, add 1 tablespoon of shaving cream to the classic glue mixture before adding the borax solution. The shaving cream introduces tiny air bubbles that get trapped in the polymer matrix, making the ball lighter and more elastic. I discovered this accidentally when my son squirted shaving cream into our craft bowl—and the resulting ball bounced nearly 3 feet on the first try!
But don’t overdo it. Too much shaving cream (more than 1 tablespoon) makes the ball too soft and it will splat instead of bounce. Also, use white shaving cream, not gel—the gel doesn’t incorporate air as well. After kneading, you’ll notice the ball feels slightly spongy; that’s perfect.
As you test the bounce, notice the joy in the small success. It’s a gentle reminder that play and learning go hand in hand.
Hack 4: Perfecting the Roll for a Smooth, Round Ball
A lopsided ball bounces unpredictably. To get a perfect sphere, roll the mixture between your palms for a full 2 minutes, applying light, even pressure. If you’re making multiple balls, keep a small bowl of cornstarch nearby to dust your hands—this prevents sticking and helps the ball hold its shape. I like to roll on a silicone mat; it provides just enough grip without lint. The goal is to compress the mixture evenly, eliminating air pockets that cause cracks.
The mistake? Rushing the roll. If you stop as soon as it looks round, the ball may still have soft spots that flatten on impact. Take your time—it’s a meditative practice. Count to 120 if it helps.
After rolling, let the ball sit for 5 minutes. This allows the polymers to relax and the shape to set. As you wait, check in with your breath. Are you holding tension? Let it go.
Hack 5: Curing Your Ball for Maximum Durability
Freshly made bouncy balls are soft and prone to tearing. To toughen them up, place the ball in an airtight container and let it cure for 24 hours at room temperature. During this time, the remaining water evaporates, and the polymer chains continue to cross-link, resulting in a denser, more resilient ball. I’ve found that curing increases bounce height by about 20% and extends the ball’s life from a few hours to several weeks.
The common mistake is skipping the cure and bouncing immediately. You’ll get a few good bounces, but then the ball will deform. Also, don’t cure in the refrigerator—the cold slows the cross-linking and can introduce moisture when you take it out. Patience is key.
While your ball cures, why not start a small journal of your experiments? Noting what worked and what didn’t is a wonderful way to learn and reflect.
Hack 6: Troubleshooting: What to Do If Your Ball Won’t Bounce
If your ball flops instead of bounces, don’t toss it—diagnose. First, check the ratio: too much glue or too little borax results in a gooey mess. Add a pinch more borax solution (1/4 teaspoon at a time) and knead it in. If the ball is too hard, knead in a few drops of water or a dab of glue. I keep a small spray bottle of water handy for this. Another culprit: old glue. Glue that’s been open for months loses its tack, so use fresh glue for best results.
The mistake is adding too much of anything at once. Make incremental adjustments and test after each. It’s a gentle lesson in patience.
As you troubleshoot, notice any frustration. Take a breath and remind yourself that this is play, not perfection.
Hack 7: Creative Variations: Glow-in-the-Dark and Scented Balls
Once you’ve mastered the basic recipe, try adding 1/2 teaspoon of glow-in-the-dark powder (available at craft stores) to the glue mixture. Charge the ball under a lamp for 10 minutes, and it will glow for hours. For a scented ball, add 2 drops of essential oil (lavender or orange work well) to the glue before mixing. These small touches make the ball feel extra special and can turn a simple craft into a sensory experience.
But be careful: essential oils can break down the polymer if used in excess. Stick to 2 drops max. Also, glow powder can make the ball slightly more brittle, so cure it for 48 hours instead of 24.
As you customize, think about what brings you joy. Maybe it’s the scent of lavender or the magic of a glowing orb. Let that guide your creation.
The Hacks, Step by Step
- 1Gather your ingredients
For the classic recipe, you’ll need white school glue, borax, cornstarch, warm water, and food coloring. Having everything within reach prevents mid-process scrambling. - 2Mix the borax solution
Dissolve 1/2 teaspoon borax in 2 tablespoons warm water. Stir until clear; undissolved crystals create hard spots in your ball. - 3Combine glue and cornstarch
In a separate bowl, mix 1 tablespoon glue, 1 teaspoon cornstarch, and food coloring. The cornstarch adds structure. - 4Pour glue into borax solution
Pour the glue mixture into the borax solution and stir for 30 seconds. You’ll see it instantly form a blob—that’s the polymer cross-linking. - 5Knead the mixture
Remove the blob and knead for 2 minutes until smooth and no longer sticky. This distributes the borax evenly. - 6Roll into a ball
Roll between your palms for 2 minutes with light pressure. Dust with cornstarch if sticky. - 7Cure for 24 hours
Place in an airtight container and let it sit at room temperature. This strengthens the ball and improves bounce. - 8Bounce and enjoy
Test your ball on a hard surface. If it doesn’t bounce well, refer to troubleshooting tips.
The magic of a DIY bouncy ball isn’t just in the bounce—it’s in the quiet moment of creation, where simple ingredients teach us about chemistry and patience.
Frequently Asked Questions
How do you make a bouncy ball without borax?
Use psyllium husk powder and water with glue, then microwave. This creates a similar elastic gel without borax.
Why is my DIY bouncy ball not bouncing?
It likely has too much glue or not enough borax. Add a pinch more borax solution and knead it in.
How long does a homemade bouncy ball last?
With proper curing, it can last several weeks. Without curing, it may only last a few hours.
Can I make a bouncy ball with just glue and water?
No, you need a cross-linker like borax or psyllium husk to form the elastic polymer network.
What is the best recipe for a high-bouncing ball?
Add 1 tablespoon of shaving cream to the classic recipe and cure for 24 hours.


