

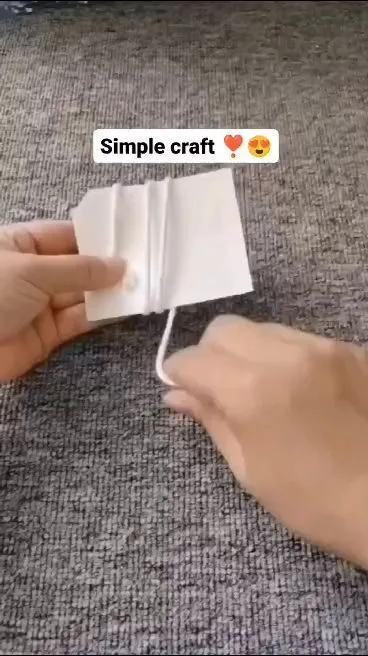
Ever stared at a blank wall or a rainy afternoon and wished you had a quick, satisfying craft to dive into? You're not alone. These seven DIY simple craft ideas are designed to be done in under an hour, with minimal supplies, and maximum joy. Let's turn that spark into something you can hold in your hands.
Advertisements1
- Simple crafts are gateways to bigger creative projects—start small to build momentum.
- Always backstitch when sewing to prevent unraveling; double-knot when tying.
- Use dry, pressed flowers for candles to avoid mold and bubbles.
- Multiple balloon layers make stress balls more durable.
- Thin, even coats of Mod Podge prevent wrinkling on decoupage.
- Measure twice, cut once—especially when upcycling clothing.
Why Simple Crafts Are Your Secret Weapon for Creativity
Simple crafts are like the warm-up jog before a marathon—they get your creative muscles loosened up without the pressure of a big project. When you finish a small craft, you get a hit of dopamine that fuels your motivation to keep creating. Plus, they're perfect for using up leftover supplies and experimenting with new techniques.
But don't mistake 'simple' for 'boring'. A simple craft can be a gateway to a new hobby, a personalized gift, or a meditative break from screens. The key is to focus on the process, not perfection. As Priya always says, 'Messy first drafts are where the magic hides.' So grab your glue gun and let's get started.
Hack 1: Turn Old Jars into Glowing Lanterns
Grab a clean glass jar (like a pasta sauce jar), some tissue paper, and Mod Podge. Tear the tissue paper into small pieces, brush the jar with Mod Podge, and layer the tissue paper on. Once dry, add a coat of Mod Podge on top to seal. Pop in a tea light or fairy lights, and you've got a cozy lantern.
Why it works: The tissue paper diffuses the light, creating a soft, warm glow. The Mod Podge acts as both adhesive and sealant, so it's durable. Mistake to avoid: Don't use too much Mod Podge or the paper will wrinkle and tear. A thin, even coat is key.
Hack 2: Create a No-Sew Fabric Coaster in 10 Minutes
Cut two 5×5 inch squares of cotton fabric (fat quarters work great). Place them right sides together and sew around the edges with a 1/4 inch seam, leaving a 2-inch gap. Turn right side out, press, and topstitch around the entire edge to close the gap. Voila—a reversible coaster!
Why it works: The two layers give it weight and absorbency, and topstitching ensures a crisp edge. Mistake to avoid: Forgetting to backstitch at the start and end of your seam, which can cause the stitches to unravel. Always backstitch for security.
Hack 3: Make a Pom-Pom Bookmark with Yarn
Wrap yarn around a fork (about 50 times for a medium pom-pom). Slide it off, tie a separate piece of yarn tightly around the center, and cut the loops. Trim into a sphere. Attach to a paperclip with a short piece of yarn. Instant cute bookmark!
Why it works: The fork method creates uniform loops, making a dense, round pom-pom. Mistake to avoid: Cutting the loops before tying the center securely—if the tie isn't tight, your pom-pom will fall apart. Double-knot it!
Hack 4: Upcycle a T-Shirt into a Tote Bag
Lay an old t-shirt flat, cut off the sleeves and neckline to create straps and an opening. Turn inside out and sew the bottom closed (or use fabric glue for no-sew). Turn right side out, and you have a stretchy, reusable bag.
Why it works: T-shirt fabric is durable and stretches to fit contents. Mistake to avoid: Cutting the neckline too deep—measure against a favorite bag to get the strap length right. Also, if sewing, use a ballpoint needle to avoid skipped stitches on knits.
Hack 5: Craft a Nature-Inspired Wall Hanging from Sticks and String
Collect a few straight sticks from your yard. Tie them together in a triangle or square with twine. Weave yarn or string across the frame in a pattern, adding beads or feathers as you go. Hang it on the wall for a boho touch.
Why it works: The sticks provide a rustic, organic frame, while the weaving adds texture and color. Mistake to avoid: Using green sticks that may crack as they dry—opt for dry, fallen branches. Also, don't pull the yarn too tight or the frame will warp.
Hack 6: Pressed Flower Candles for a Touch of Nature
Melt soy wax in a double boiler. While it melts, press small flowers (like pansies) between two sheets of parchment paper with a heavy book for an hour. Pour wax into a mold, let it set for 5 minutes, then place flowers on the surface and pour a thin layer of wax over them. Let cool completely.
Why it works: The thin top layer seals the flowers, preserving their color. Mistake to avoid: Using fresh flowers with moisture—they'll cause air bubbles and mold. Always dry or press them first.
Hack 7: DIY Stress Balls from Balloons and Rice
Stretch a balloon over a funnel and fill with rice (about 1/2 cup). Tie off the balloon. Cut the neck off another balloon and wrap it around the first for extra durability. Repeat with a third balloon if desired. Squeeze away stress!
Why it works: Rice provides a satisfying squish, and multiple balloon layers prevent breakage. Mistake to avoid: Overfilling—leave some room for the rice to move. Also, use a funnel to avoid a messy spill.
The Hacks, Step by Step
- 1Gather Your Supplies
Before starting any craft, collect all materials. This prevents mid-project scrambles and keeps your creative flow uninterrupted. - 2Set Up a Dedicated Workspace
Clear a table or counter. Cover it with newspaper or a mat. Having a designated area signals to your brain that it's time to create. - 3Start with a Warm-Up
Do a quick 5-minute craft like a doodle or a simple paper fold. It loosens your hands and gets ideas flowing. - 4Embrace Imperfection
Don't aim for perfection on the first try. Remember, messy first drafts lead to beautiful final pieces. Laugh off mistakes and keep going. - 5Take Breaks
If you feel stuck, step away for 10 minutes. A fresh perspective often sparks a solution. - 6Show Off Your Creation
Share your finished craft with a friend or on social media. Positive feedback boosts confidence and inspires others.
The best craft is the one you actually finish—so keep it simple, keep it fun, and let your creativity flow.
Frequently Asked Questions
What are some easy DIY crafts for beginners?
Start with no-sew projects like fabric coasters or pom-pom bookmarks. They require minimal tools and yield quick results.
How can I make my DIY crafts look professional?
Pay attention to finishing details: press seams, trim loose threads, and use quality materials. A little extra care goes a long way.
What craft supplies should I always have on hand?
Keep a stash of Mod Podge, yarn, fabric scraps, glue gun, and basic sewing kit. These cover most simple projects.
How do I avoid common mistakes in DIY crafts?
Read instructions fully before starting and don't rush. Common mistakes include using too much glue, not backstitching, and skipping drying times.
Can I sell my DIY crafts online?
Absolutely! Platforms like Etsy are perfect for handmade items. Just ensure you comply with safety regulations for items like candles.


