

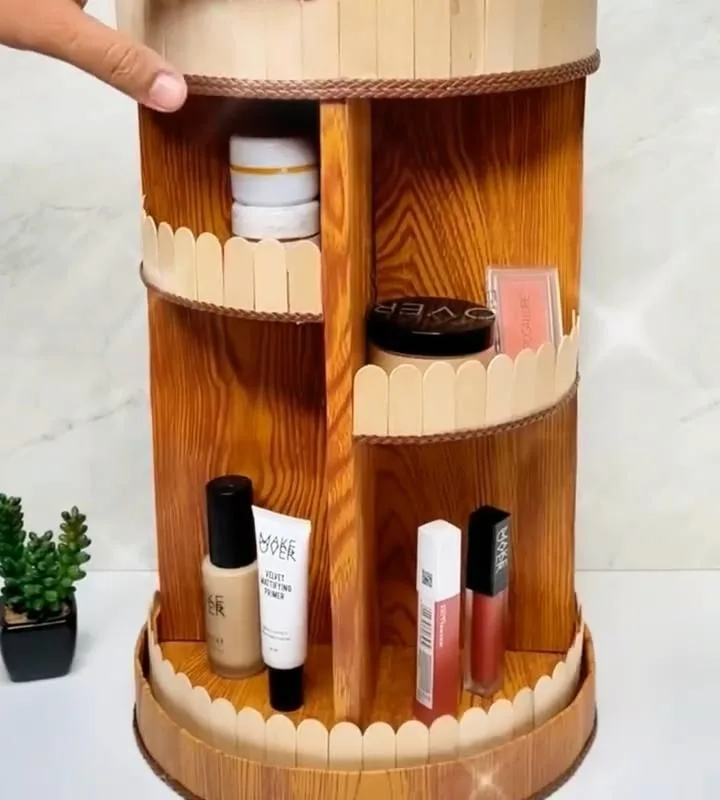
Ever knocked over a tower of lipsticks while rushing out the door? A DIY rotating makeup organizer solves that—and you can build one from a lazy Susan and a few cheap materials. Here are seven hacks, each with the why and the watch-outs, so you get a functional, good-looking organizer without the trial and error.
Advertisements1
- A Lazy Susan bearing is the best base for smooth rotation—avoid cake turntables.
- Tiered storage maximizes vertical space and keeps categories separate.
- Secure small items with acrylic drawers and magnetic strips.
- A non-slip pad and spin test ensure stability and prevent wobbles.
- Seal wooden components to protect against spills and humidity.
- Keep heavier items on lower tiers to prevent tipping.
Why a Rotating Organizer Beats a Static One
A rotating organizer isn't just a pretty face—it's a functional upgrade. With a static tray, you're constantly reaching over front items to get to the back, which leads to knocked-over bottles and a cluttered counter. A rotating base lets you spin the entire collection to face you, so everything is accessible with a flick of the wrist.
Think of it like a Lazy Susan in a corner cabinet: it turns dead space into usable space. For makeup, that means you can store more items in the same footprint without sacrificing visibility. Plus, it makes your vanity feel like a boutique display—and who doesn't want that?
But here's the catch: not all rotating bases are created equal. A cheap plastic one might wobble or stick, especially if you overload it. We'll cover how to choose the right base in Hack #1.
Hack #1: Use a Lazy Susan Base (Not a Cake Turntable)
The foundation of any rotating organizer is the base. A Lazy Susan bearing (the kind used in corner cabinets) is ideal because it's designed for heavy loads and smooth rotation. You can buy a 6- or 9-inch one for under $10 online or at a hardware store. Avoid cake turntables—they're meant for lightweight decorating and often have a small lip that makes attaching shelves tricky.
Why it works: Lazy Susan bearings have steel ball bearings and a low profile, so they spin effortlessly even when fully loaded. They also come with pre-drilled holes for easy mounting.
Common mistake: buying a base that's too small for your collection. Measure your counter space and your makeup footprint first. A 9-inch base fits most vanity setups; if you have a tiny shelf, go for 6-inch.
Hack #2: Stack Cake Tins or PVC Couplings for Tiered Storage
To create tiers, you don't need fancy acrylic. Stack cake tins of decreasing sizes (like a wedding cake) and secure them with a central threaded rod. Or, for a more industrial look, use PVC couplings and flanges to build a sturdy frame. Both methods are cheap and customizable.
Why it works: Tiered storage maximizes vertical space, letting you separate categories—lipsticks on top, brushes in the middle, bottles on the bottom. It also looks intentional and stylish.
Common mistake: using lightweight materials that can't handle the weight of glass bottles. Cake tins are sturdy, but if you go the PVC route, make sure to glue the joints or use screws—otherwise, it'll wobble.
Hack #3: Repurpose a Wooden Salad Bowl as the Base
For a rustic-chic look, flip a wooden salad bowl upside down and attach a Lazy Susan bearing to the bottom. Then, screw a smaller plate or tray on top to hold your makeup. This creates a stable, wide base that won't tip over.
Why it works: The bowl's wide rim distributes weight evenly, and the wood adds warmth to your decor. It's also a great way to upcycle a thrifted bowl.
Common mistake: not sealing the wood. Makeup spills and humidity can warp or stain the wood, so apply a coat of polyurethane or spray sealer before assembling.
Hack #4: Add Acrylic Drawers for Small Items
Small items like eyeliner pencils, tweezers, and hair ties tend to get lost in open organizers. Attach small acrylic drawers (available at craft stores) to the sides of your rotating tower using double-sided tape or small screws.
Why it works: Drawers keep tiny items contained and dust-free, and they add a professional look. Plus, they're see-through, so you can find what you need without digging.
Common mistake: placing drawers too high, which can make the tower top-heavy. Keep heavier drawers near the bottom for stability.
Hack #5: Use Magnetic Strips for Metal Tools
If you have metal tools like tweezers, nail clippers, or bobby pins, attach a magnetic strip (like a knife magnet) to the side of your organizer. They'll stay put and be easy to grab.
Why it works: Magnets are a space-saving way to store metal items without clutter. It also keeps them within reach.
Common mistake: using a weak magnet that can't hold heavier tools. Test the magnet with your heaviest item before attaching.
Hack #6: Create a Brush Holder from a Plastic Cup
Cut a plastic cup to the desired height, sand the rim smooth, and attach it to the top tier with hot glue. Fill it with rice or beads to keep brushes upright.
Why it works: Brushes stay organized and easy to access, and the rice/beads absorb moisture and keep bristles from splaying.
Common mistake: not sanding the cut edge, which can scratch your brushes. Also, avoid using a cup that's too tall—it might block your view of other items.
Hack #7: Finish with a Non-Slip Pad and a Spin Test
Attach a non-slip pad (like shelf liner) to the bottom of your organizer to prevent it from sliding on the counter. Then, give it a spin to check for wobbles. Adjust the base or redistribute weight as needed.
Why it works: A non-slip pad adds stability and protects your counter from scratches. A spin test ensures smooth operation.
Common mistake: skipping the pad and ending up with a wobbly organizer that drives you crazy every morning. A $2 pad solves this.
The Hacks, Step by Step
- 1Measure your space and inventory
Before buying anything, measure your counter depth and width, and count how many items you need to store. This prevents buying a base that's too small or too large. - 2Choose your base
Buy a Lazy Susan bearing (6- or 9-inch) or repurpose a wooden bowl. Ensure it's sturdy and spins smoothly. - 3Build the tiers
Stack cake tins or PVC couplings, securing them with a central rod or glue. Test stability as you go. - 4Attach drawers and magnetic strips
Use double-sided tape or screws to attach acrylic drawers and magnetic strips to the sides. Keep heavier items low. - 5Add a brush holder
Cut a plastic cup to size, sand the rim, and glue it to the top. Fill with rice or beads. - 6Finish with a non-slip pad
Cut a piece of shelf liner to fit the bottom of the base and attach it. This prevents sliding. - 7Spin test and adjust
Give the organizer a spin. If it wobbles, check that the base is level and redistribute weight. Add shims if needed.
The secret to a wobble-free rotating organizer is a quality Lazy Susan bearing and a spin test before you load it up.
Frequently Asked Questions
What is the best material for a DIY rotating makeup organizer?
A Lazy Susan bearing combined with sturdy materials like wood or PVC. These handle weight well and spin smoothly.
How do I prevent my rotating organizer from wobbling?
Use a non-slip pad under the base and ensure weight is evenly distributed, with heavier items on lower tiers.
Can I make a rotating organizer without a Lazy Susan?
Yes, you can use a cake turntable or even a round tray with a central pivot, but Lazy Susan bearings are more durable and spin better.
How much weight can a DIY rotating organizer hold?
A standard Lazy Susan bearing can hold 20-30 pounds if properly mounted. Distribute weight evenly to avoid tipping.
What are some common mistakes to avoid?
Using a weak base, overloading the top tier, and skipping the non-slip pad are common pitfalls. Measure your space first.


