

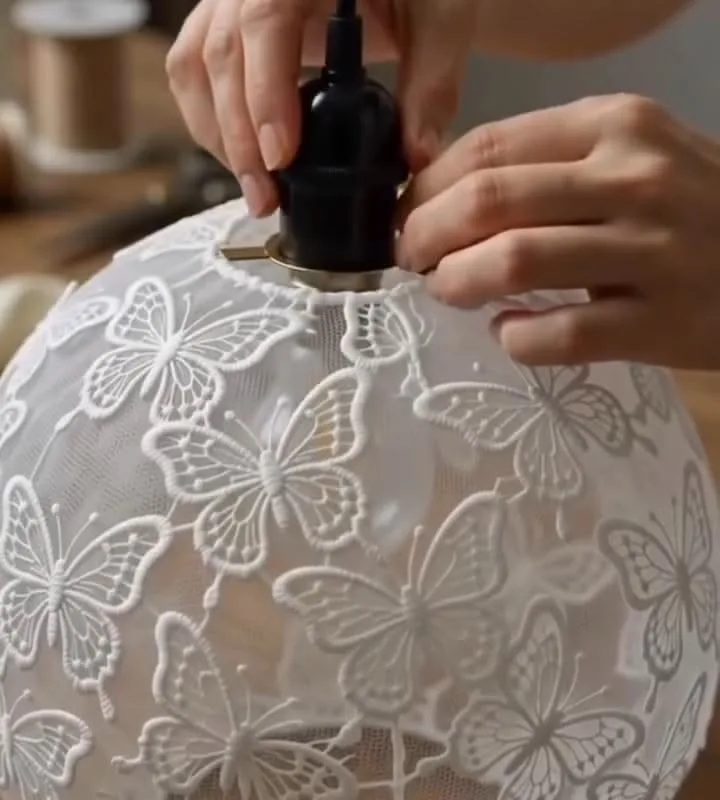
Ever scrolled past those dreamy, ethereal hanging lights on Pinterest and thought, 'I could never make that'? Well, grab a cup of tea and let's prove that voice wrong—with net cloth, a few clever hacks, and a little bit of magic, you'll have a showstopper in an afternoon.
Advertisements1
- Net cloth is the ultimate diffuser—it turns harsh light into a soft, ethereal glow and hides imperfections.
- The no-sew gathering technique with elastic saves hours and is beginner-friendly.
- The balloon method creates perfectly round lanterns; use equal parts glue and water for the best results.
- Always use LED bulbs to prevent heat buildup and fire hazards.
- Secure your hanging light with proper anchors—weight-test before trusting.
- Layer colors and textures for depth; don't be afraid to experiment with dyes and embellishments.
Why Net Cloth Is the Secret Ingredient for Ethereal Hanging Lights
Net cloth—whether it's tulle, mesh, or fishnet—is like the fairy dust of the craft world. It's lightweight, inexpensive, and when layered, it diffuses light into a soft, dreamy glow that solid fabrics just can't match. Think of it as a cloud catcher: the open weave lets light dance through, creating patterns that shift as the bulb warms up. Plus, it's forgiving; mistakes disappear into the texture. I once made a pendant from leftover black tulle and a $3 wire basket, and guests still ask where I bought it. The key is to choose a net with a fine mesh for a subtle glow, or a wider mesh for a more dramatic, sculptural look. And remember, natural fibers like cotton mesh can be dyed with tea or fabric paint for a custom hue—just test a swatch first. What colors would you dare to try?
Hack #1: The No-Sew Gathering Technique That Saves Hours
Forget sewing—this hack uses simple knots and elastic to gather net cloth into billowy clouds. Cut your tulle into strips about 6 inches wide and 2 feet long. Then, take a long piece of elastic (1/4 inch wide) and tie a knot at one end. Loop the tulle strips around the elastic, tying each with a simple overhand knot, pushing them close together. The elastic allows you to stretch the gathered net over your frame like a shower cap. Why it works: the elastic provides tension, so the net stays put without sagging. I used this method for a nursery mobile and it held up for years. Common mistake: tying knots too tightly, which creates lumps. Leave a little breathing room—think of it as arranging flowers, not packing a suitcase.
Hack #2: The Balloon Method for Perfectly Round Lanterns
This is where net cloth becomes truly sculptural. Inflate a balloon to your desired size (a 12-inch balloon makes a lovely lantern). Mix equal parts white school glue and water. Dip strips of net cloth into the mixture, squeeze out excess, and drape them over the balloon, overlapping in a crisscross pattern. Let it dry for 24 hours—yes, patience is a virtue here. Once dry, pop the balloon and peel it away. You're left with a stiff, translucent shell that looks like spun sugar. Insert a battery-operated fairy light or a small LED bulb on a cord. Why it works: the glue stiffens the net, and the balloon ensures a uniform shape. I made a set of three in different sizes and hung them at varying heights above my dining table; the effect was magical. Common mistake: using too much glue, which makes the net heavy and prone to drooping. Aim for a thin, even coat—like dressing a salad, not soaking a sponge.
Hack #3: Upcycle a Wire Basket into a Boho Pendant
Thrift stores are goldmines for wire baskets—the uglier, the better, because they'll be hidden. Find a basket with an open weave; a wire wastebasket works perfectly. Spray-paint it in a metallic color like rose gold or matte black if desired. Then, cut a piece of net cloth large enough to wrap around the outside and tuck inside. Use a hot glue gun to secure the net to the top rim, gathering it as you go to create folds. Why it works: the basket provides structure, while the net softens the industrial look. I found a $2 wire basket at Goodwill and turned it into a pendant that looks like it came from Anthropologie. Common mistake: not securing the net at the bottom, causing it to sag. Add a few discreet stitches or glue dots at the base to keep it taut.
Hack #4: Layer Net with Fairy Lights for a Starry Night Effect
This hack is all about the glow. Start with a simple net cloth pendant—either the balloon method or the wire basket. Then, take a string of battery-operated copper wire fairy lights (20-30 LEDs) and weave them through the layers of net, securing with small clear tape or hot glue. The lights should be distributed evenly, not clumped. Why it works: the net diffuses the tiny points of light, making them look like distant stars. I used warm white lights for a cozy feel, but cool white gives a modern, icy vibe. For a truly magical effect, use lights with a twinkle setting. Common mistake: using lights with a bulky battery pack that's visible. Hide the pack inside the pendant or run the wire down the cord and secure the pack near the ceiling. Also, ensure the lights don't overheat—LEDs are safe, but incandescent fairy lights can get warm and pose a fire risk.
Hack #5: Create a Cascading Chandelier with Net and Embroidery Hoops
For a dramatic statement piece, use three embroidery hoops of different sizes (e.g., 6, 9, and 12 inches) and net cloth. Cover each hoop with a layer of net, gathered and glued around the rim. Then, suspend them from a single ceiling hook using fishing line or clear cord, with the largest at the bottom and smallest at the top, spaced about 6 inches apart. Why it works: the tiered arrangement creates a cascading effect, and the net diffuses light from a single bulb placed inside the largest hoop. I made one for my sister's wedding and it cost under $15. Common mistake: not balancing the hoops, causing them to tilt. Use a level to ensure each hoop hangs straight, and attach the lines at three equidistant points on each hoop for stability.
Hack #6: The Secret to Hanging Your Light Safely and Securely
You've made your beautiful light, but how do you hang it without bringing down the ceiling? First, determine the weight—most net cloth pendants are lightweight (under 2 pounds), so a simple ceiling hook rated for 5 pounds works. But if you're using a glass bulb and a metal frame, it might be heavier. Use a toggle bolt or a ceiling anchor for drywall. Always turn off the power at the breaker if you're hardwiring. For plug-in cords, use a cord cover to hide the wire, and secure it with cable clips. Why it works: proper anchors distribute weight and prevent accidents. I once hung a light with a flimsy adhesive hook and it crashed at 2 a.m.—lesson learned. Common mistake: ignoring the weight limit of your hook. When in doubt, over-engineer. Also, keep the light at least 12 inches from curtains or other flammable materials.
The Hacks, Step by Step
- 1Gather Your Materials
You'll need net cloth (tulle or mesh), a frame (wire basket, embroidery hoop, or balloon), LED bulb or fairy lights, scissors, hot glue gun, and hanging hardware. Choose net in colors that complement your space—2 yards of 54-inch width is enough for one medium pendant. - 2Prepare Your Frame
If using a wire basket, clean and spray-paint it if desired. For embroidery hoops, separate the inner and outer rings. For the balloon method, inflate a balloon to your desired size and secure it on a cup for stability. - 3Cut and Layer Net
Cut net into strips or large squares, depending on your method. For gathering, cut 6-inch-wide strips. For balloon, cut 2-inch-wide strips. Layer two colors for depth—this is where the magic begins. - 4Attach Net to Frame
Use the no-sew gathering technique with elastic, or dip strips in glue for the balloon method. Secure with hot glue at key points. Don't over-gather; allow the net to breathe and create soft folds. - 5Add Lighting
Insert a battery-operated fairy light string or an LED bulb on a cord. Ensure the light source is cool to the touch. Weave lights through layers for a starry effect, or place a single bulb inside for a soft glow. - 6Hang Securely
Install a ceiling hook or anchor appropriate for your ceiling type and the weight of your light. Use a level to ensure straight hanging. Hide cords with covers or clips. Test the hook's strength before hanging your creation. - 7Finishing Touches
Add embellishments like dried flowers, beads, or ribbon. Adjust the net for the perfect drape. Step back and admire your work—you've just created a custom piece that looks store-bought.
Net cloth is like a cloud catcher—it turns a simple bulb into a piece of art that makes your space feel like a dream.
Frequently Asked Questions
What kind of net cloth is best for making hanging lights?
Soft tulle or fine mesh works best because it drapes beautifully and diffuses light evenly. Avoid stiff nets meant for petticoats; they won't create that ethereal look.
Can I use a regular light bulb with a net cloth pendant?
No, always use LED bulbs because they stay cool. Incandescent bulbs can get hot and pose a fire risk, especially if the net is wrapped closely.
How do I hang a net cloth light without damaging my ceiling?
Use a toggle bolt or heavy-duty adhesive hook rated for at least 5 pounds. For renters, adhesive hooks specifically designed for ceilings work well if you clean the surface first.
Can I wash a net cloth light fixture?
Yes, if you used the no-sew method and didn't glue the net, you can gently hand wash it in cold water and air dry. If glued, spot clean only with a damp cloth.
How long does it take to make a net cloth hanging light?
Most methods take 1-2 hours of active crafting time, plus drying time if using glue (24 hours for the balloon method). The no-sew method is the quickest at under an hour.


