

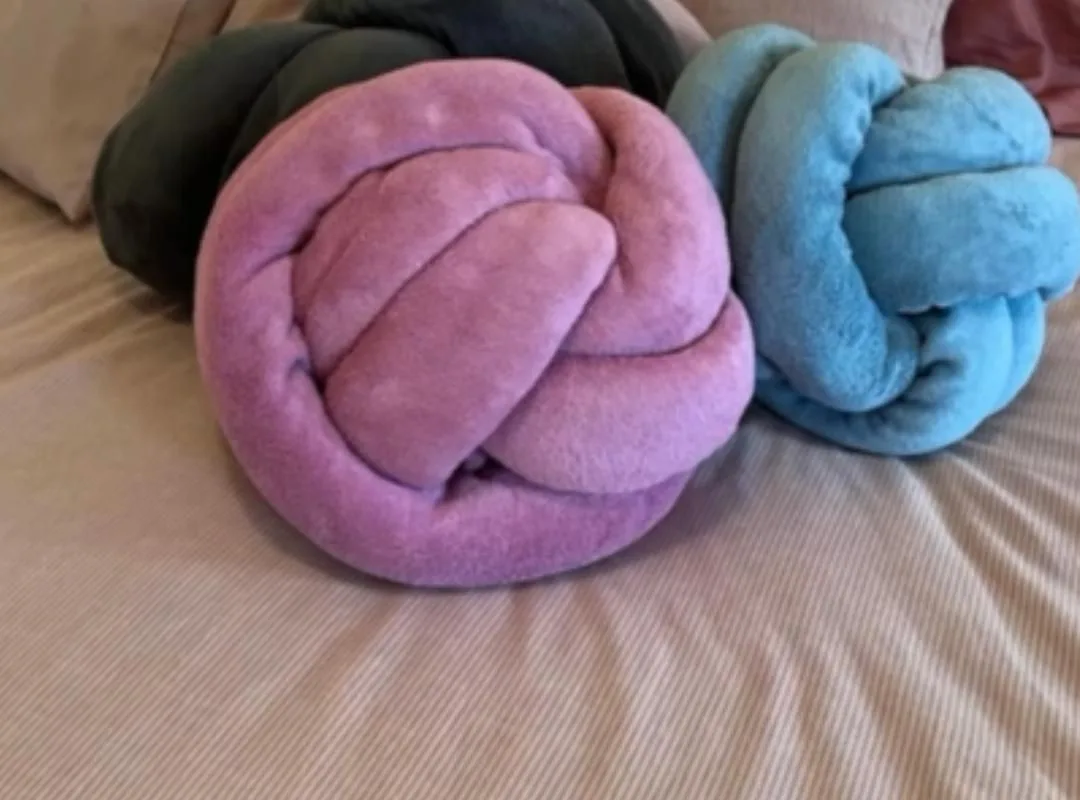
You've seen those chunky knot pillows on Pinterest and thought, 'I could make that.' You're right—but a blanket alone won't cut it. These seven hacks turn a simple throw into a structured, durable accent piece that actually holds its shape.
Advertisements1
- Use a 50×60 cotton or cotton-blend blanket for the best structure.
- A core of scrap fabric beats polyfill—it's firmer and more sustainable.
- Tie the knot loosely first, then shape it, to avoid a misshapen ball.
- Hide loose ends with a few hand stitches for a polished look.
- Fluff daily and wash in cold water to keep the knot tight.
- Pair with textured throws for a cozy, designer feel.
Why a Blanket Knot Pillow? The Problem with Store-Bought
Store-bought knot pillows cost $40–$80, and most are stuffed with polyester that flattens within weeks. A DIY version from a blanket costs under $15 and lets you match any room. But the common mistake is choosing a blanket that's too thin or slippery—it won't tie tightly and the knot will sag. You need a fabric with structure, like a cotton waffle weave or a dense knit, not a silky polyester throw.
The Right Blanket: Size, Fabric, and Texture
For a standard 12-inch knot pillow, you need a blanket that's at least 50 x 60 inches. Larger (60 x 80) gives you a fuller, 14-inch pillow. Fabric matters more than you think: cotton or cotton-blend with a tight weave holds a knot better than acrylic or microfiber, which tends to stretch. Test by squeezing a corner—if it springs back, it's good. Avoid blankets with fringe; it will unravel and look messy.
The Core: Why a Ball of Scrap Fabric Beats Polyfill
Most tutorials tell you to stuff with polyfill, but that creates a lumpy, soft knot that flops. Instead, use a core of scrap fabric—old t-shirts, towels, or leftover batting. Roll them into a tight ball about 12 inches in diameter and secure with twine. This gives you a firm, moldable core that supports the knot shape. If you do use polyfill, wrap it in a thin cotton pillowcase first to keep it from poking through the weave.
Tying the Knot: The Double-Loop Method
This is the make-or-break step. Lay the blanket flat, find the center, and fold it in half lengthwise. Then, make a loose loop with the folded end, insert the core, and pull the other end through. Tighten gradually—not all at once—to avoid wrinkles. The trick: leave the knot slightly loose, then twist the pillow to adjust the shape. A common mistake is pulling too hard, which creates a tight, misshapen ball. Practice on a small towel first.
Finishing the Ends: Tucking and Trimming
After the knot is tied, you'll have two loose ends. Tuck one end into the knot's folds to hide it. The other can be left as a decorative tail, but if it's too long, fold it under and secure with a few hidden stitches. Use a needle and thread that matches the blanket, and make small whip stitches to keep the fold in place. For a cleaner look, trim the tail to about 6 inches and fray the edge deliberately for a boho feel.
Styling Your Knot Pillow: Placement and Pairing
A knot pillow works best as a floor cushion, a reading chair accent, or a bed's centerpiece. On a bed, place it against the headboard, flanked by two standard pillows. For a couch, use it as an armrest or lumbar support. Pair it with textured throws—like a chunky knit or a faux fur—to create contrast. Avoid placing it on a slippery leather sofa; it will slide. Add a non-slip rug pad underneath if it's on a hardwood floor.
Maintaining the Shape: Fluffing and Cleaning
Over time, the knot will loosen and flatten. Fluff it daily by squeezing and shaking it. For deeper maintenance, untie the knot, wash the blanket cover (if removable), and re-tie. To prevent pilling, wash in cold water on a gentle cycle and air dry. Never use a dryer on high heat—it can shrink the fabric and ruin the knot. If the core gets lumpy, replace it with fresh scrap fabric.
The Hacks, Step by Step
- 1Gather your materials
You'll need a 50×60-inch cotton or cotton-blend blanket, scrap fabric or polyfill, twine, scissors, and a needle and thread. Choose a blanket with a tight weave and no fringe. - 2Create the core
Roll scrap fabric into a tight ball about 12 inches in diameter. Wrap with twine to secure. If using polyfill, put it in a cotton pillowcase first. - 3Fold the blanket
Lay the blanket flat and fold it in half lengthwise, so you have a long rectangle. Smooth out wrinkles. - 4Tie the knot
Make a loose loop at one end, insert the core, and pull the other end through. Tighten gradually, leaving the knot slightly loose for shaping. - 5Shape the pillow
Twist and adjust the knot to create a smooth, round shape. Push the core into the center and fluff the fabric around it. - 6Tuck and secure ends
Tuck one end into the knot. Fold the other end under and secure with hidden stitches. Trim if needed. - 7Place and fluff
Position your pillow and give it a final squeeze. Fluff daily to maintain shape.
A knot pillow is not about the tie—it's about the core that holds the shape.
Frequently Asked Questions
What size blanket do I need for a knot pillow?
Use a 50×60-inch blanket for a 12-inch pillow, or 60×80 for a 14-inch pillow. Smaller throws won't give enough fabric to tie a full knot.
Can I use a fleece blanket for a knot pillow?
Yes, but fleece stretches and may not hold a tight knot. Choose a thicker, non-slip fleece and double up if needed.
How do I keep the knot pillow from flattening?
Use a firm core of scrap fabric, not just polyfill. Fluff it daily and reshape by twisting the knot.
Can I wash a knot pillow?
Yes, but check the blanket's care label. Most cotton can be washed in cold water on gentle and air-dried. Avoid high heat.


