

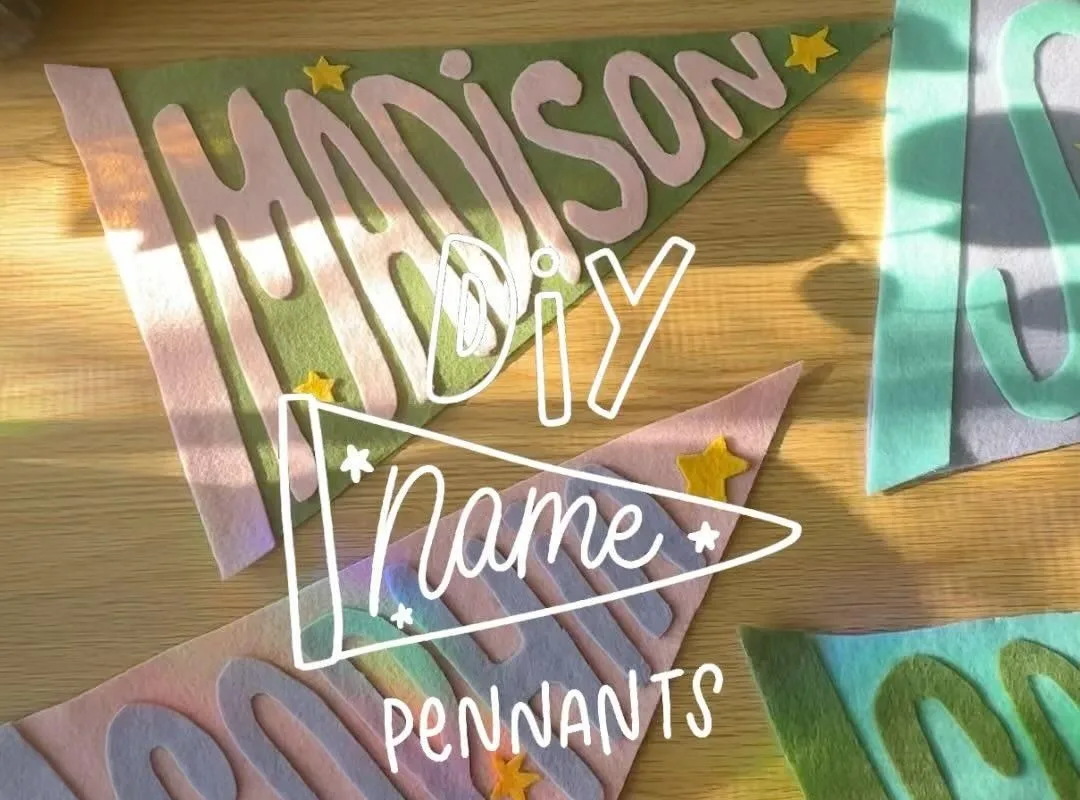
Stop pinning and start making. These seven felt pennant hacks will save you hours and give you a result that looks store-bought—minus the price tag. I'm Lucas Fernandez, and I've made enough pennants to know what works and what's a waste of time.
Advertisements1
- Freezer paper is the cheapest way to get perfect felt letters—no more tracing disasters.
- Wool-blend felt costs more but outlasts acrylic and looks 10x better.
- Low-temp glue guns prevent burns and give you wiggle room to reposition.
- Interfacing is the difference between a saggy pennant and a crisp one.
- Folded paper guides eliminate math and ensure even letter spacing.
- A 1/4-inch dowel is the minimum for a sturdy pennant that won't bow.
Hack 1: Use Freezer Paper for Flawless Letters
Tracing letters onto felt is a pain. The felt stretches, the marker bleeds, and your letters end up looking like abstract art. Here's the fix: print your letters on freezer paper, iron them shiny-side down onto the felt, and cut around the paper. The paper stiffens the felt, so your scissors glide. Plus, you get a perfect outline every time. This works because freezer paper adheres temporarily when heated, creating a stable template that peels off without residue. Common mistake: using too much heat and scorching the felt. Keep your iron on the lowest setting and press for 2-3 seconds.
Hack 2: Choose the Right Felt (Not All Felt Is Equal)
Craft felt from the dollar store pills and fuzzes. Wool-blend felt (like 20-35% wool) costs a bit more but cuts cleanly, doesn't stretch, and looks premium. For pennants, use 1-2mm thick felt for the base and 1mm for letters. If you're on a budget, acrylic felt works but expect fraying—seal edges with a thin line of fabric glue. Why it works: denser fibers hold shape and resist pilling. Mistake: buying felt by the sheet without checking fiber content. Always read the label.
Hack 3: The Glue Gun Trick That Saves Your Fingers
Hot glue strings and burned fingertips are a DIY rite of passage, but you can skip both. Use a low-temp glue gun and apply glue in small dots, not lines. Press the letter down for 5 seconds. The low temp prevents burns and gives you a few extra seconds to reposition. For a stronger bond, use fabric glue (like Fabri-Tac) for letters and hot glue for the dowel. Why it works: low-temp glue still bonds felt securely but is more forgiving. Mistake: using high-temp glue and pressing too hard—you'll flatten the felt and create shiny spots.
Hack 4: Stabilize with Interfacing (Yes, Really)
Felt pennants can sag, especially if you use a single layer. Iron on a lightweight fusible interfacing to the back of your base pennant before adding letters. This adds structure without bulk. Cut interfacing 1/4 inch smaller than the felt to avoid gumming up your iron. Why it works: interfacing prevents stretching and gives the pennant a crisp, professional drape. Mistake: using heavy interfacing—it makes the felt stiff as cardboard. Look for 'lightweight' or 'featherweight' on the label.
Hack 5: Perfect Letter Spacing Without Measuring
Eyeballing letter spacing is a rookie move. Instead, cut a strip of paper the same width as your pennant, fold it in half, then in quarters. Unfold and use the crease lines as guides to center your letters. For multiple words, leave a gap the width of one letter between words. Why it works: folding gives you equal divisions without math. Mistake: spacing letters too far apart—they should almost touch. A good rule: leave a gap equal to the thickness of your pinky finger.
Hack 6: Attach the Dowel Like a Pro
A flimsy dowel ruins the whole look. Use a 1/4-inch wooden dowel cut 2 inches wider than your pennant on each side. Fold the top edge of the felt over the dowel and glue it down, leaving the ends exposed for hanging. For extra security, sew a line of stitches along the fold. Why it works: the fold distributes weight evenly, preventing sag. Mistake: using a dowel that's too thin—it'll bow under the weight of the felt. Go for 1/4-inch diameter minimum.
Hack 7: Finish Edges with a Blanket Stitch (or Fake It)
Raw felt edges look unfinished. If you sew, a blanket stitch adds a polished border. If you don't, use pinking shears to cut a zigzag edge—it prevents fraying and looks intentional. Or run a thin bead of fabric glue along the edge and let it dry clear. Why it works: a finished edge elevates the entire project from 'crafty' to 'crafted.' Mistake: cutting with regular scissors and hoping for the best. Felt doesn't fray much, but it does pill. A clean edge makes a difference.
The Hacks, Step by Step
- 1Gather Your Supplies
You'll need: wool-blend felt (1-2mm thick), freezer paper, low-temp glue gun, fabric glue, 1/4-inch dowel, pinking shears, iron, and a printer. Don't skip the freezer paper—it's the secret weapon. - 2Cut the Base Pennant
Decide on size (I use 12×18 inches for a classic look). Cut a triangle from the felt. If you want a symmetrical shape, fold the felt in half and cut once. Use a rotary cutter and ruler for straight edges. - 3Prepare and Attach Letters
Print letters in reverse on freezer paper, iron onto felt, cut out, peel off paper. Arrange letters on the pennant using the folded-paper spacing method. Glue down with low-temp glue or fabric glue. - 4Add Interfacing (Optional but Recommended)
Cut lightweight fusible interfacing 1/4 inch smaller than the pennant. Iron onto the back following package directions. This prevents sagging and gives a professional feel. - 5Attach the Dowel
Cut dowel 2 inches wider than the pennant on each side. Fold the top edge of the felt over the dowel and glue or sew in place. Make sure the dowel is centered. - 6Finish the Edges
Use pinking shears to cut a zigzag edge, or sew a blanket stitch around the perimeter. If using glue, run a thin line along the edge and let dry. - 7Add Hanging String
Tie a length of twine or ribbon to each end of the dowel. Use a secure knot like a double knot. Trim excess. Hang and admire your work.
The secret to a professional-looking felt pennant isn't talent—it's freezer paper and a low-temp glue gun.
Frequently Asked Questions
What kind of felt is best for pennants?
Wool-blend felt (20-35% wool) is best because it's denser, cuts cleanly, and resists pilling. Acrylic felt is cheaper but frays and looks less premium.
How do I keep letters from falling off?
Use fabric glue (like Fabri-Tac) for a permanent bond, or low-temp hot glue for a quick fix. Press firmly for 5 seconds. Avoid high-temp glue, which can melt the felt.
Can I wash a felt pennant?
Spot-clean only. Felt can't handle machine washing—it'll pill and lose shape. Use a damp cloth with mild soap and air dry.
What size should a name pennant be?
A standard size is 12×18 inches, but you can scale up or down. Just keep the dowel 2 inches wider on each side for hanging.
How do I hang a felt pennant without nails?
Use removable adhesive hooks (like Command hooks) or tie the string to existing nails or hooks. The pennant is lightweight, so most hooks will hold.


