

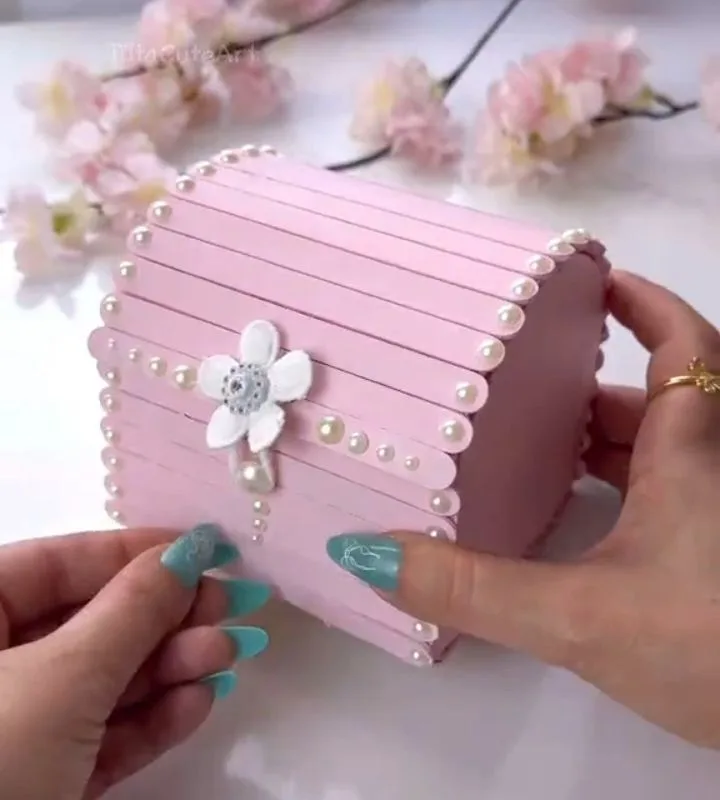
Ever spotted a gorgeous treasure box on Pinterest and thought, 'I could never make that'? Think again. With these seven practical hacks, you'll transform simple materials into an elegant keepsake that looks boutique-made—no special skills required.
Advertisements1
- Start with a sturdy box that has a tight-fitting lid—it's the foundation of a flawless finish.
- Primer and sanding are non-negotiable steps for a smooth, professional-looking paint job.
- Decoupage with napkins is an easy way to add intricate designs without painting skills.
- Gold leaf adds instant elegance; handle with tweezers to avoid tearing.
- Lining the interior with fabric elevates the box from homemade to boutique-worthy.
- Always seal with water-based polycrylic to protect your work and prevent yellowing.
Hack 1: Choose the Right Box for a Flawless Finish
The foundation of any elegant treasure box is the box itself. Skip flimsy cardboard and opt for a sturdy papier-mâché or wooden box with a tight-fitting lid. A 6×4-inch box is ideal for jewelry, while an 8×6-inch works for larger keepsakes. Why does this matter? A well-constructed box won't warp when you apply paint or glue, ensuring a smooth, professional finish. I learned this the hard way after a cheap box buckled under a coat of acrylic paint.
Common mistake: buying a box with a loose lid. It will never sit flush, no matter how you decorate it. Test the lid in-store—it should require a gentle tug to open. If you're thrifting, check for cracks or water damage. A quick sand with 220-grit sandpaper preps the surface for paint and removes any shine.
Hack 2: Prep with Sandpaper and Primer for a Pro Finish
Think of primer as the double-sided tape between your box and paint—it helps everything stick. After sanding, apply a thin coat of gesso or multi-surface primer using a foam brush. Let it dry for 30 minutes, then sand lightly with 400-grit for an ultra-smooth base. This step prevents paint from soaking in unevenly, which can make your box look blotchy.
Why it works: primer fills tiny pores and creates a uniform surface, so your topcoat glides on like butter. I once skipped primer on a wooden box and the paint dried with ugly streaks. Never again! Common mistake: applying primer too thickly. A little goes a long way; thick layers cause drips and brush marks. If you're using a dark paint, tint your primer gray to reduce the number of topcoats needed.
Hack 3: Master the Art of Decoupage with Napkins
Decoupage is just a fancy word for gluing paper onto a surface—and it's the secret to those intricate floral designs you see on Pinterest. Grab a paper napkin with a pretty pattern, separate the plies, and use only the top layer with the design. Brush a thin layer of Mod Podge onto the box, carefully place the napkin, and smooth it with a soft brush. Seal with another coat on top.
Why it works: the napkin's thinness allows it to conform to curves without wrinkling, and Mod Podge dries clear, leaving a seamless design. I've used this technique to turn a plain box into a vintage-inspired treasure. Common mistake: using too much glue, which makes the napkin tear. Work in small sections and use a light hand. If you get a wrinkle, don't panic—gently lift and reposition while the glue is still wet.
Hack 4: Add Gold Leaf for Instant Elegance
Nothing says 'elegant' like a touch of gold. Gold leaf sheets are surprisingly affordable and easy to apply. Brush a thin layer of adhesive where you want the gold (edges, corners, or a monogram), wait until it's tacky—about 10 minutes—then gently press a gold leaf sheet over the area. Use a soft brush to burnish and remove excess. The result? A luxurious metallic accent that catches the light.
Why it works: gold leaf adheres to the adhesive only where you apply it, giving you precise control. I love using it on the rim of a box for a jewelry-box vibe. Common mistake: touching the gold leaf with bare fingers—it will stick to your skin and tear. Use tweezers or a brush to handle it. Also, work in a draft-free area; even a slight breeze can send those delicate sheets flying.
Hack 5: Line the Interior with Fabric for a Luxe Feel
The inside of your treasure box matters just as much as the outside. Cut a piece of velvet, felt, or silk to fit the bottom and sides. For the bottom, trace the box onto the fabric, cut slightly smaller, and glue it in with fabric glue. For the sides, cut strips and press them in. This prevents items from sliding and adds a soft, high-end touch.
Why it works: fabric lining protects your treasures from scratches and muffles sound when you close the lid—a detail that makes the box feel expensive. I once lined a box with a scrap of velvet from an old dress, and it became my favorite jewelry holder. Common mistake: using too much glue, which soaks through the fabric and leaves stiff, discolored patches. Apply glue in dots, not lines, and press the fabric gently.
Hack 6: Seal with Polycrylic for Lasting Protection
You've put in the work—now protect it. A water-based polycrylic sealer (like Minwax Polycrylic) is your best friend. Apply two thin coats with a soft brush, letting each dry for two hours. This seals the paint, decoupage, and gold leaf, preventing scratches and yellowing over time. It also gives a subtle sheen that makes colors pop.
Why it works: polycrylic forms a clear, durable barrier that resists moisture and handling. I use it on all my boxes, especially those meant for daily use. Common mistake: using oil-based polyurethane, which can yellow white paint and has strong fumes. Stick with water-based. Also, don't shake the can—stir gently to avoid bubbles. If you see bubbles, lightly sand with 400-grit between coats.
Hack 7: Personalize with a Monogram or Charm
The final touch: make it uniquely yours. Paint a monogram with a stencil, attach a small charm to the lid with a jump ring, or add a tiny label holder. For a monogram, print a letter in a fancy font, cut it out, and trace it onto the box with a pencil. Fill in with acrylic paint and a fine brush. Or use a metal stamp and a hammer for an embossed look.
Why it works: personalization turns a generic box into a meaningful gift or keepsake. I made one for my niece with her initial in gold, and she treasures it. Common mistake: rushing the monogram and smudging the paint. Let each layer dry completely, and use painter's tape to mask off areas you don't want painted. If you're adding a charm, pre-drill a small hole to avoid splitting the wood.
The Hacks, Step by Step
- 1Sand and Prime
Lightly sand the box with 220-grit sandpaper, wipe away dust, and apply a thin coat of primer. Let dry for 30 minutes. This creates a smooth base for painting. - 2Paint the Base
Apply two thin coats of acrylic paint in your chosen color, letting each dry for 20 minutes. Thin coats prevent drips and give a professional finish. - 3Decoupage Your Design
Separate a paper napkin, cut out the motif, and apply Mod Podge to the box. Press the napkin on, smooth with a brush, and seal with another coat of Mod Podge. - 4Add Gold Leaf Accents
Brush adhesive on edges or corners, wait 10 minutes until tacky, then press gold leaf sheets on. Burnish with a soft brush and remove excess. - 5Line the Interior
Cut fabric to fit the bottom and sides. Glue in with fabric glue, pressing gently. This adds a luxurious feel and protects contents. - 6Seal with Polycrylic
Apply two thin coats of water-based polycrylic, letting each dry for two hours. This protects your work and adds a subtle sheen. - 7Personalize
Add a monogram with paint or a stencil, or attach a small charm to the lid. Let everything dry completely before handling.
The secret to an elegant treasure box isn't expensive materials—it's the patience to prep, layer, and seal each step properly.
Frequently Asked Questions
What kind of box is best for a DIY treasure box?
A sturdy papier-mâché or wooden box with a tight-fitting lid is best. It won't warp when you apply paint or glue, ensuring a smooth finish. Avoid flimsy cardboard or boxes with loose lids.
Can I use regular glue for decoupage?
No, regular glue can dry yellow or lumpy. Use a dedicated decoupage medium like Mod Podge, which dries clear and smooth. It's formulated to adhere paper without wrinkling.
How do I prevent gold leaf from tearing?
Handle gold leaf with tweezers or a soft brush, never bare fingers. Work in a draft-free area and apply it to a tacky adhesive surface. This prevents tearing and ensures a smooth application.
What sealer should I use on a painted treasure box?
Use a water-based polycrylic sealer. It dries clear, doesn't yellow, and provides a durable finish. Oil-based polyurethane can yellow white paint and has strong fumes.
How can I personalize my treasure box?
Add a monogram with a stencil and acrylic paint, or attach a small charm to the lid with a jump ring. You can also use a metal stamp for an embossed look. Let each layer dry completely to avoid smudges.


