

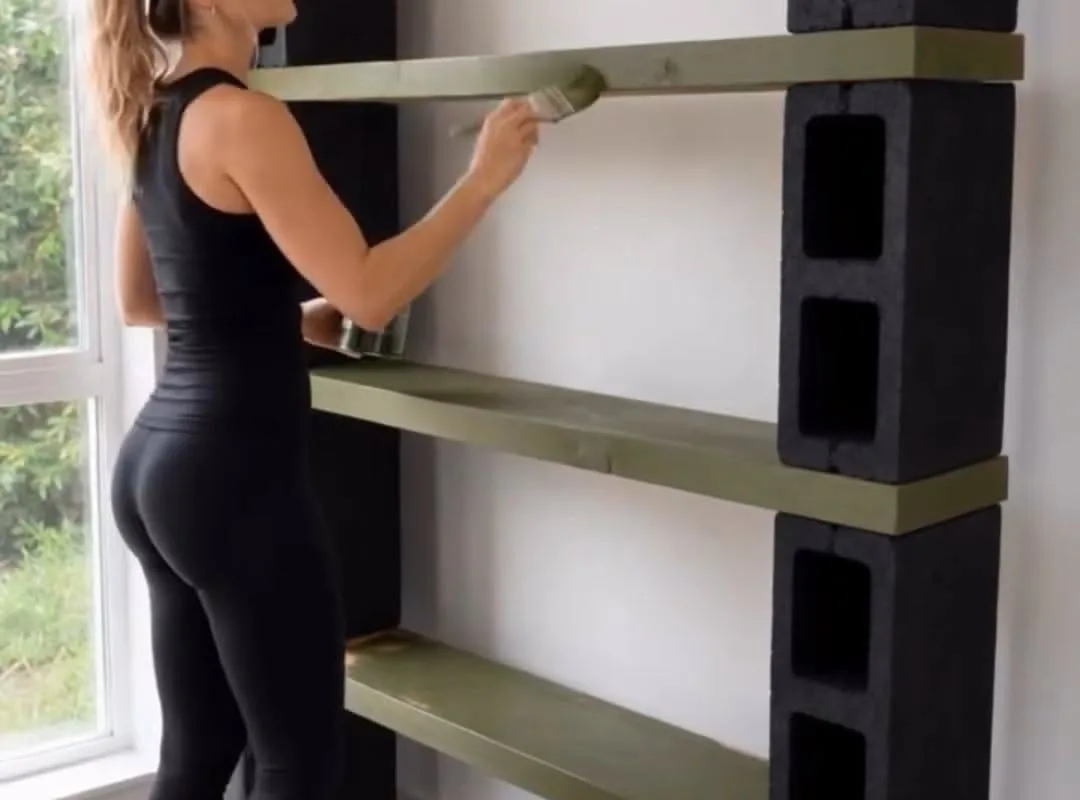
You don't need to spend $400 on a particleboard shelf that sags in six months. A cinder block bookshelf costs under $80, holds 200+ pounds per shelf, and looks like a designer piece if you get three details right. Here's how to build one that won't wobble, crack your floor, or look like a dorm room.
Advertisements1
- A cinder block bookshelf costs under $80 in materials but holds 200+ pounds per shelf — far stronger than $300 particleboard units.
- Use lightweight 8x8x16-inch CMUs (28-35 lbs each), not dense commercial blocks that weigh 40+ lbs and scratch floors.
- Always add heavy-duty felt pads under every block that touches the floor — this prevents $200+ in floor damage.
- Span no more than 4 feet between supports for a 2×12 plank; add a middle support for 6-foot spans to prevent sagging.
- Anchor any unit taller than 4 feet to a wall stud with an L-bracket — this is non-negotiable for safety.
- The 90% difference between a dorm-room look and a designer look is in the finish: sand to 220, water-based stain, three coats of polyurethane.
Why Cinder Blocks Beat Cheap Particleboard Shelves
Particleboard shelves are sawdust and glue pressed into a shape that fails the moment moisture touches it. A standard 8x8x16-inch concrete block has a compressive strength of 1,900 to 2,500 PSI. That's not furniture — that's infrastructure. You can stack 300 pounds of books on a 2-inch-thick oak plank supported by blocks and it won't bow. Try that with a $79 IKEA Billy.
The math is simple: four blocks per shelf level at $2.50 each, plus a 6-foot 2×12 plank at $18. A three-shelf unit runs about $70 in materials. The same footprint in solid wood furniture starts at $350. You're not sacrificing strength — you're gaining it.
But here's the catch: not all blocks are equal. You want 'lightweight' or 'normal weight' CMUs (concrete masonry units) from a big-box store, not the dense ones from a commercial supplier. The dense ones weigh 40+ pounds each and will scratch hardwood. The standard 8x8x16 block weighs 28-35 pounds depending on aggregate. Pick them up. If it feels like a bowling ball, put it back.
The Three Block Layouts That Actually Look Intentional
Most DIY cinder block shelves look like a construction site because people stack blocks like bricks — all the same orientation. That's the mistake. You need variation in the negative space.
Layout 1: The Column. Stack two blocks vertically at each end, with the holes facing forward. Place a plank across. Repeat. This gives you a clean, industrial look with visible circular voids. Use this for a 2-foot-wide unit.
Layout 2: The Stagger. Put one block flat, one block on its side, alternating. The side-oriented block is 8 inches tall instead of 16. This creates uneven shelf heights — perfect for art books and tall vases. It looks deliberate, not accidental.
Layout 3: The Floating Stagger. This is the pro move. Use only one block per support point, placed 12 inches from the wall. The plank overhangs the block by 6 inches on the front. It creates a cantilever effect that reads as 'designed' rather than 'stacked.' You'll need a 2×12 plank, not a 1×12, because the overhang puts torque on the wood.
Measure your space first. A 6-foot plank with three support points (two ends, one middle) handles 400 pounds. Two support points handle 200 pounds. Don't skip the middle block on anything longer than 4 feet.
How to Stop Blocks from Scratching Your Floor
Concrete blocks have grit on the bottom. Drag one across oak flooring and you've just added a $200 refinishing job to your DIY project. This is the single most common mistake I see in Pinterest builds.
Fix it with adhesive felt pads. Buy the 1-inch round heavy-duty felt pads — the ones rated for furniture, not the flimsy craft store ones. Stick four pads on the bottom of each block that touches the floor. That's 16 pads for a four-block base. Cost: $6.
If you have carpet, skip the felt and use a rubber non-slip pad instead. Felt slides on carpet; rubber grips. Cut a 6×6-inch square of rubber shelf liner and place it under each block.
One more thing: seal the blocks. Raw concrete sheds dust. A single coat of matte concrete sealer (about $15 for a quart) brushed on with a foam brush stops the dust and darkens the color slightly. Let it cure 24 hours before stacking. This also makes the blocks easier to wipe clean.
The Plank Finish That Separates 'Dorm' from 'Designer'
You can use construction-grade 2×12 lumber, but it looks like… construction-grade lumber. The upgrade is a 1.5-inch-thick edge-glued panel or a piece of 2×12 that you sand and stain yourself.
Go to the lumber aisle and pick through the 2x12s. You want one with tight, straight grain and no knots larger than a quarter. Knots weaken the board and look rustic — fine if that's your thing, but not for a modern look. Expect to pay $18-$25 for a good 8-foot board.
Sand with 80-grit, then 120, then 220. Wipe with a tack cloth. Stain with a water-based stain — oil-based takes 24 hours to dry and stinks up your apartment. I use Minwax Water-Based Wood Stain in 'Charcoal Gray' for a modern look or 'Natural' for a Scandinavian vibe. One coat, wipe off after 5 minutes.
Top with three coats of water-based polyurethane, sanding with 400-grit between coats. This takes 48 hours total but gives you a finish that resists water rings and won't feel tacky. The difference between a $70 build and a $700 build is 90% finish work.
Load-Bearing Limits and Safety You Can't Ignore
A cinder block bookshelf is not anchored to the wall. That's fine for a 3-foot-tall unit. It's a death trap for a 6-foot-tall unit in a house with kids or pets.
Rule of thumb: if the top of your shelf is higher than 4 feet, anchor it. Use a 2-inch L-bracket screwed into a wall stud and into the top plank. One bracket is enough for a 4-foot unit; use two for anything wider. This costs $4 and takes 10 minutes.
Weight limits: each 8x8x16 block can handle 1,900 PSI, but the weak point is the plank. A 2×12 plank spanning 4 feet with a 200-pound load will deflect about 1/8 inch. That's fine. Spanning 6 feet, it deflects 3/8 inch — noticeable. Add a middle support block at 6 feet.
Don't stack blocks more than 6 high. That's 96 inches. Above that, the stack becomes top-heavy and a bump from a vacuum cleaner can topple it. If you need a 7-foot shelf, build two 3-foot units and place them side by side with a shared middle support.
The $12 Upgrade That Makes It Look Custom
The exposed holes in cinder blocks are the giveaway that this is a DIY project. You can lean into that — or you can cover them.
Option 1: Paint the inside of the holes. Use a small foam brush and matte black paint. It creates a shadow box effect that looks intentional. Takes 20 minutes.
Option 2: Insert 4-inch PVC caps. They fit snugly into the holes and give a clean, circular detail. A 10-pack costs $8 at Home Depot. Spray them matte black or leave them white for contrast.
Option 3: Use the holes as storage. Rolled magazines, wine bottles, or a small LED candle fit perfectly in a 6-inch hole. This is the zero-cost option and it's what I do. A block with a bottle of whiskey in one hole and a rolled poster in another looks curated.
Pick one and commit. Mixing painted holes with PVC caps with empty holes looks messy. Consistency is what reads as 'designed.'
The Hacks, Step by Step
- 1Measure your space and plan the footprint
Decide on width (4 feet max for two supports, 6 feet needs a middle support) and height (max 6 blocks high). Mark the floor with painter's tape to visualize. This prevents buying the wrong number of blocks. - 2Buy the right blocks and planks
Get 8x8x16-inch lightweight CMUs from a big-box store. For each shelf level, you need 2 blocks (4-foot unit) or 3 blocks (6-foot unit). Buy 2×12 planks, one per shelf. Pick straight boards with tight grain. - 3Seal the blocks and apply felt pads
Brush one coat of matte concrete sealer on all blocks. Let cure 24 hours. Stick four 1-inch heavy-duty felt pads on the bottom of every block that touches the floor. This stops dust and scratches. - 4Sand and finish the planks
Sand 80 → 120 → 220 grit. Wipe with tack cloth. Apply water-based stain, wipe after 5 minutes. Then three coats of water-based polyurethane, sanding with 400-grit between coats. Let dry 48 hours total. - 5Stack and level
Place bottom blocks on felt pads. Check level with a 2-foot level. If uneven, slip a thin shim under the low block. Add plank, then next layer of blocks. Repeat. Don't skip the level check — a 1/8-inch tilt at the bottom becomes 1 inch at the top. - 6Anchor if taller than 4 feet
Use a 2-inch L-bracket screwed into a wall stud and the top plank. One bracket for 4-foot units, two for wider. This prevents tipping from kids, pets, or earthquakes. - 7Style the holes and shelves
Either paint the block holes matte black, insert 4-inch PVC caps, or use them for rolled magazines and bottles. Pick one method. Arrange books by color or size for a clean look.
Concrete blocks have 1,900 PSI compressive strength — that's not furniture, that's infrastructure. You're not building a shelf, you're building a load-bearing wall that happens to hold books.
Frequently Asked Questions
How much weight can a cinder block bookshelf hold?
A single 8x8x16-inch concrete block can support over 1,900 pounds, but the limiting factor is the plank. A 2×12 plank spanning 4 feet safely holds 200 pounds; a 6-foot span with a middle support holds 400 pounds. Never exceed 200 pounds per shelf without a middle support.
Do cinder blocks scratch hardwood floors?
Yes, raw concrete blocks will scratch hardwood. Prevent this by attaching 1-inch heavy-duty felt pads to the bottom of every block that touches the floor. For carpet, use rubber non-slip pads instead of felt.
What kind of wood should I use for cinder block shelves?
Use 2×12 lumber or a 1.5-inch-thick edge-glued panel. Avoid 1×12 boards — they sag under weight. Pick straight boards with tight grain and no large knots. Sand to 220 grit and finish with water-based stain and polyurethane.
How do I keep a cinder block bookshelf from tipping over?
Anchor any unit taller than 4 feet to a wall stud using a 2-inch L-bracket. One bracket is enough for a 4-foot unit; use two for wider units. This prevents tipping from kids, pets, or earthquakes.
Can I paint cinder blocks for a bookshelf?
Yes, but seal them first with a matte concrete sealer to stop dust. Then paint with a masonry paint or use a foam brush to paint just the inside of the holes for a shadow box effect. Let cure 24 hours before stacking.


