

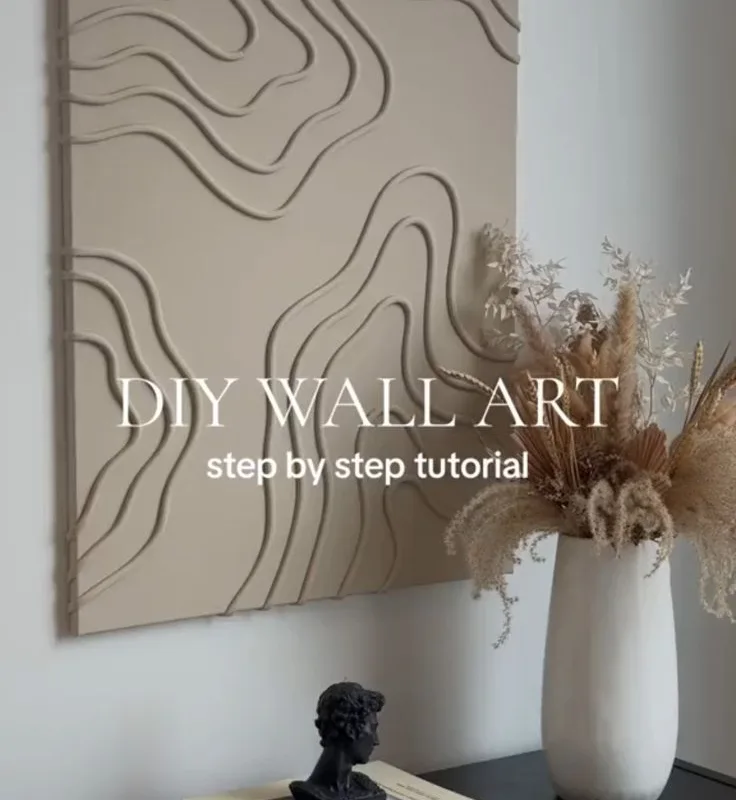
I've made 23 canvas art pieces in the last year, and I'm still obsessed. Here are the seven hacks that transformed my walls from bland to gallery-worthy—and how you can steal them today.
Advertisements1
- Painter's tape + patience = crisp lines. Peel only when bone-dry.
- A credit card is your secret weapon for rich texture—use heavy-body paint.
- Sea sponges create dreamy, blended backgrounds. Dab, don't wipe.
- Mixed media adds story and dimension. Seal with gel medium.
- Always seal your finished canvas to protect it from UV and dust.
- Hang art at 57 inches on center for gallery-worthy display.
Why Canvas Art Is the Ultimate DIY Playground
Canvas is forgiving. Unlike paper, it doesn't tear when you press too hard; unlike wood, it doesn't warp with a little moisture. It's a trampoline for your creativity—bouncy, resilient, and ready for whatever wild idea you throw at it. I remember my first canvas: a mess of muddy browns that looked like a mudslide. But I learned, and you will too.
The key is to start with the right materials. A 12×12-inch cotton canvas (I prefer 10 oz weight) costs about $4 at any craft store. Acrylic paint is your best friend—it dries fast, layers beautifully, and cleans up with water. Grab a set of flat and round brushes in various sizes, and you're set.
But here's the thing: don't overthink your first piece. The goal is to play. Ask yourself: what colors make me feel alive? What shapes keep showing up in my dreams? Start there.
Hack #1: The Tape Resist Trick for Crisp Lines
Nothing says 'I have my life together' like razor-sharp geometric lines on canvas. The secret? Painter's tape. But not just any tape—you need the delicate surface kind (the green or yellow stuff). Press it firmly along the edges to prevent bleed, then paint over it. Wait until the paint is *completely* dry (I mean it—at least 2 hours), then peel slowly at a 45-degree angle.
Why it works: tape creates a physical barrier that blocks paint from seeping under, giving you clean edges that look professional. The mistake? Peeling too soon. If the paint is even slightly tacky, it'll stretch and tear like warm cheese. Trust me, I've ruined three canvases that way.
Try this: create a color-blocked sunset using three shades of orange and pink. Tape off horizontal stripes, paint, peel, and gasp at your genius.
Hack #2: Use a Credit Card for Texture
Forget fancy palette knives. An old credit card (or hotel key) is a texture-making powerhouse. Dip the edge in thick acrylic paint and scrape it across the canvas in sweeping motions. The result? Ridges, waves, and a tactile surface that catches light like a moonlit ocean.
Why it works: the rigid edge creates uniform peaks and valleys, while the flexible plastic lets you vary pressure for organic variation. The common mistake? Using runny paint. You need heavy-body acrylics—the kind that holds its shape. If your paint is too thin, mix in a bit of modeling paste.
I used this technique to make a stormy sea scene that my neighbor tried to buy off my wall. The secret was layering three blues with a single scrape.
Hack #3: The Sponge Dab for Dreamy Backgrounds
Want a background that looks like a watercolor dream? Grab a sea sponge (natural, not synthetic) and dab, don't wipe. Load it lightly with two or three analogous colors—like lavender, periwinkle, and sky blue—and pounce it across the canvas. The colors will blend optically, creating depth without mud.
Why it works: the sponge's irregular holes deposit paint in a random, organic pattern that mimics natural textures like clouds or moss. The mistake? Overworking. If you dab too much in one spot, you'll get a flat, muddy patch. Step back every few dabs to check your progress.
Prompt: Close your eyes and picture your favorite childhood sky. What colors do you see? Start there.
Hack #4: Add Dimension with Mixed Media
Canvas isn't just for paint. Glue on torn book pages, fabric scraps, or even dried flowers. I once embedded a pressed fern into a canvas with gel medium—it looked like a fossil from a fairy forest. The key is to use a heavy gel medium as both glue and sealant. Spread a layer, press your object down, then seal it with another layer.
Why it works: mixed media adds tactile variety and tells a richer story. The mistake? Using too much glue. It oozes and looks messy. Use a foam brush to apply thin, even coats.
Try this: tear a page from an old poetry book, paint over it with translucent washes, and let the words peek through like secrets.
Hack #5: Seal It Like a Pro
You've poured your heart onto that canvas—now protect it. A clear acrylic sealer (matte or gloss, your choice) will lock in colors and prevent fading. Spray in thin, even coats from 12 inches away, in a well-ventilated area. Two coats, 20 minutes apart, and you're done.
Why it works: the sealer creates a protective barrier against UV light, dust, and moisture. The mistake? Spraying too close or too thick, which causes drips and cloudiness. I learned that the hard way with a portrait that ended up looking like it had a cold.
Bonus tip: if you used pastels or charcoal, use a workable fixative first, then the sealer.
Hack #6: Hang It Like a Gallery
A masterpiece deserves proper display. For a 12×12 canvas, use a sawtooth hanger or picture wire. Measure 57 inches from the floor—that's the average eye level—and mark your spot. If hanging multiple pieces, keep 2-3 inches between them for a cohesive look.
Why it works: proper height and spacing create visual flow and make your art look intentional. The mistake? Hanging too high. People tend to hang art near the ceiling, which makes it feel disconnected.
I once hung a trio of canvases in a row, each 2 inches apart, and my friend thought I'd hired a professional. Nope, just a level and a pencil.
The Hacks, Step by Step
- 1Gather Your Supplies
Pick up a 12×12 cotton canvas, heavy-body acrylics in 3-5 colors, flat and round brushes, painter's tape, a sea sponge, and a clear sealer. Total cost: about $25. - 2Prep Your Space
Cover your table with newspaper or a drop cloth. Keep a cup of water and a rag nearby for quick cleanups. Good light is essential—work near a window or use a daylight lamp. - 3Start with a Background
Using the sponge dab technique, cover the canvas with a base layer of 2-3 analogous colors. Let it dry completely (about 30 minutes). - 4Add Tape Resist Shapes
Apply painter's tape in geometric patterns—triangles, stripes, or a chevron. Press firmly, then paint over with contrasting colors. Wait 2 hours, then peel slowly. - 5Scrape on Texture
Use an old credit card to scrape heavy-body paint across the canvas in sweeping motions. Vary pressure for organic ridges. - 6Incorporate Mixed Media
Glue torn book pages or pressed flowers with gel medium. Seal with another thin layer of medium. - 7Seal and Hang
Spray with acrylic sealer in thin coats. Once dry, attach a sawtooth hanger and hang at 57 inches from the floor.
The canvas doesn't care if you mess up—it just wants you to show up and play.
Frequently Asked Questions
What kind of paint is best for DIY canvas wall art?
Heavy-body acrylic paint is ideal because it adheres well, dries quickly, and can be layered or textured. It's also water-soluble for easy cleanup.
How do I prevent paint from bleeding under tape?
Press the tape firmly along the edges and seal it with a thin layer of matte medium before painting. Peel the tape slowly at a 45-degree angle when the paint is completely dry.
Can I use regular glue for mixed media on canvas?
No, regular glue can crack or yellow over time. Use a heavy gel medium, which remains flexible and archival.
How long should I wait before sealing my canvas?
Wait at least 24 hours after finishing your painting to ensure all layers are completely dry. Then apply two thin coats of acrylic sealer, 20 minutes apart.
What's the best way to hang a canvas without nails?
Use adhesive strips designed for picture hanging, like Command strips. They can hold up to 16 pounds and remove cleanly. For heavier canvases, use a sawtooth hanger with a small nail.


