

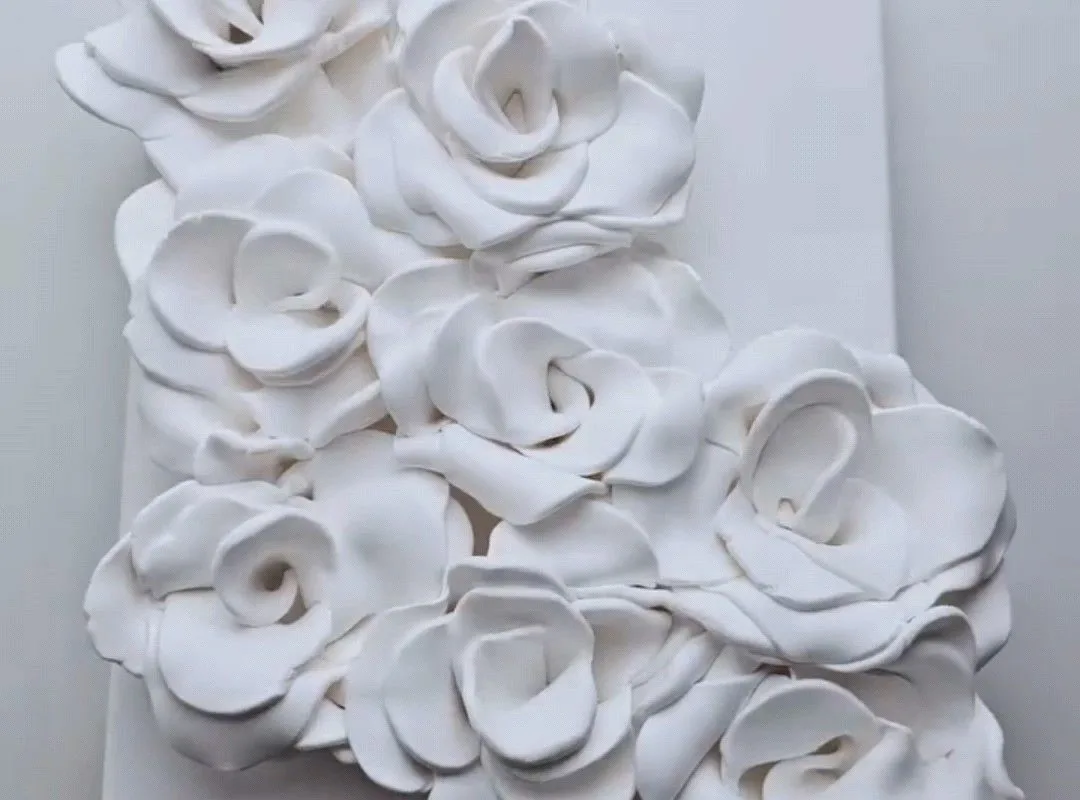
You can make gallery-worthy clay rose art on canvas—even if you've never sculpted before. These seven hacks give you specific, step-by-step techniques to create elegant textured wall art that lasts.
Advertisements1
- Air-dry clay is best for canvas art because it's lightweight and doesn't require baking.
- Always prepare your canvas with gesso or glue to prevent clay from sliding off.
- Shape roses with 5-7 overlapping petals for a realistic look—vary petal sizes slightly.
- Seal your finished piece with matte varnish to protect it from moisture and UV damage.
- Plan your composition using the rule of thirds for a balanced, professional look.
- Dry your canvas flat for at least 48 hours to avoid cracks.
Start with the Right Clay: Air-Dry vs. Polymer
Choose air-dry clay for large canvases because it's lightweight and won't need baking. For example, use a 1-pound block of DAS Air-Hardening Clay to cover an 8×10 canvas with about 15 small roses. Polymer clay (like Sculpey) is better for intricate details but requires oven-baking, which can be tricky on a canvas. If you go polymer, bake the roses separately on a ceramic tile before attaching them.
Why it works: Air-dry clay adheres well to canvas and dries hard without cracking when applied in thin layers. Common mistake: using too-thick clay, which cracks as it dries. Keep petals no thicker than 1/4 inch.
Build a Strong Base: Prepare Your Canvas Properly
Before adding clay, coat your canvas with a thin layer of acrylic gesso and let it dry for 24 hours. This gives the clay a textured surface to grip. For extra hold, mix a tablespoon of white glue into your clay before shaping. Example: I use Mod Podge brushed on the canvas, then press the clay firmly.
Why it works: Gesso and glue create a porous, tacky surface that prevents clay from sliding off. Mistake: skipping this step leads to roses popping off after drying. Always test a small piece first.
Shape Realistic Roses with a Simple 3-Petal Method
Roll clay into a small ball (about the size of a marble), then flatten it into a teardrop shape. That's your first petal. Make two more, overlapping them slightly around the center. Pinch the bottom to secure. For a 2-inch rose, use 5-7 petals, each about 1/8 inch thick. Example: I shape petals on a silicone mat, then transfer to the canvas.
Why it works: Overlapping petals mimic natural rose growth and hide seams. Mistake: making petals too uniform—vary sizes slightly for realism. Use a toothpick to curl edges outward.
Add Texture and Depth with Household Tools
Use a toothpick to score veins into petals, and a small ball tool (or the end of a paintbrush) to soften edges. For leaves, press clay through a garlic press to create fine veins. Example: I use a clean comb to add texture to the canvas background before adding roses.
Why it works: Texture catches light and makes the art look more dimensional. Mistake: over-texturing—keep it subtle. Aim for 2-3 distinct textures per piece.
Dry and Seal for Durability
Let your canvas dry flat for 48-72 hours in a dust-free area. Air-dry clay shrinks slightly, so check for loose petals and glue them with craft glue. Once dry, seal with two coats of matte acrylic varnish. Example: I use Liquitex Matte Varnish to keep the natural look.
Why it works: Sealing protects from moisture and UV damage. Mistake: rushing drying with a hairdryer—this causes cracks. Patience pays off.
Design a Balanced Composition
Sketch a rough layout on the canvas before adding clay. Use the rule of thirds: place the main rose cluster off-center. For an 8×10 canvas, 3 large roses and 5 smaller buds create balance. Example: I arrange roses in a diagonal line from bottom left to top right.
Why it works: A planned composition looks intentional and professional. Mistake: clustering all roses in the center—it feels heavy. Leave negative space.
Display and Care for Your Art
Hang your canvas away from direct sunlight and humidity. Dust with a soft brush. If a petal chips, repair with a dab of clay and re-seal. Example: I keep mine in a hallway with indirect light—it's lasted 3 years.
Why it works: Proper care extends the life of clay art. Mistake: hanging in bathrooms—moisture softens clay. Avoid extreme temperatures.
The Hacks, Step by Step
- 1Gather materials
You'll need air-dry clay, a canvas, gesso, acrylic varnish, and basic tools (toothpick, silicone mat). Why: Having everything ready prevents interruptions. - 2Prepare the canvas
Coat with gesso and let dry for 24 hours. Why: Creates a grippy surface for clay. - 3Shape the roses
Roll clay into balls, flatten into petals, and overlap 5-7 petals per rose. Why: Simple method yields realistic results. - 4Attach to canvas
Press roses firmly onto the canvas, using a dab of glue if needed. Why: Ensures they stay put during drying. - 5Add texture
Use a toothpick to score veins and a comb for background texture. Why: Adds depth and visual interest. - 6Dry completely
Let dry flat for 48-72 hours. Why: Prevents cracking and warping. - 7Seal and display
Apply two coats of matte varnish and hang away from sunlight. Why: Protects and prolongs the art.
The secret to elegant clay rose art isn't talent—it's layering thin petals and letting them dry slowly.
Frequently Asked Questions
Can I use polymer clay on canvas?
Yes, but you must bake the clay separately before attaching it to the canvas. Polymer clay is more durable but requires oven-baking, which can be tricky with a canvas backing.
How do I prevent clay from cracking?
Keep clay layers thin (no more than 1/4 inch) and dry slowly at room temperature. Avoid using heat to speed up drying.
What's the best way to attach clay to canvas?
Press the clay firmly onto a gessoed canvas. For extra hold, mix a little white glue into the clay or apply a thin layer of Mod Podge on the canvas before pressing.
How long does air-dry clay take to dry?
It typically takes 24-72 hours depending on thickness and humidity. For canvas art, allow at least 48 hours for small roses.
Can I paint the clay roses?
Yes, you can paint them with acrylics after they're dry. Seal with varnish afterward to protect the paint.


