

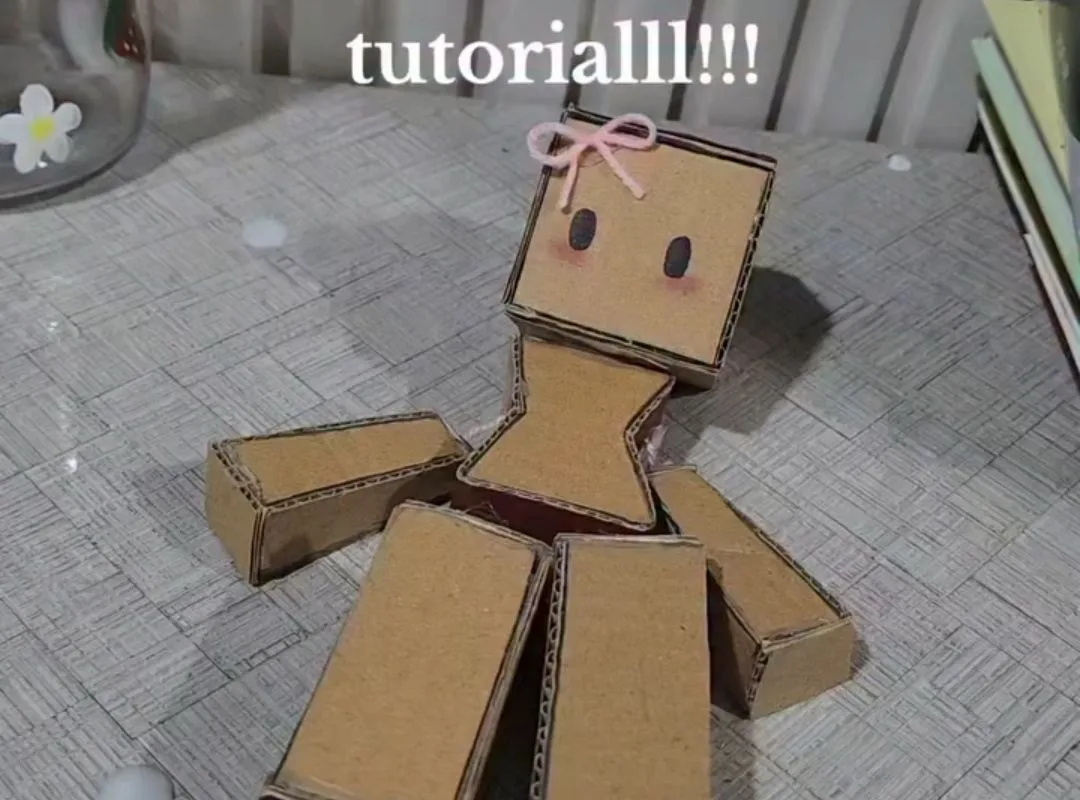
A cardboard doll is not a lesser doll. It is a study in edges, weight, and the small decisions that make a flat thing seem to breathe. Here is what I have learned from making them by the window, with a craft knife and a cup of tea going cold.
Advertisements1
- Cut with the grain vertical — it is the difference between a doll that stands and one that slumps by morning.
- Score joints rather than cutting them; a single light pass holds a seated pose indefinitely.
- A three-layer body with a 3 mm inset middle reads as solid because of the shadow at the edge.
- Weight the feet with a coin, never the head — low center of gravity, stable doll.
- Thin acrylic to roughly one part paint, two parts water, and build in three or four washes.
Start With the Grain, Not the Shape
Corrugated cardboard has a direction. Run your palm across the surface and you will feel the flutes beneath the liner — tiny ridges, like a held breath. Cut a doll's torso with the grain running vertically and the piece stays stiff and upright. Cut it across the grain and it will bow the moment the glue dries.
I learned this the hard way with a family of twelve dolls for a school fete. The first six were cut crosswise because the box was easier to lay that way. By morning they had all slumped forward, as if embarrassed. The second six, cut along the grain, stood through a whole afternoon of small hands.
A common mistake: using a single layer of thin cereal-box board for anything load-bearing. It photographs beautifully and folds like paper. Double it, grain crossed, and you have a spine.
Score the Joints Before You Fold
Every doll needs a neck, a waist, a hip that turns. Instead of cutting a hinge, score it: a single light pass with a blunt butter knife along a steel ruler, pressing maybe a third of the way through the liner. Fold toward the score and the cardboard bends in a clean line rather than a bruised one.
This is the difference between a doll that sits and a doll that sags. A scored hip at 4 mm from the edge will hold a seated pose indefinitely. An unscored one will crease wherever it feels like, usually somewhere unflattering.
The mistake I see most: scoring too deep. Go past the liner and you have made a tear with extra steps. Two gentle passes beat one enthusiastic one.
Build the Body in Three Layers
A doll that reads as solid from across a room is almost always three layers thick at the core: a front silhouette, a corrugated middle cut slightly smaller, and a back silhouette. The middle layer is the secret. It gives shadow at the edge, and shadow is what the eye reads as volume.
For a 20 cm doll, I inset the middle layer by 3 mm all around. Any more and the edge looks chipped; any less and the effect vanishes. Glue with PVA, weight it under a heavy book for twenty minutes, and resist checking on it.
One warning: do not inset the middle layer at the neck or shoulders. Those points need full contact or the head will droop like a tired flower.
Give the Face Less Than You Think
The temptation is to draw a full face. Resist it. Two dots for eyes, set low on the head, and one small curved line for a mouth will do more than eyelashes and cheeks combined. Low-set features read as gentle; high-set features read as startled.
I use a 0.3 mm pigment liner, never a marker. Marker bleeds along the cardboard's fibers and turns a delicate eye into a bruise overnight. If you must erase, do it before the ink sets, with the lightest touch of a kneaded eraser.
The common mistake here is symmetry. Perfect symmetry looks manufactured. Offset one eye by a millimeter and the doll gains a small, private expression.
Weight the Feet, Not the Head
A cardboard doll stands because of what is at the bottom. I glue a coin — a 5-cent piece for a 20 cm doll — inside each foot between the layers. The weight sits low, the center of gravity drops, and the doll holds its ground on a shelf that gets bumped.
A friend once weighted the head instead, reasoning that a heavy head would feel more real. It fell over within the hour and took a teacup with it. Weight belongs at the base, always.
Keep the coins centered in the foot, not at the toe. A toe-weighted doll stands on tiptoe and looks permanently anxious.
Sand the Edges, Then Seal Them
Freshly cut cardboard has a raw, fuzzy edge that catches light badly. A few passes with 220-grit sandpaper, held at a shallow angle, transforms it — the fuzz falls away and the edge becomes a clean line. Then brush a thin coat of PVA mixed with a little water along the cut. It dries clear, hardens the fibers, and stops the edge from drinking paint unevenly.
This step takes four minutes and is the single biggest difference between a school-project doll and one that looks considered. I do it on every edge that will be seen, which is most of them.
The mistake: sanding the flat faces. You will roughen the liner and the paint will grab in patches. Sand the edges only, and lightly.
Paint in Thin Washes, Let Light Do the Rest
Acrylic straight from the tube will sit on cardboard like a mask. Thin it with water — roughly one part paint to two parts water — and build color in three or four translucent layers, letting each dry. The cardboard's own tone comes through, and the doll keeps a warmth that opaque paint kills.
Work near a window in the afternoon. The raking light will show you exactly where the wash is pooling and where the edge needs one more pass. I keep a scrap of the same cardboard beside me and test every mix on it first.
A frequent error: painting over wet PVA sealant. Wait until it is fully clear, or the paint will bead and you will chase it around the surface with a brush.
The Hacks, Step by Step
- 1Choose the right box
Pick a double-wall corrugated box, about 5 mm thick, and check the flute direction by looking at the cut edge. Cut all body pieces with the grain vertical so the doll stands without bracing. - 2Score every joint
Run a blunt knife once along a ruler at each neck, waist, and hip line, pressing only a third of the way through. Fold toward the score so the bend is clean and the doll can hold a seated pose. - 3Cut three layers
Cut a front silhouette, a back silhouette, and a middle layer inset by 3 mm all around — but not at the neck or shoulders. Glue with PVA and weight under a book for 20 minutes. - 4Draw a minimal face
Use a 0.3 mm pigment liner. Two low-set dots and one small curved mouth. Offset one eye by a millimeter so the expression feels human rather than manufactured. - 5Weight the feet
Glue a 5-cent coin between the layers of each foot, centered rather than at the toe. The low center of gravity keeps a 20 cm doll upright on a shelf that gets bumped. - 6Sand and seal the edges
Sand cut edges with 220-grit at a shallow angle, then brush on thinned PVA. Let it dry fully clear before painting so the wash absorbs evenly. - 7Paint in thin washes
Mix one part acrylic to two parts water and build color over three or four layers, testing each mix on a scrap of the same cardboard. Work in raking afternoon light.
A cardboard doll is not a lesser doll — it is a study in edges, and the shadow at the edge is what the eye reads as volume.
Frequently Asked Questions
What kind of cardboard is best for making a doll?
Double-wall corrugated cardboard around 5 mm thick is best because it holds a standing pose without bracing. Single-layer cereal-box board is too flimsy for load-bearing parts and should only be used doubled, with the grain crossed.
How do I make a cardboard doll stand up?
Glue a small coin inside each foot between the layers, centered rather than at the toe. The low center of gravity keeps a 20 cm doll upright, and cutting the body with the grain vertical adds stiffness.
Can you paint cardboard without it warping?
Yes, if you seal the edges with thinned PVA first and paint in thin washes of one part acrylic to two parts water. Heavy opaque coats in a single pass are what cause warping and a mask-like finish.
How do you make joints on a cardboard doll?
Score the joint with a single light pass of a blunt knife along a ruler, pressing about a third of the way through the liner, then fold toward the score. Cutting a hinge instead of scoring it weakens the piece and it will sag.
How long does a cardboard doll take to make?
About two to three hours for a 20 cm doll, including drying time between the three glue layers and the paint washes. Most of that is waiting, which is the part that cannot be rushed.


