

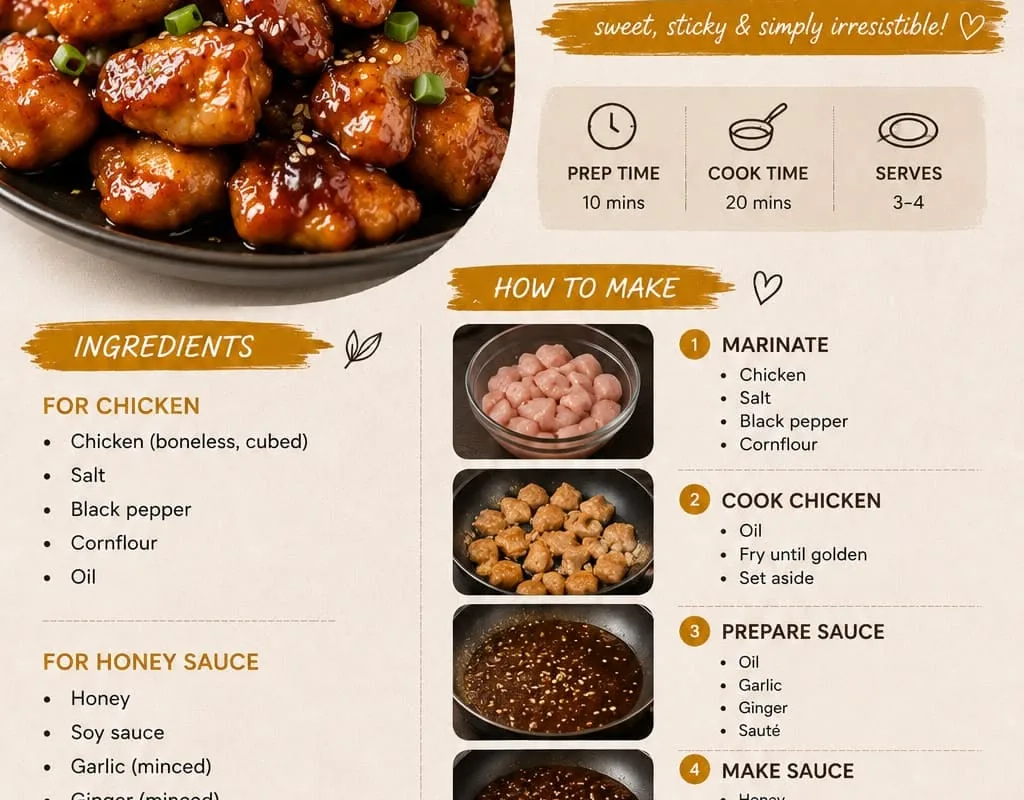
Honey chicken is one of those dishes that feels like a magic trick. You take a few pantry staples, give them a whisk, and suddenly you have a glossy amber glaze that clings to chicken like a favorite sweater. It is the kind of dinner that makes people at the table go quiet for a second, then ask you to make it again next week.
Advertisements1
Here is the honest truth: most honey chicken recipes fail because the honey burns before the chicken cooks through. Think of it like putting sunscreen on at the beach. Timing matters. We solve that by roasting first, glazing second, and letting the broiler do a quick, dramatic finish at the very end.
I have tested this one more times than I care to admit, and the version below is the one my family requests on repeat. It uses bone-in, skin-on thighs, which stay juicy and forgiving while the honey-soy mixture turns into a sticky lacquer. No deep fryer, no fancy equipment, just one sheet pan and a small bowl. Stay curious, stay safe.
Why You'll Love This Recipe
About the Ingredients
6 bone-in, skin-on chicken thighs (about 2.5 lb / 1.1 kg total)
Bone-in thighs stay juicier than boneless. If you only have boneless skinless thighs, reduce the first roast to 15 minutes and watch them closely.
1/3 cup (80 ml) honey
Clover honey is mild and reliable. Avoid raw buckwheat honey here, its strong molasses flavor will overpower the sauce.
3 tablespoons (45 ml) low-sodium soy sauce
Tamari works perfectly for a gluten-free version. If using regular soy sauce, skip the added salt in the sauce.
2 tablespoons (30 ml) rice vinegar
Apple cider vinegar is a fine substitute. Rice vinegar is gentler and lets the honey shine.
3 garlic cloves, minced (about 1 tablespoon)
Fresh garlic beats jarred every time. Look for firm, heavy heads with tight papery skin at the store.
1 tablespoon (15 ml) toasted sesame oil
Toasted, not plain, sesame oil carries the nutty aroma. A little goes a long way, so measure carefully.
1 tablespoon (15 g) unsalted butter, melted
Melted butter adds gloss and richness. Olive oil works if you are keeping it dairy-free.
1/2 teaspoon freshly ground black pepper
Freshly cracked pepper blooms more aroma than pre-ground. A small grinder is a worthwhile kitchen investment.
1 teaspoon cornstarch whisked into 1 tablespoon cold water
This slurry thickens the glaze into a spoonable sauce. Arrowroot powder is a 1:1 swap if you avoid corn.
1 tablespoon toasted sesame seeds and 2 sliced scallions, for garnish
Toast sesame seeds in a dry pan for 60 seconds to wake up their flavor. Buy them in small amounts since they go rancid slowly over months.
Tips & Tricks
Do Not Glaze Too Early
Honey caramelizes fast, so brush the glaze on only after the chicken has roasted for 20 minutes. If you glaze at the start, you will get blackened sugar and raw chicken.
Dry the Skin Thoroughly
Pat the thighs bone-dry with paper towels before seasoning. Moisture is the enemy of crisp skin, like trying to toast bread while it is still wet.
Use an Instant-Read Thermometer
Pull the chicken when the thickest part reads 175F (79C). Dark meat is more forgiving than breast meat and stays tender at that temperature.
Rest Before Slicing
Give the chicken 5 minutes off the heat so the juices redistribute instead of running all over the pan.
Pro Tips
Step-by-Step Instructions
1. Heat the Oven and Prep
Preheat your oven to 425F (220C) and line a rimmed sheet pan with parchment paper. Pat the chicken thighs dry and season both sides with salt and the black pepper.
2. Whisk the Honey Glaze
In a small bowl, whisk together the honey, soy sauce, rice vinegar, garlic, sesame oil, and melted butter until smooth. Set aside about 3 tablespoons of this mixture for drizzling later.
3. Roast the Chicken First
Arrange the thighs skin-side up on the pan and roast at 425F (220C) for 20 minutes. The skin should look pale gold and the fat should be rendering and sizzling at the edges.
4. Brush On the Glaze
Pull the pan out and brush each thigh generously with the honey mixture. Return to the oven and roast another 12 to 15 minutes at 425F (220C), until the glaze is bubbling and the chicken reads 175F (79C) at the thickest part.
5. Broil for the Lacquer Finish
Switch the oven to broil at 500F (260C) and cook 2 to 3 minutes, watching closely, until the glaze turns deep amber and the skin is crisp and golden brown.
6. Thicken the Reserved Sauce
While the chicken rests, simmer the reserved glaze in a small saucepan over medium heat with the cornstarch slurry for 1 to 2 minutes, until it coats the back of a spoon.
7. Rest and Garnish
Let the chicken rest 5 minutes, then scatter with toasted sesame seeds and sliced scallions. Serve with the thickened sauce on the side.
Delicious Variations
Spicy Honey Chicken
Add 1 to 2 teaspoons of sriracha or gochujang to the glaze for a sweet-heat version that is fantastic over rice.
Honey Lemon Chicken
Swap the rice vinegar for fresh lemon juice and add a teaspoon of lemon zest to brighten the glaze.
Honey Garlic Wings
Use the same glaze on 2 pounds of split chicken wings and roast at 425F (220C) for 35 to 40 minutes, tossing halfway.
How to Store Easy and Delicious Honey Chicken
Refrigerator
Store cooled chicken in an airtight container for up to 4 days. Keep the extra sauce separately so the skin does not turn soggy.
Freezer
Freeze portions in a freezer-safe bag for up to 3 months. Thaw overnight in the refrigerator before reheating.
Reheating
Reheat in a 350F (175C) oven for 10 to 12 minutes to keep the skin crisp. Avoid the microwave if you can, it softens the glaze.
Frequently Asked Questions
Q: Can I use chicken breast instead of thighs?
Yes, but reduce the first roast to 15 minutes and pull the chicken at 165F (74C) internal temperature. Breast meat dries out faster, so check it early and glaze it a bit more gently.
Q: Why did my honey chicken burn?
The honey was likely applied before the chicken had a chance to cook, so the sugar scorched. Roast the chicken plain first, then glaze and finish with a short broil.
Q: Is honey chicken gluten-free?
It can be if you use tamari or a certified gluten-free soy sauce and check your other labels. The rest of the ingredients, honey, vinegar, garlic, sesame oil, and butter, are naturally gluten-free.
Q: How do I know when the chicken is done?
Use an instant-read thermometer and look for 175F (79C) in the thickest part, away from the bone. The juices should run clear and the glaze should be bubbling at the edges.
Q: Can I make this honey chicken ahead of time?
Yes, roast it fully, cool it, and refrigerate up to 2 days ahead. Reheat in a 350F (175C) oven for 12 minutes and add a fresh brush of warmed glaze to bring back the shine.
Give this honey chicken a try this week and watch how fast it disappears. If you make it, snap a photo and tell me how it turned out, I read every comment. Stay curious, stay safe.

Easy and Delicious Honey Chicken
This Easy and Delicious Honey Chicken recipe delivers sticky, golden-glazed chicken thighs with a sweet-savory sauce in about 50 minutes.
🧂 Ingredients
- 6 bone-in, skin-on chicken thighs (about 2.5 lb / 1.1 kg total)
- 1/3 cup (80 ml) honey
- 3 tablespoons (45 ml) low-sodium soy sauce
- 2 tablespoons (30 ml) rice vinegar
- 3 garlic cloves, minced (about 1 tablespoon)
- 1 tablespoon (15 ml) toasted sesame oil
- 1 tablespoon (15 g) unsalted butter, melted
- 1/2 teaspoon freshly ground black pepper
- 1 teaspoon cornstarch whisked into 1 tablespoon cold water
- 1 tablespoon toasted sesame seeds and 2 sliced scallions, for garnish
📋 Instructions
- 1Heat the Oven and Prep — Preheat your oven to 425F (220C) and line a rimmed sheet pan with parchment paper. Pat the chicken thighs dry and season both sides with salt and the black pepper.
- 2Whisk the Honey Glaze — In a small bowl, whisk together the honey, soy sauce, rice vinegar, garlic, sesame oil, and melted butter until smooth. Set aside about 3 tablespoons of this mixture for drizzling later.
- 3Roast the Chicken First — Arrange the thighs skin-side up on the pan and roast at 425F (220C) for 20 minutes. The skin should look pale gold and the fat should be rendering and sizzling at the edges.
- 4Brush On the Glaze — Pull the pan out and brush each thigh generously with the honey mixture. Return to the oven and roast another 12 to 15 minutes at 425F (220C), until the glaze is bubbling and the chicken reads 175F (79C) at the thickest part.
- 5Broil for the Lacquer Finish — Switch the oven to broil at 500F (260C) and cook 2 to 3 minutes, watching closely, until the glaze turns deep amber and the skin is crisp and golden brown.
- 6Thicken the Reserved Sauce — While the chicken rests, simmer the reserved glaze in a small saucepan over medium heat with the cornstarch slurry for 1 to 2 minutes, until it coats the back of a spoon.
- 7Rest and Garnish — Let the chicken rest 5 minutes, then scatter with toasted sesame seeds and sliced scallions. Serve with the thickened sauce on the side.

Kwame writes about technology and digital privacy for everyday users. He breaks down complex topics like data tracking and encryption into simple, relatable terms.


